(v 1.3)
Safety and usage cautions
Before installing our products, we recommend you to consult the section about safety and usage cautions at the link below

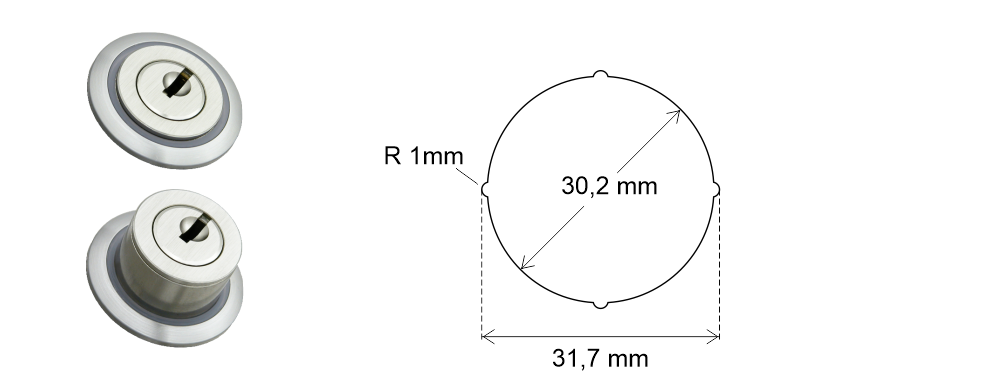
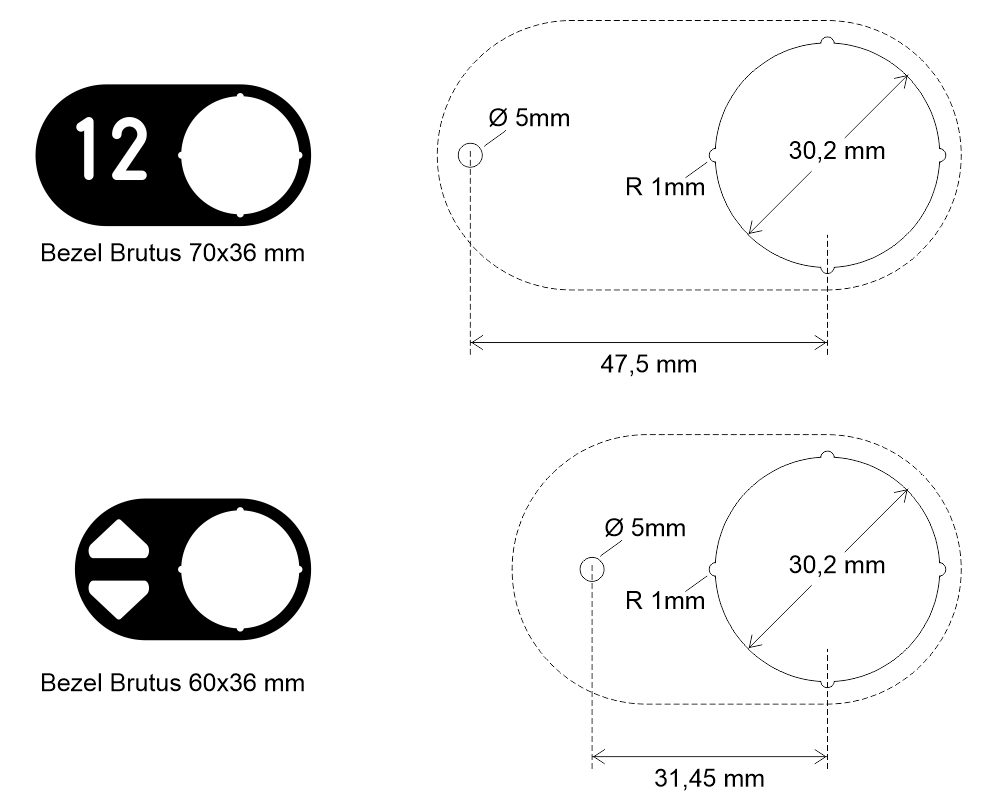
Cut-out
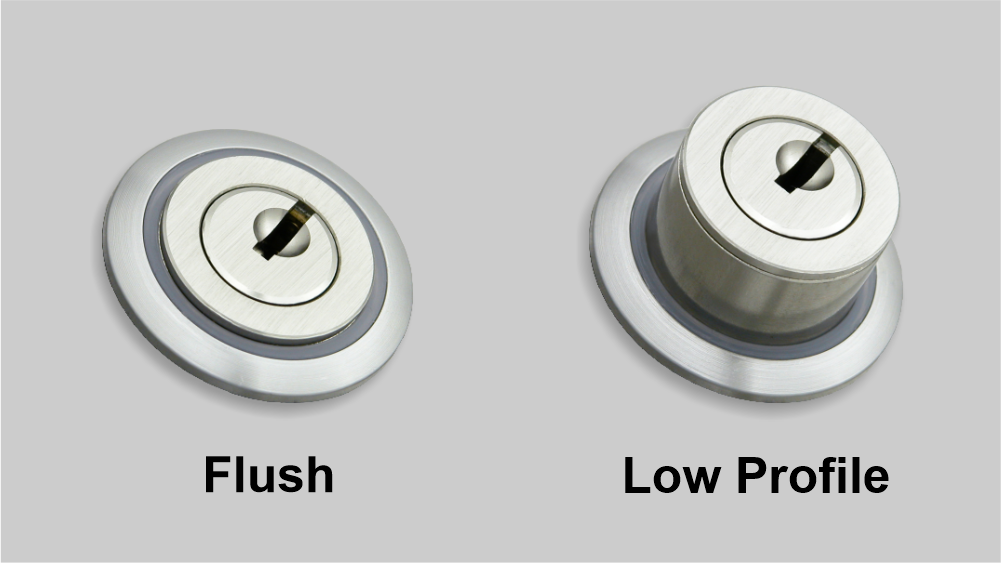
Mounting
Components
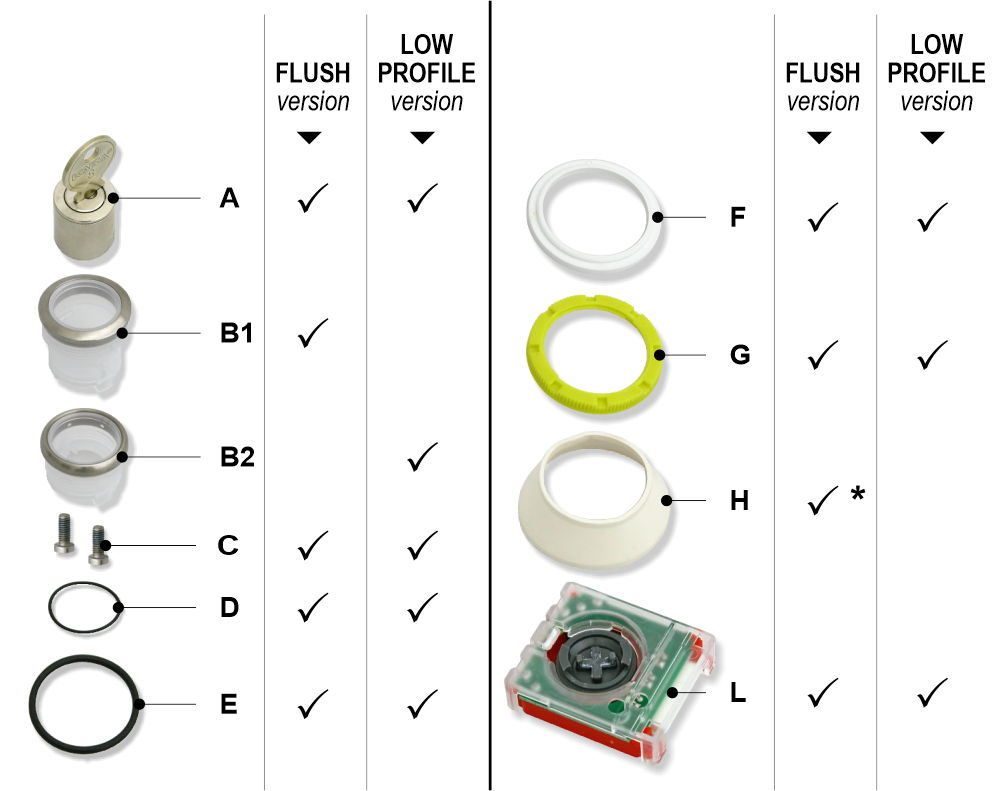
(*) – Variant 5 only (not luminous)
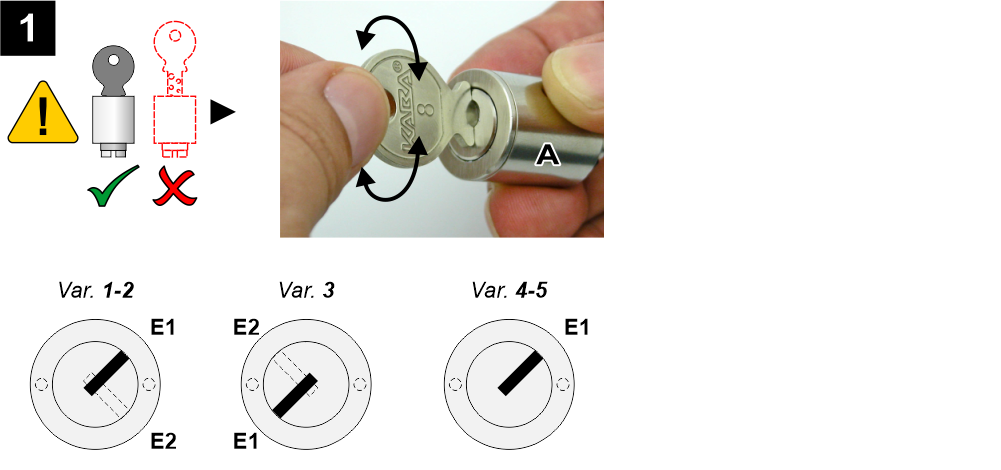
[ 1 ]
E1/E2 – Extraction
Extract key in the E1 position and check the second extraction (E2).

[ 2 ]
E1/E2 – Extraction
Insert the cylinder (A) in the body (B1/B2) as in the figure.
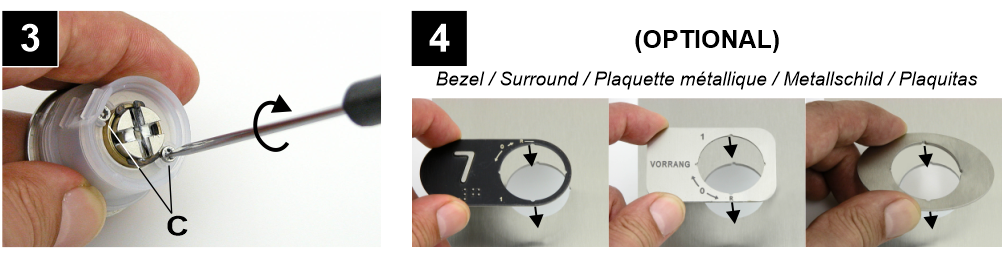
[ 3 ] – Secure the cylinder with the screws.
[ 4 ] – Insert the metal plate.
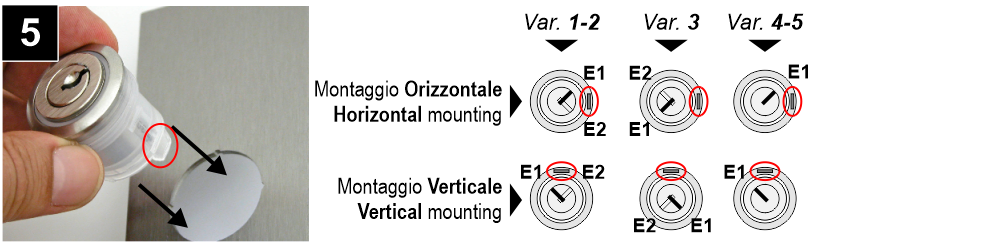
[ 5 ] – Insert the cylinder as shown in the figure.
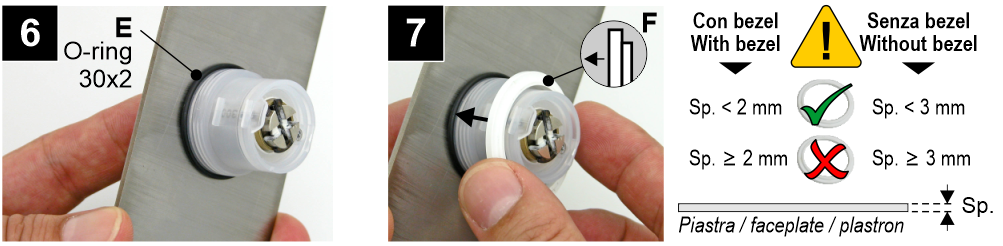
[ 6 ] – Insert the o-ring.
[ 7 ] – Insert the spacer as shown in the figure.
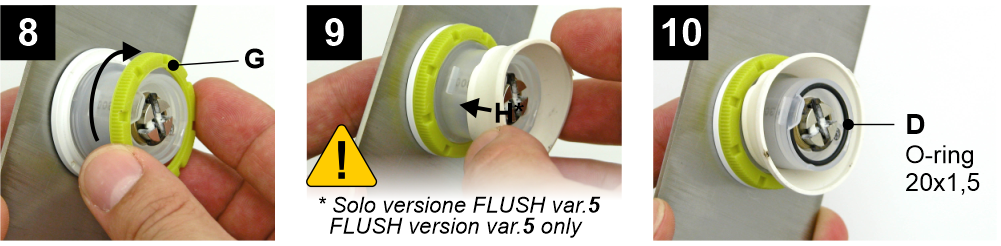
[ 8 ] – Screw the locking ring.
[ 9 ] – Only the flush version with variant 5.
[ 10 ] – Insert the o-ring.
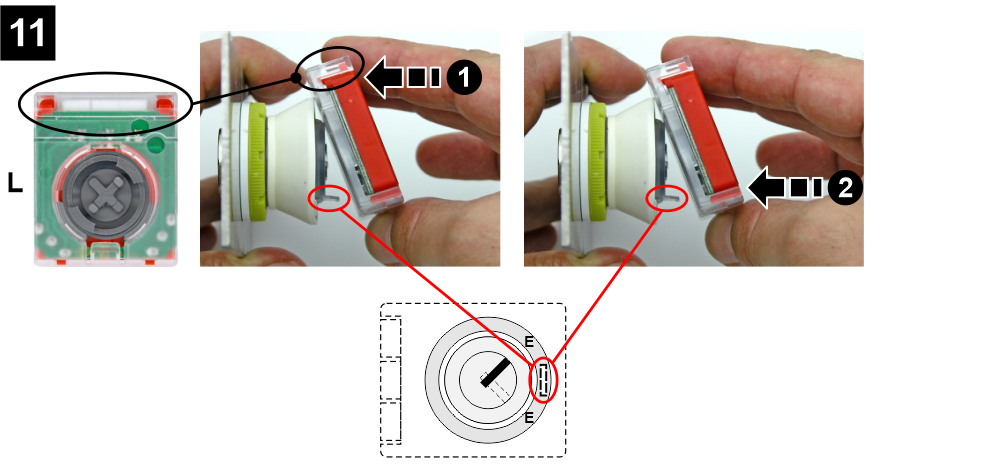
[ 11 ] – Insert the contact holder module as indicated.
Contacts
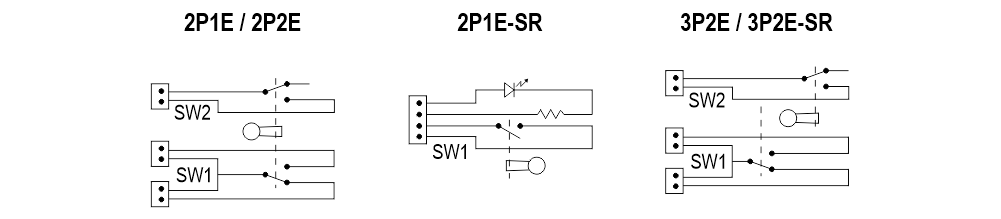
Legend:
P = Positions
E = Extractions
SR = Spring return
Download
| Reference | Version | Link |
|---|---|---|
| 1.3 (current version) | Download PDF (English) | |