(v 1.1)

Safety and usage cautions
Before installing our products, we recommend you to consult the section about safety and usage cautions at the link below

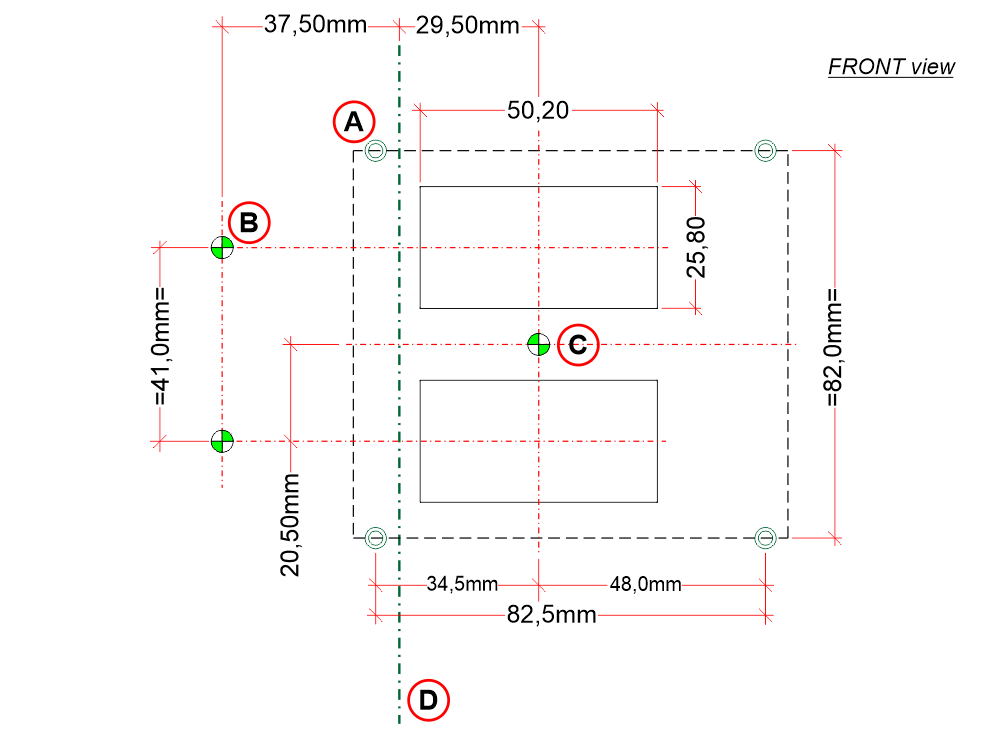
Layout & Dimensions
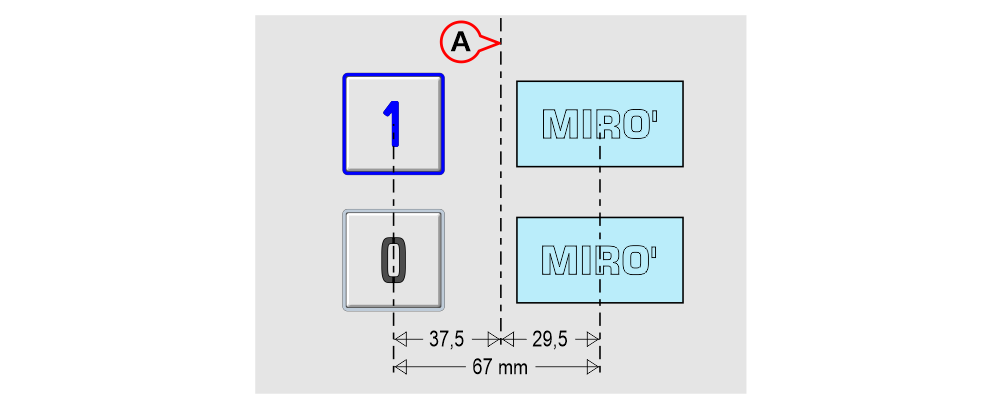
A) – Central axis of the pushbutton panel
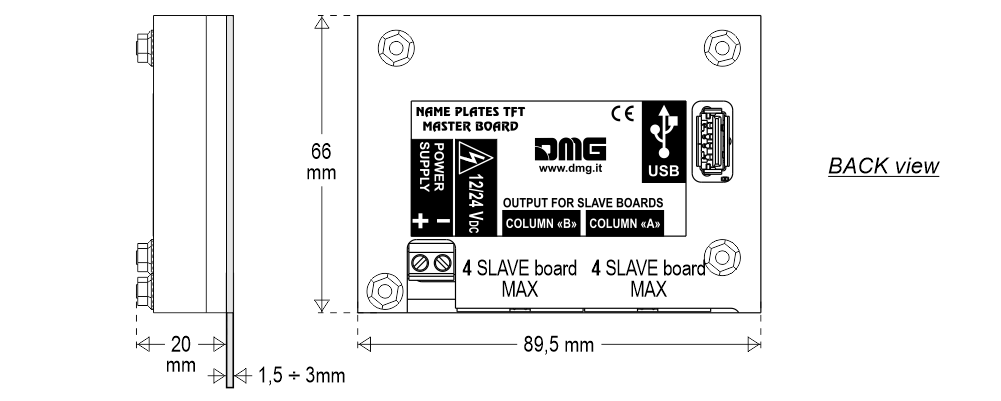
– MASTER board –
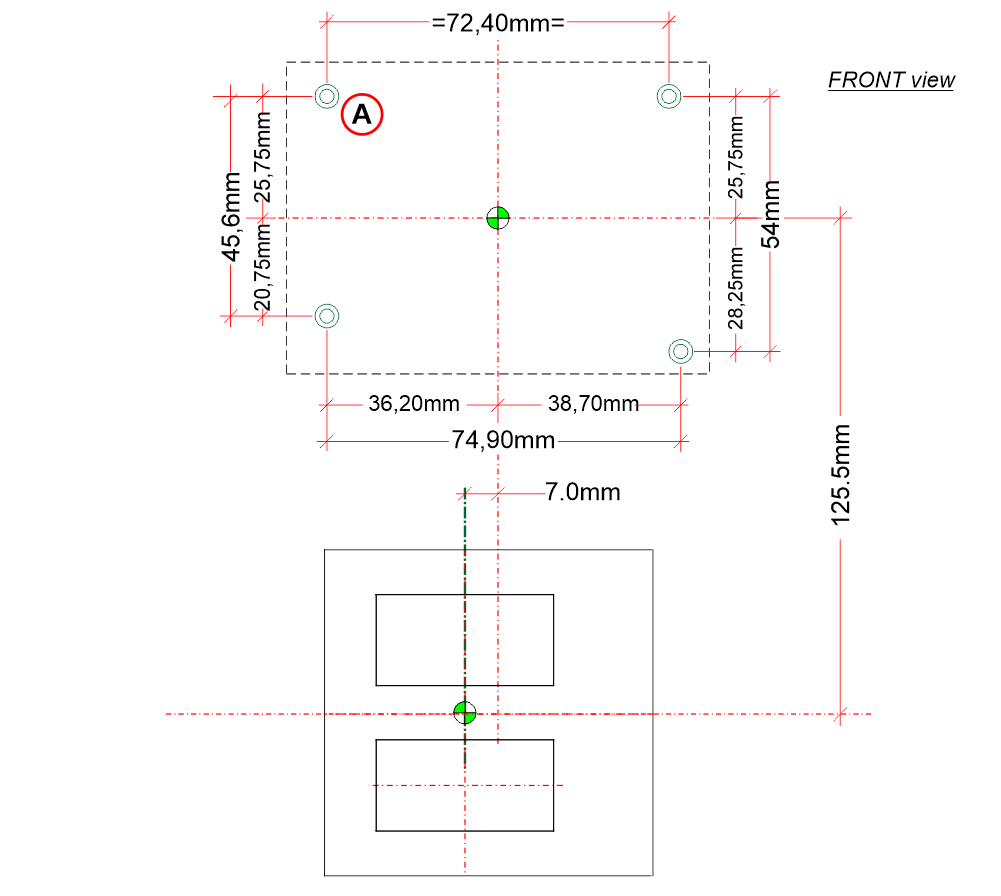
A) – Pins M3x20
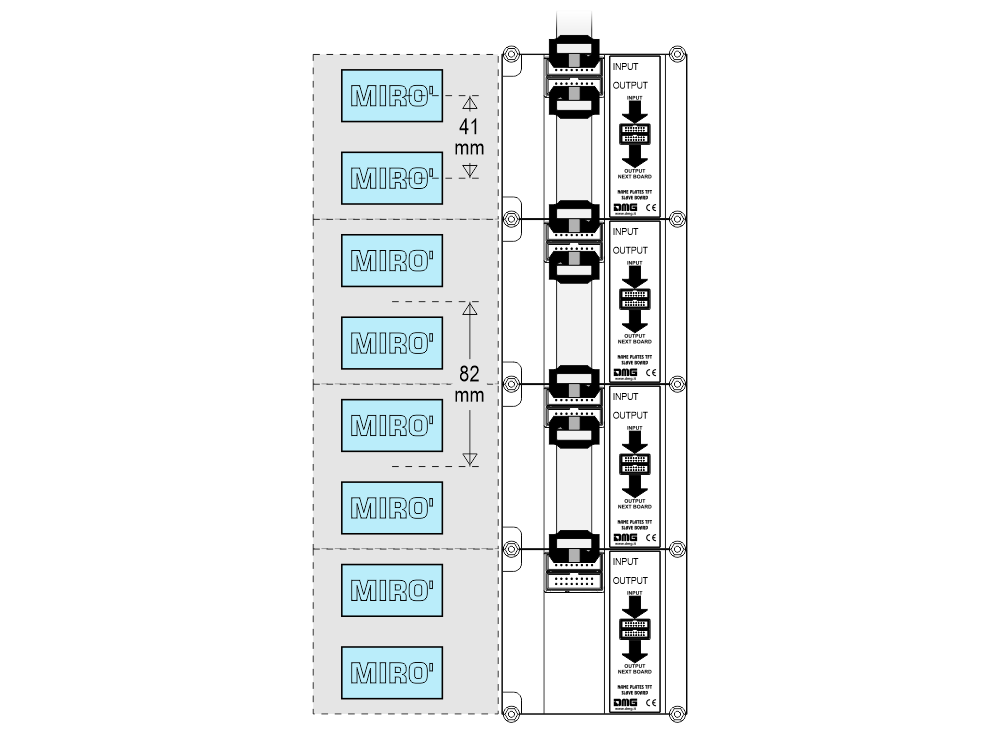
– SLAVE board –
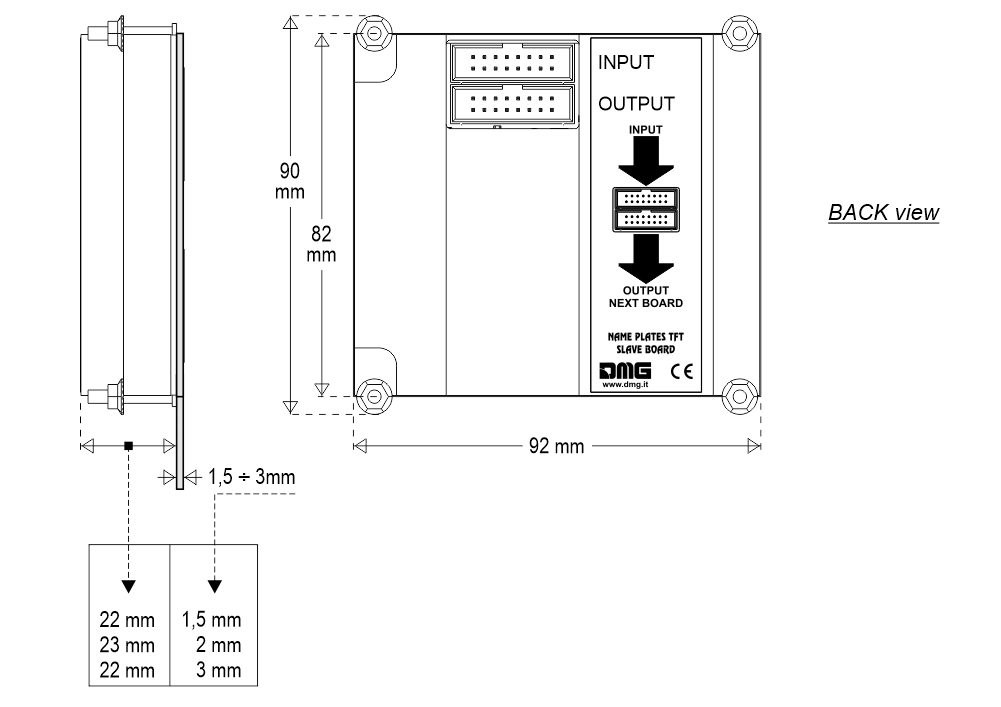
A) – Pins M3x20
B) – The center of the button
C) – The center of the slave board
D) – button panel axis
Wiring Instructions
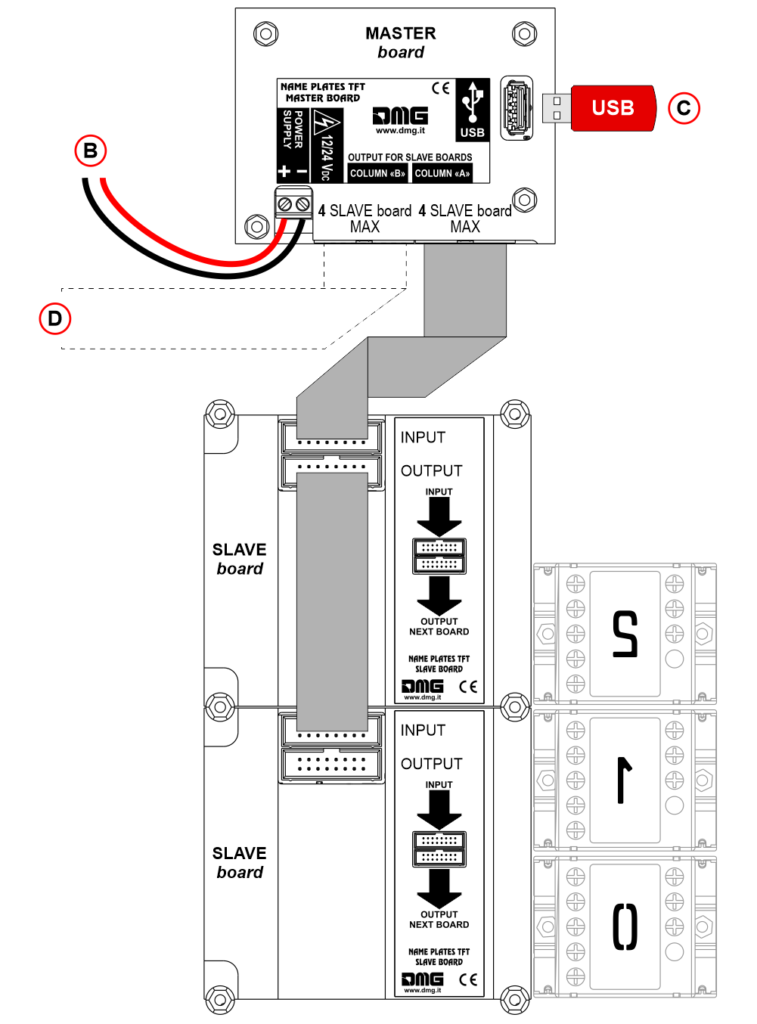
B) – 12/24V dc Power Supply.
C) – Programming via USB key and PC software “Mosaic”.
D) – Second additional row of nameplates.
Up to 8 MIRO’ nameplate per row can be connected (4 SLAVE boards).
Download
| Reference | Version | Link |
|---|---|---|
| 1.1 (current version) | Download PDF (English) | |