(v 1.3)
Veiligheids- en gebruikswaarschuwingen
Voordat u onze producten installeert, raden wij u aan het gedeelte over veiligheids- en gebruiksvoorzorgsmaatregelen te raadplegen via de onderstaande link.

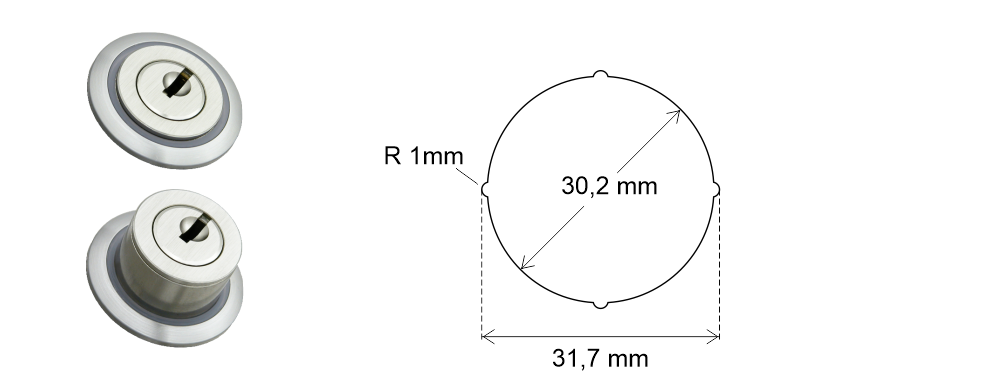
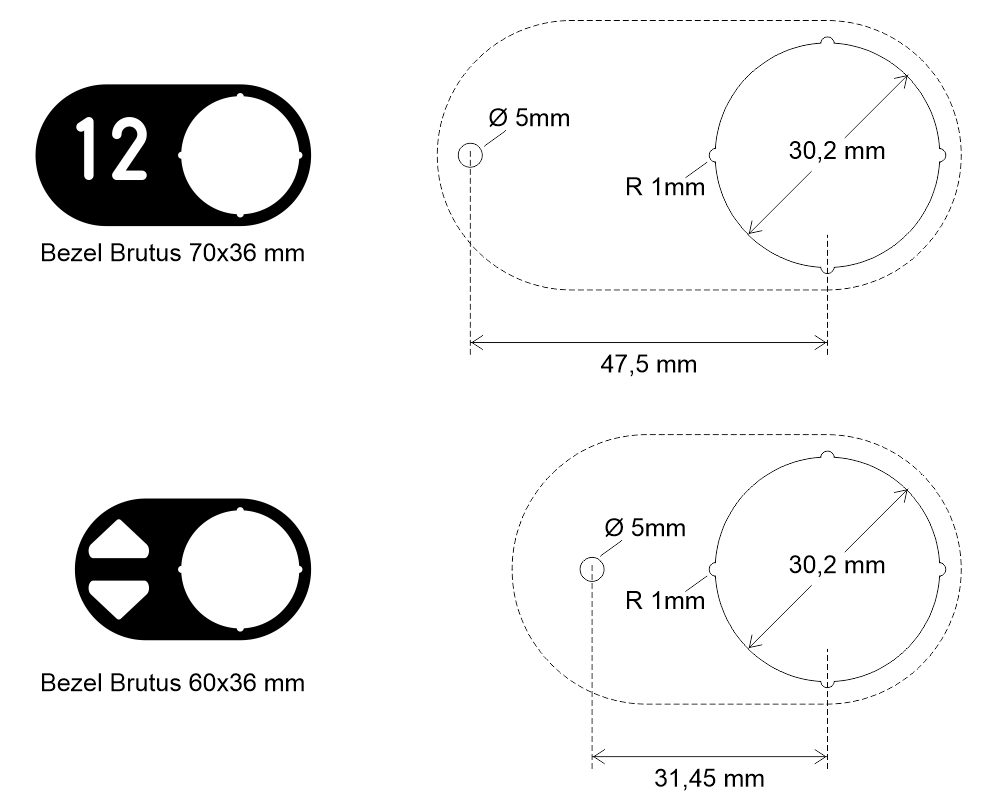
Uitsnede
Montage
Onderdelen
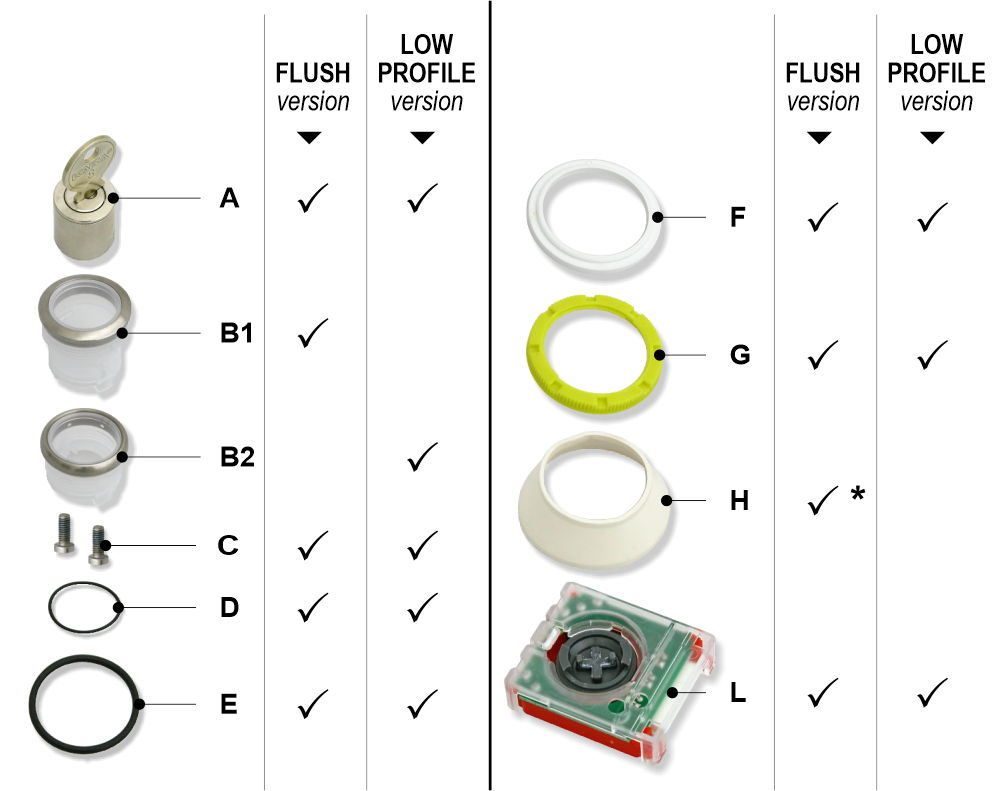
(*) – Alleen variant 5 (niet lichtgevend)
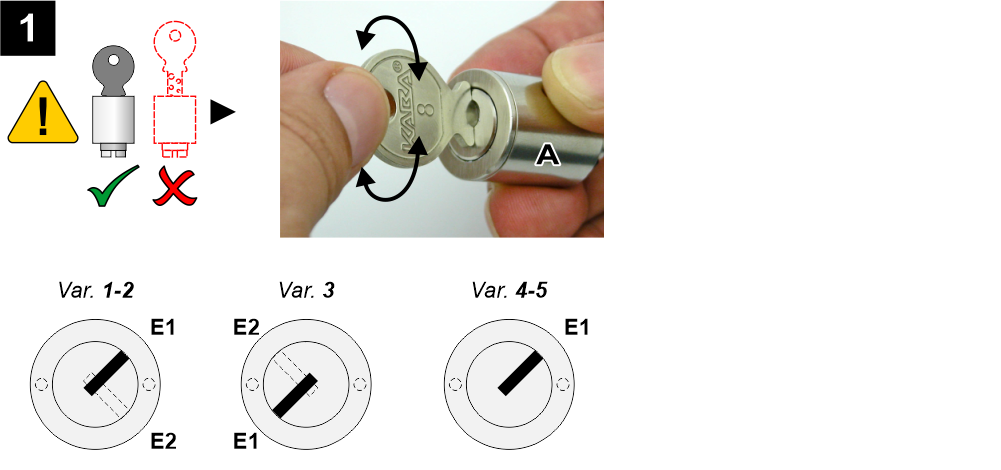
[ 1 ]
E1/E2 – Extractie
Trek de sleutel uit in de E1-positie en controleer de tweede extractie (E2).

[ 2 ]
E1/E2 – Extractie
Plaats de cilinder (A) in het lichaam (B1/B2) zoals in de afbeelding.
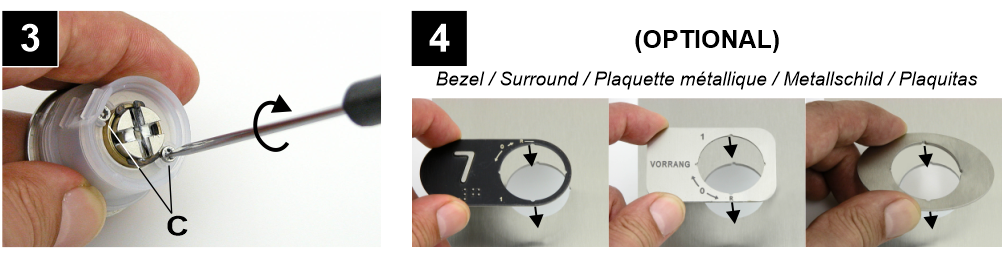
[ 3 ] – Zet de cilinder vast met de schroeven.
[ 4 ] – Plaats de metalen plaat.
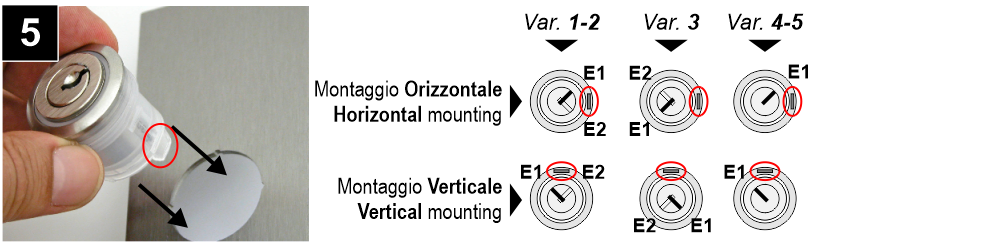
[ 5 ] – Plaats de cilinder zoals weergegeven in de afbeelding.
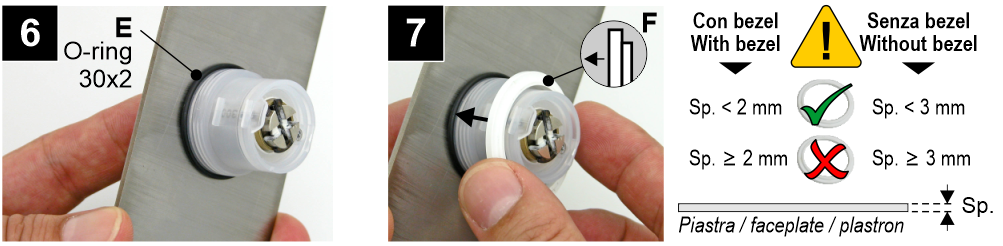
[ 6 ] – Plaats de O-ring.
[ 7 ] – Plaats de afstandhouder zoals weergegeven in de afbeelding.
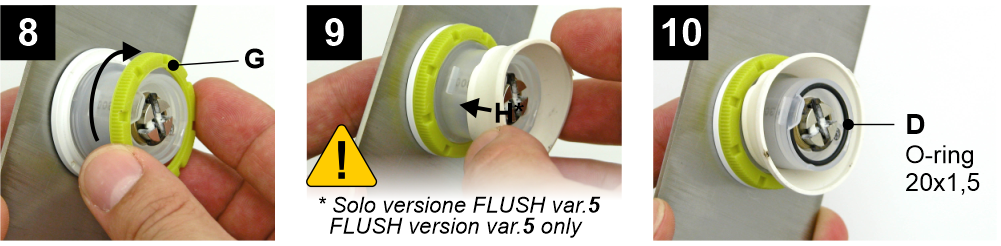
[ 8 ] – Schroef de borgring vast.
[ 9 ] – Alleen de inbouwversie met variant 5.
[ 10 ] – Plaats de O-ring.
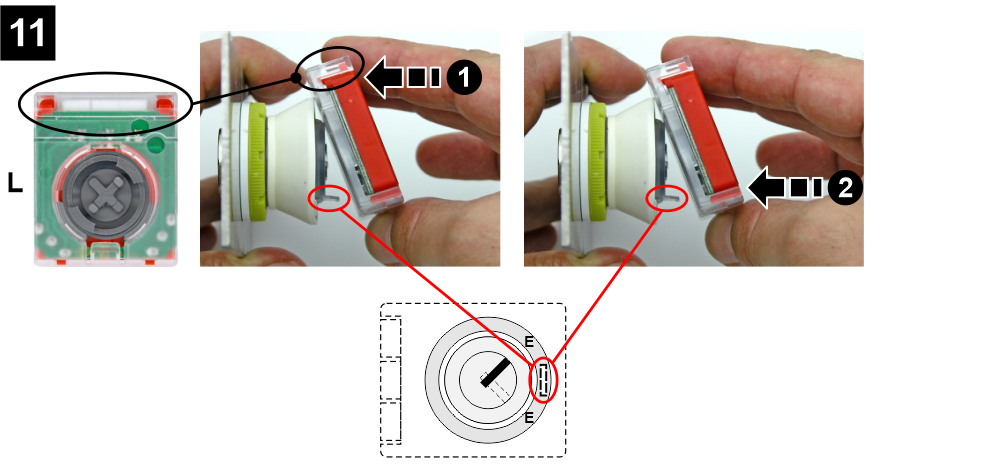
[ 11 ] – Plaats de contacthoudermodule zoals aangegeven.
Contacten
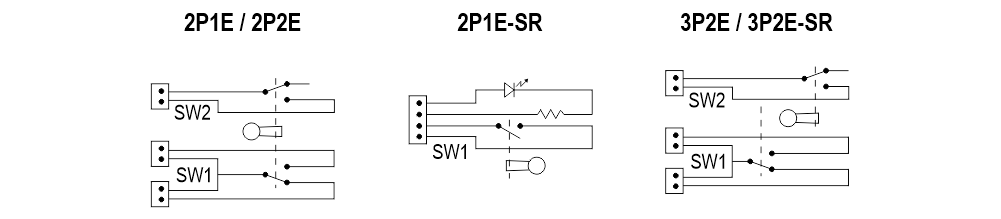
Legenda:
P = Posities
E = Extracties
SR = Veerretour
Download
| Referentie | Versie | Link |
|---|---|---|
| 1.3 (huidige versie) | Download (Engels) | |