(версия 1.4)
Меры безопасности и предостережения по использованию
Перед установкой наших продуктов мы рекомендуем вам ознакомиться с разделом о мерах безопасности и предосторожностях при использовании по ссылке ниже.

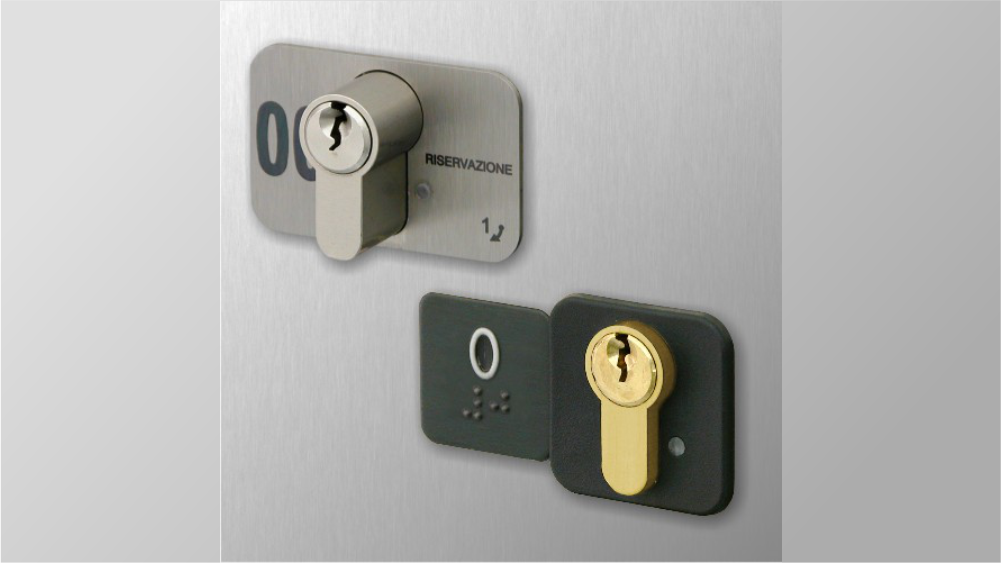
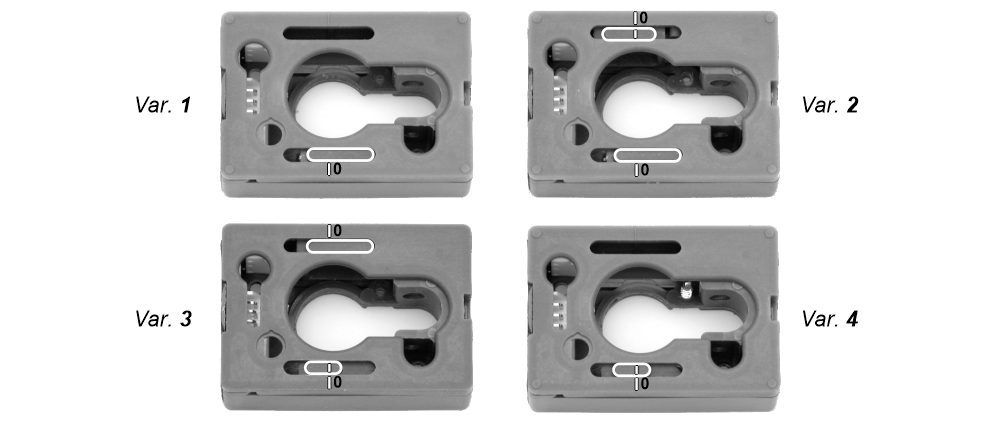
Монтаж ключа обслуживания (вариант 1/2/3/4)
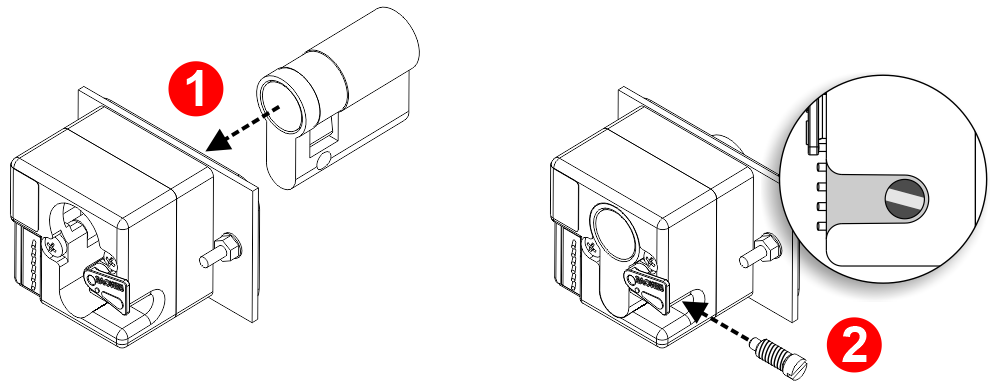
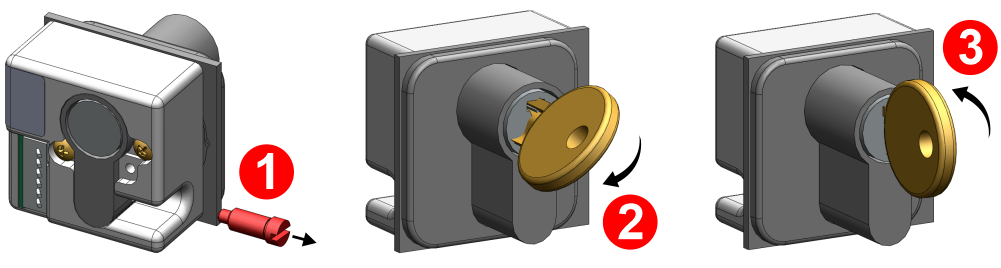
Компонент, установленный на пластине
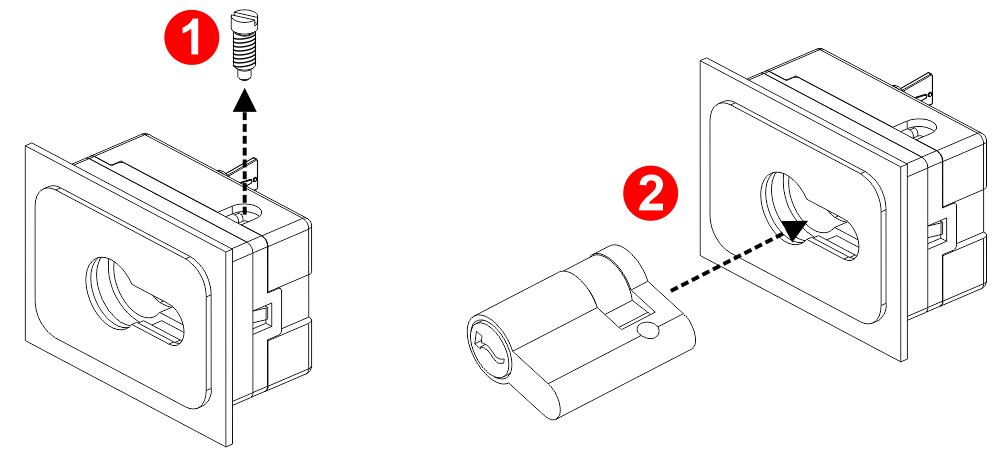
[ 1 ] – Снимите стопорный винт.
[ 2 ] – Вставьте цилиндр.
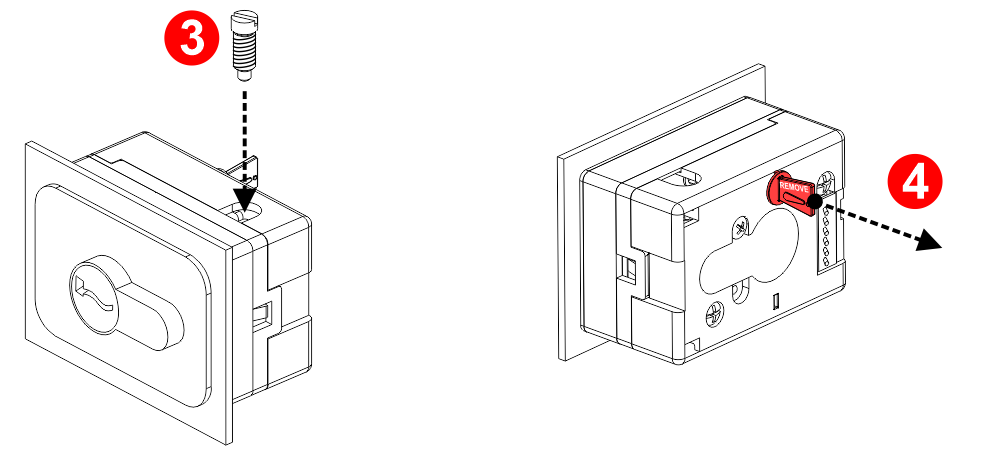
[ 3 ] – Вставьте стопорный винт.
[ 4 ] – Снимите предохранительный замок.
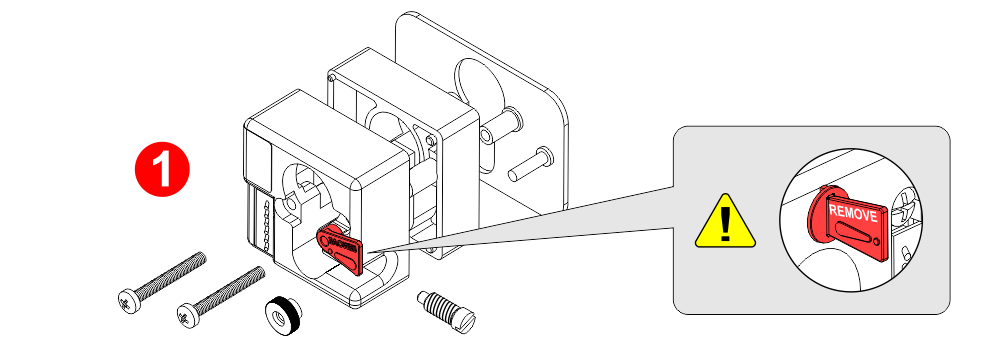
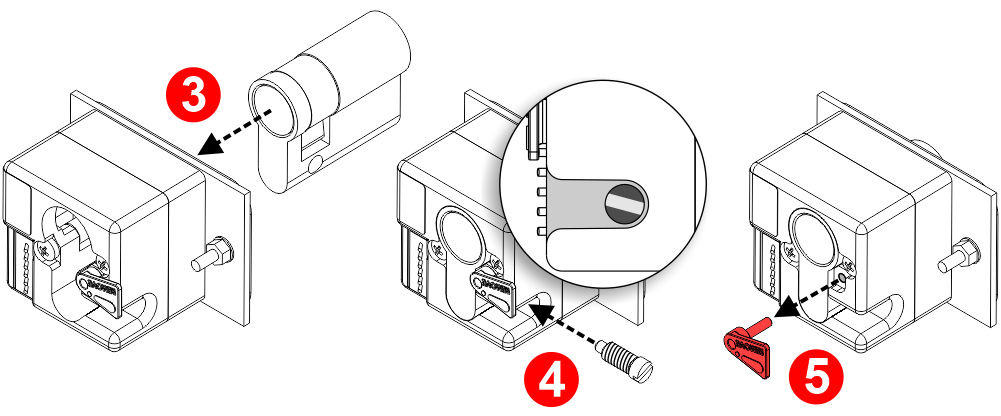
Запасной компонент (не устанавливается на пластину)
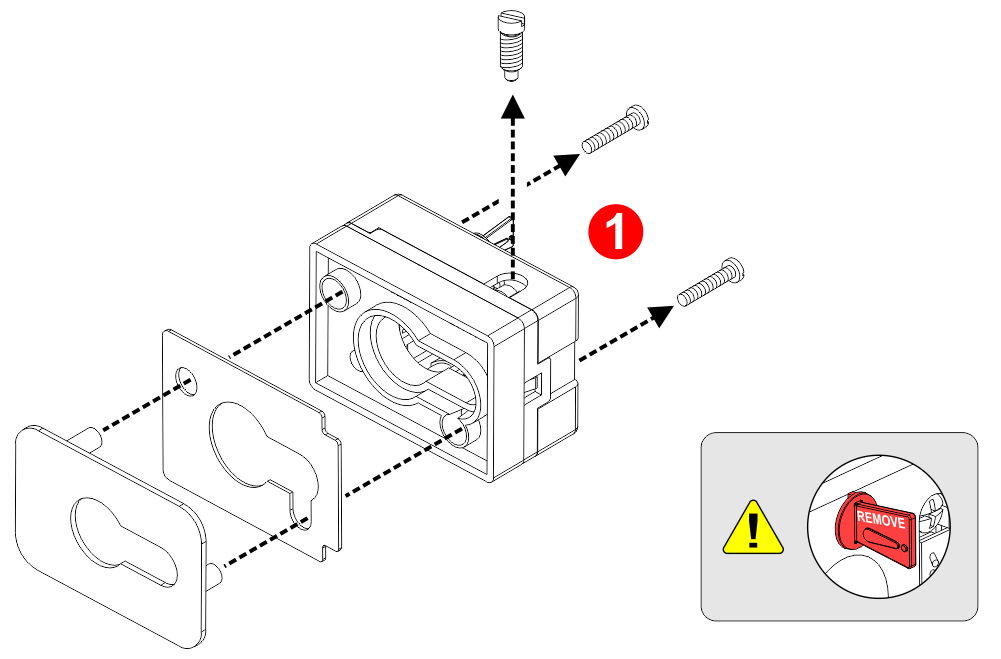
[ 1 ] – Разберите компоненты.
Внимание: не снимайте сейчас предохранитель.
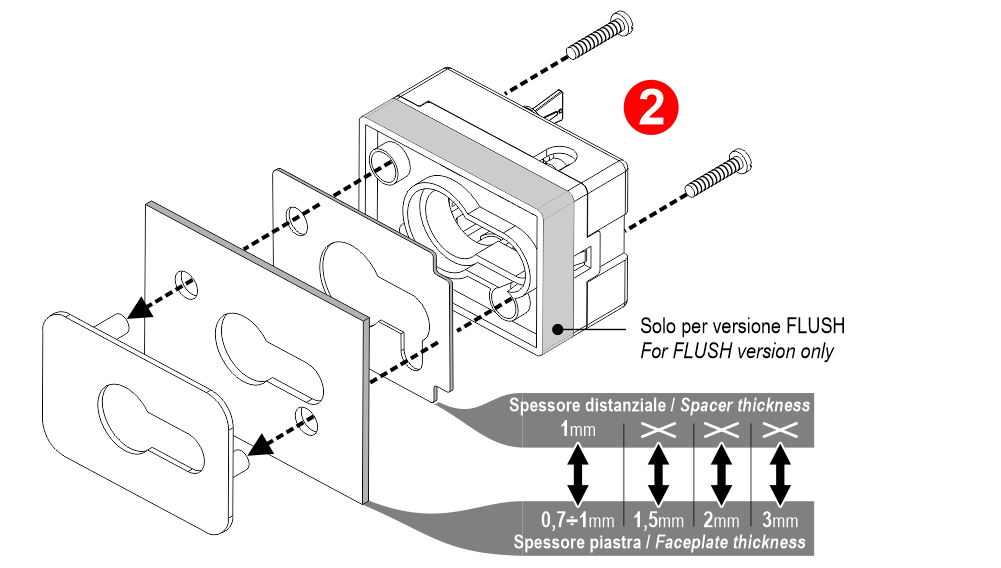
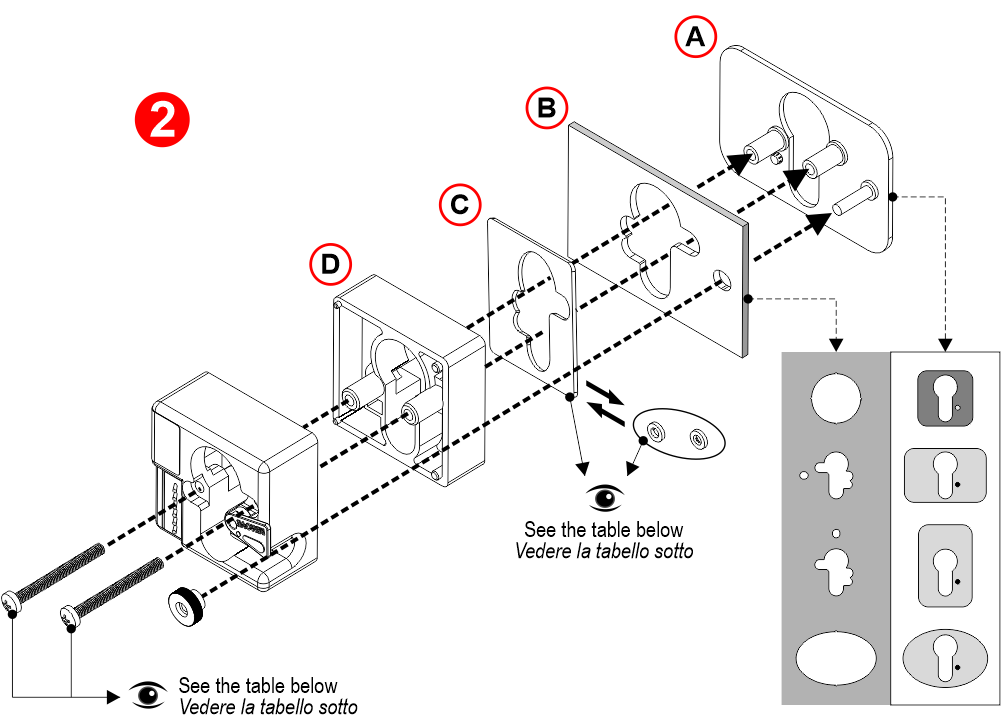
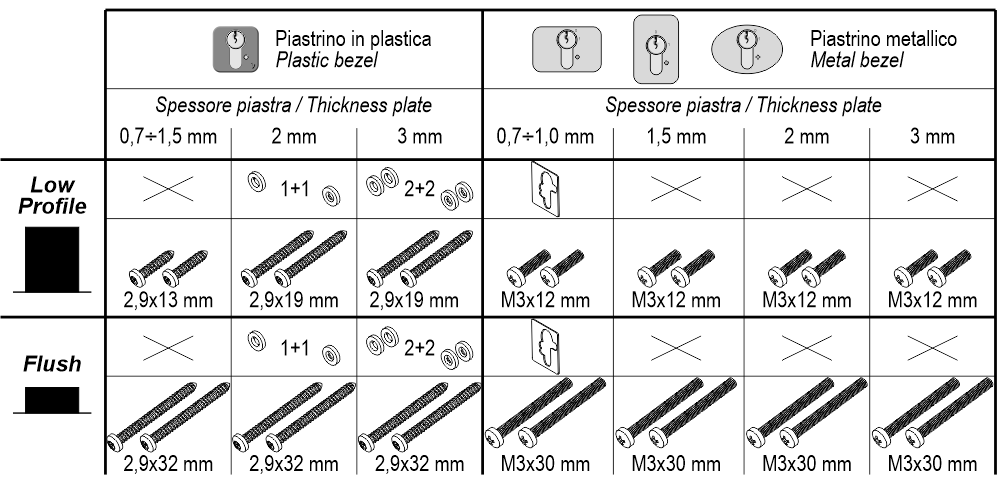
[ 2 ] – Соберите компоненты на пластине, как показано на рисунке.

Будьте внимательны к выравниванию распорки.
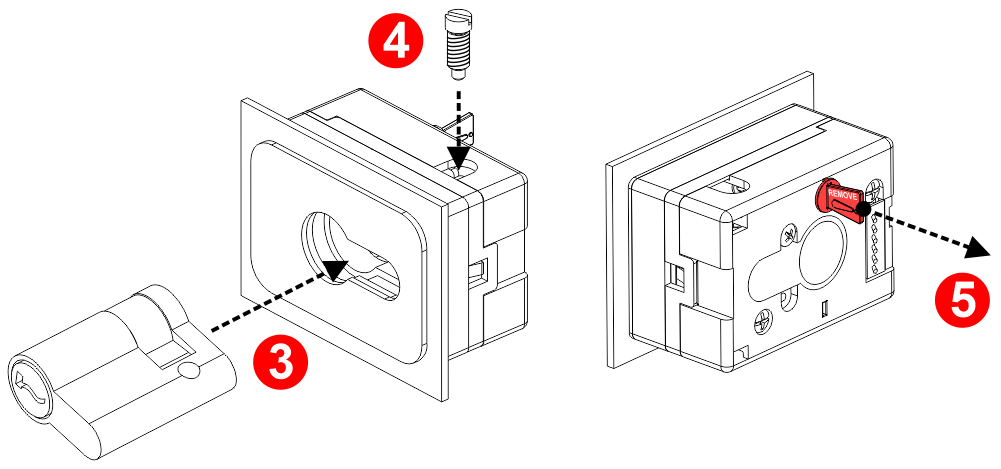
[ 3 ] – Вставьте цилиндр.
[ 4 ] – Вставьте стопорный винт.
[ 5 ] – Снимите защитный замок.
Монтаж клавиши вызова (вариант 5)
Компонент, установленный на пластине
[ 1 ] – Вставьте цилиндр.
[ 2 ] – Вставьте стопорный винт.

[ 3 ] – Снимите защитный замок.
Запасной компонент (не устанавливается на пластину)
[ 1 ] – Разберите компоненты.
Внимание: не снимайте сейчас предохранитель.
[ 2 ] – Соберите компоненты на пластине, как показано на рисунке.
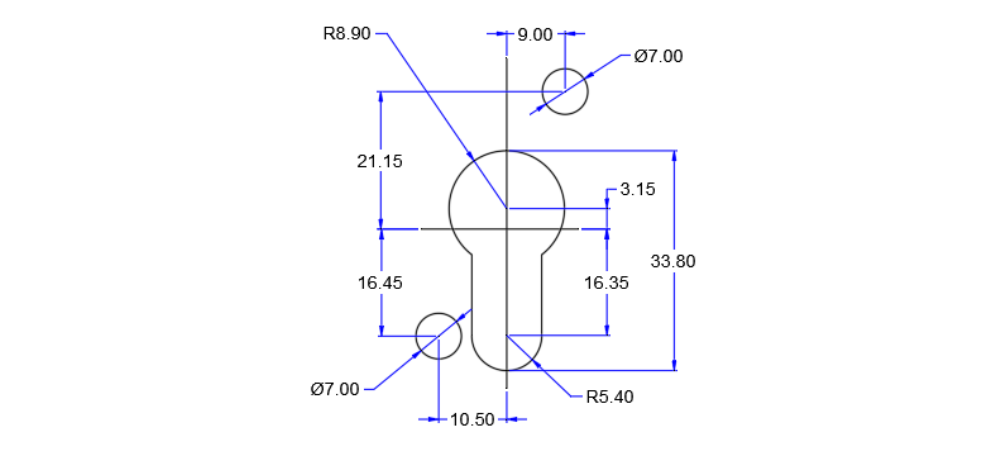
A) – Эстетическая пластина
B) – Вырез
C) – Распорка
D) – Только для встраиваемой версии
[ 3 ] – Вставьте цилиндр.
[ 4 ] – Вставьте стопорный винт.
[ 5 ] – Снимите защитный замок.
Замена цилиндра
[ 1 ] – Снимите стопорный винт.
[ 2 ] – Аккуратно поверните ключ в направлении активации и вытащите цилиндр примерно на 5 мм до упора.
[ 3 ] – Отпустите ключ в положение 0, затем полностью вытащите цилиндр.
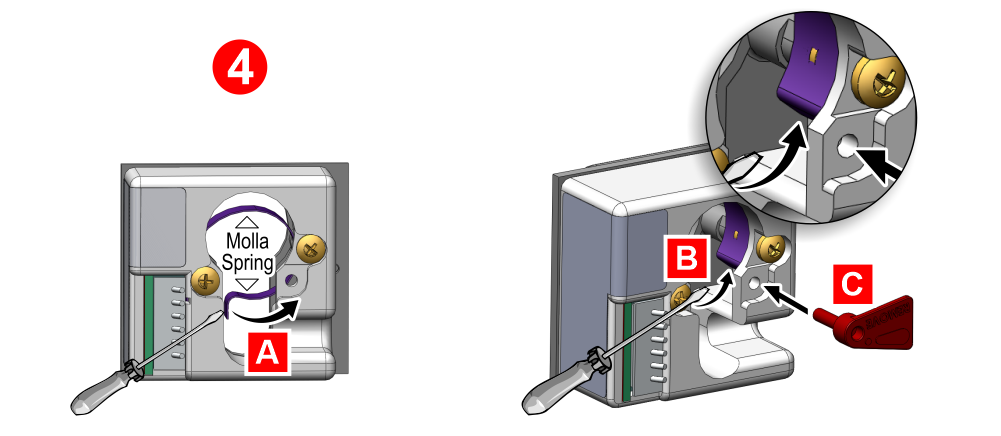
[ 4 ] – С помощью отвертки верните пружину в правильное положение (A+B) и одновременно вставьте фиксатор пружины (C) или любой цилиндрический элемент диаметром 2 мм.
Теперь можно вставить новый цилиндр.
Download
| Ссылка | Версия | Ссылка |
|---|---|---|
| 1.4 (текущая версия) | Download « » (английский язык) | |