(v 1.0)

Safety and usage cautions
Before installing our products, we recommend you to consult the section about safety and usage cautions at the link below

Installation introduction
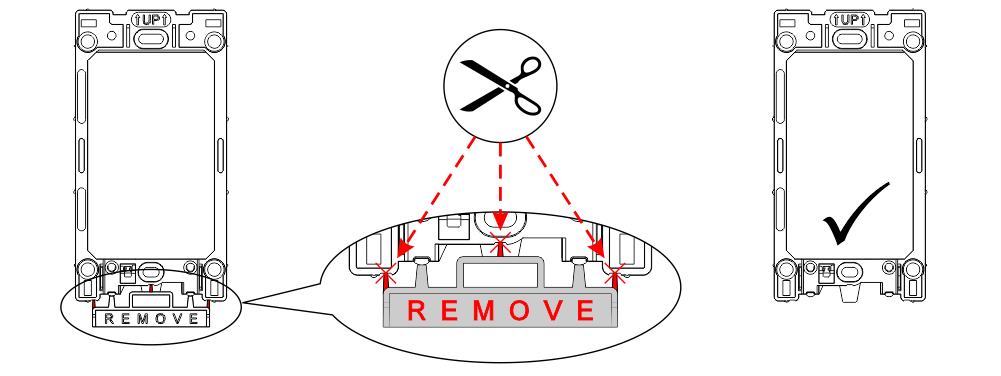
Remove the break-off section from the plastic frame before starting installation.
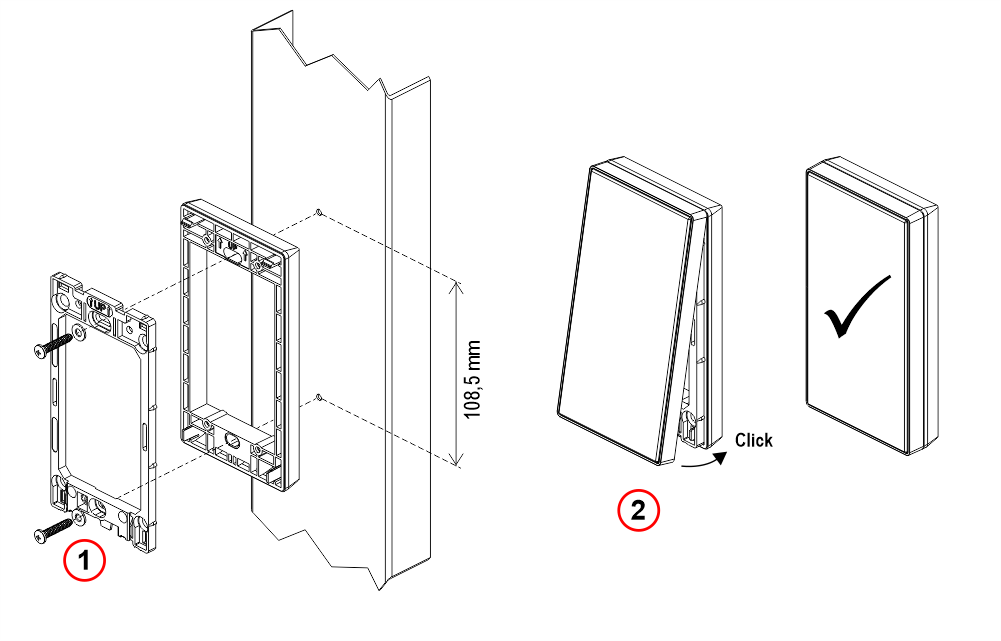
DOOR FRAME Mounting
Flush installation
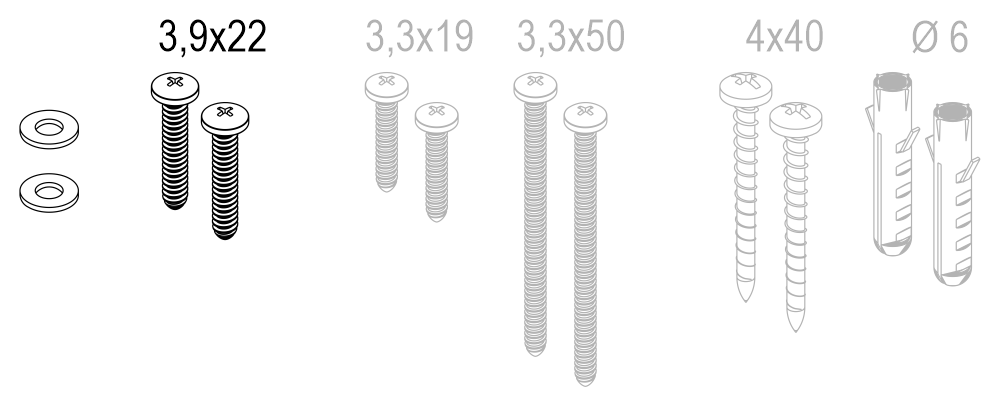
Installation Kit
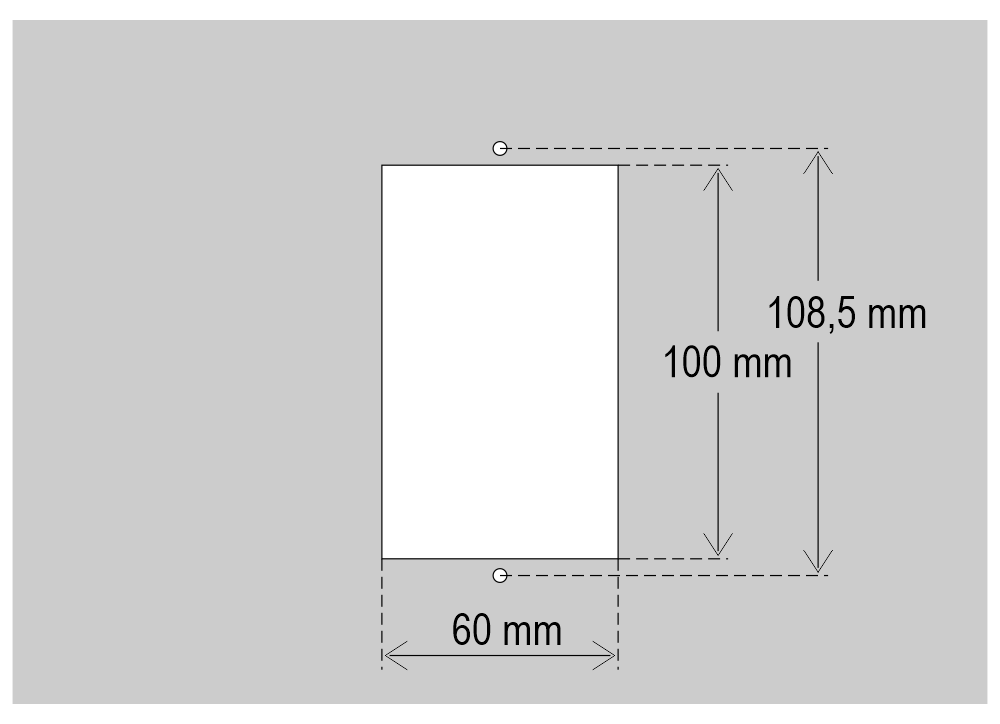
Cut-out
1) Self-tapping screw 3.9×22 mm
Surface installation
Installation Kit
1) Self-tapping screw 3.9×22 mm
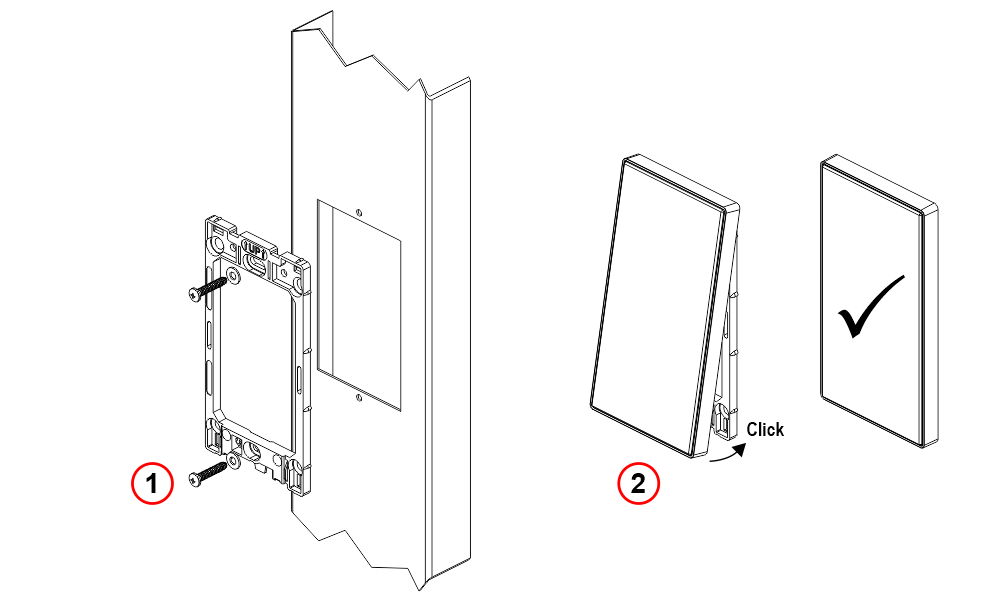
WALL Mounting
Flush installation (with recessed wall box type 504)
Installation Kit

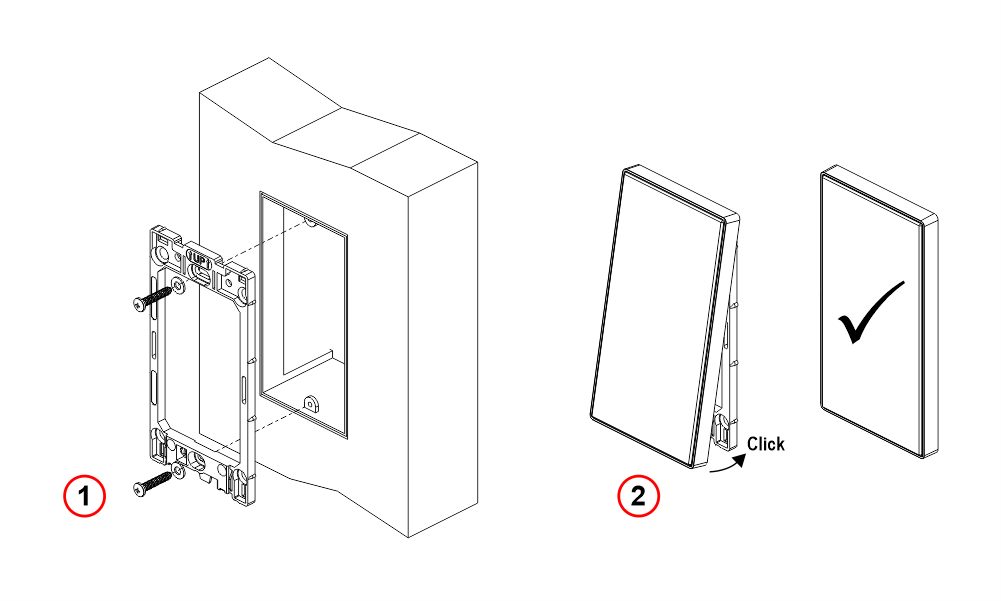
1) Self-tapping screw 3.3×19 mm. The recessed wall box type 504 is not supplied.
Use 3.3×50 mm screws when using the spacer with the wall-mount box.
Surface installation (without wall box)
Installation Kit
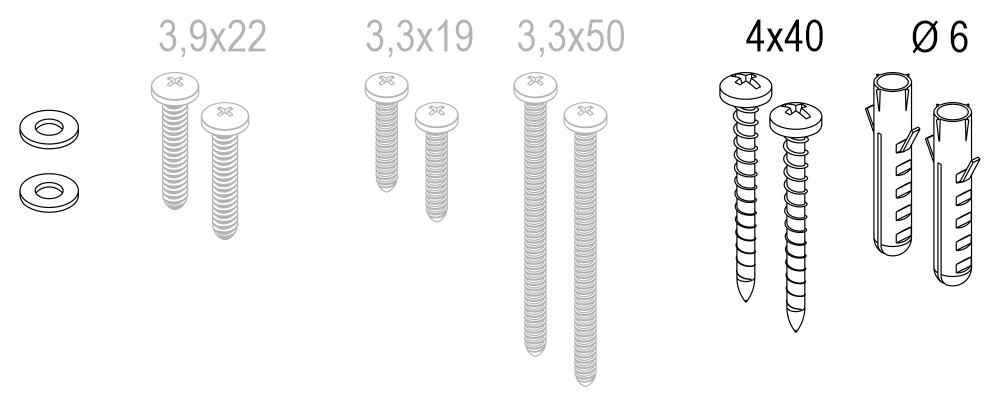
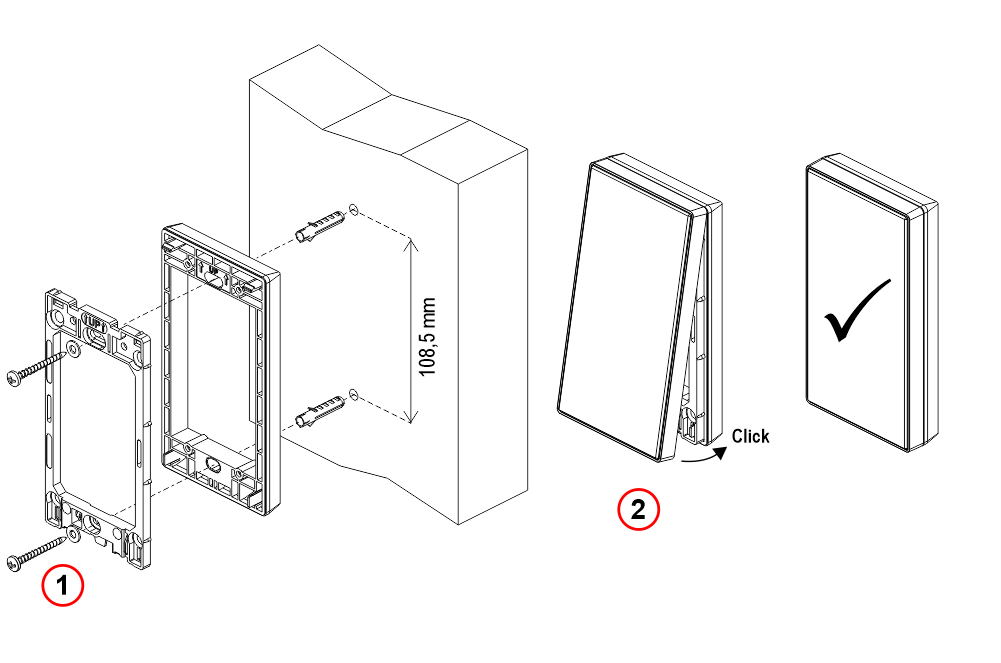
1) Self-tapping screw 4×40 mm.
Dismantling
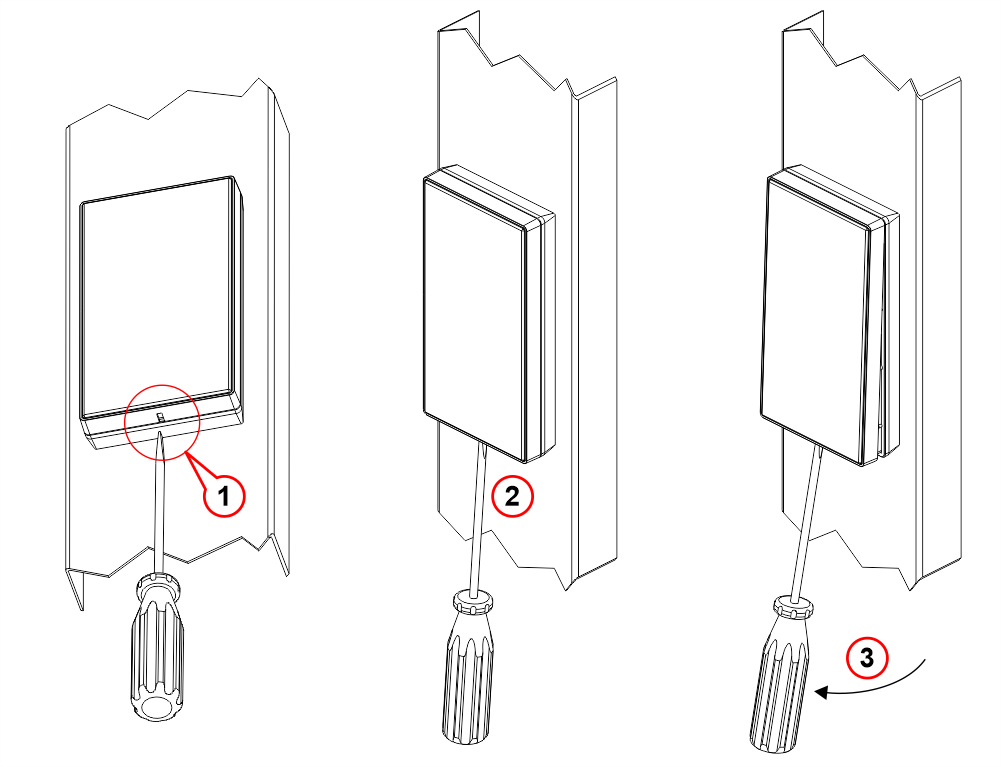
1) Insert a flat-head screwdriver into the slot beneath the plate.
Wirings
Refer to the relevant pages for wiring of individual components:
Touchless button
Download
| Reference | Version | Link |
|---|---|---|
| 1.0 | Download PDF (English) | |