(v 1.4)
Safety and usage cautions
Before installing our products, we recommend you to consult the section about safety and usage cautions at the link below

Mounting
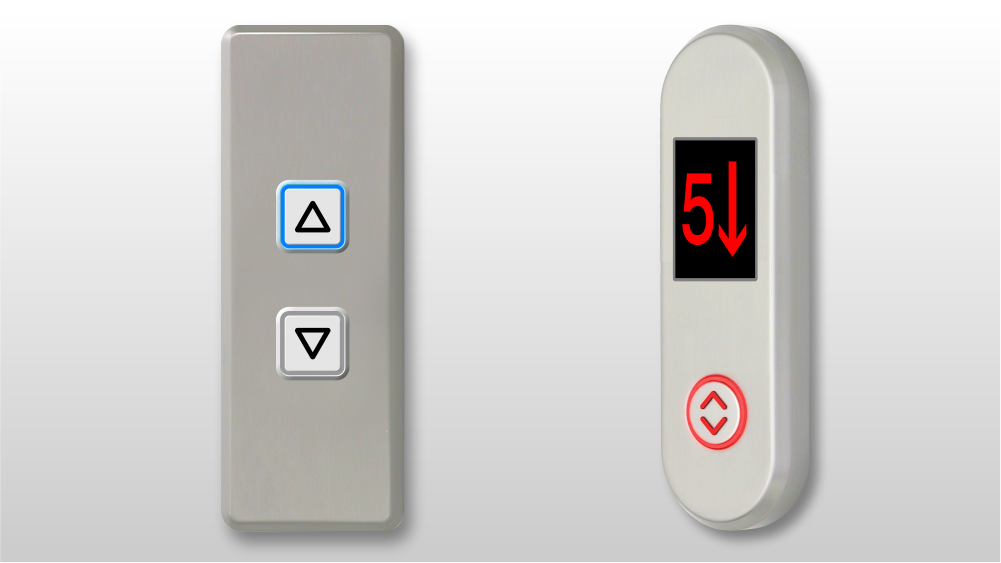
The pushbutton panel in the elevator car has the assembly instructions directly on the template supplied with the product.
Brick & Beetle 70x220mm / 90x250mm
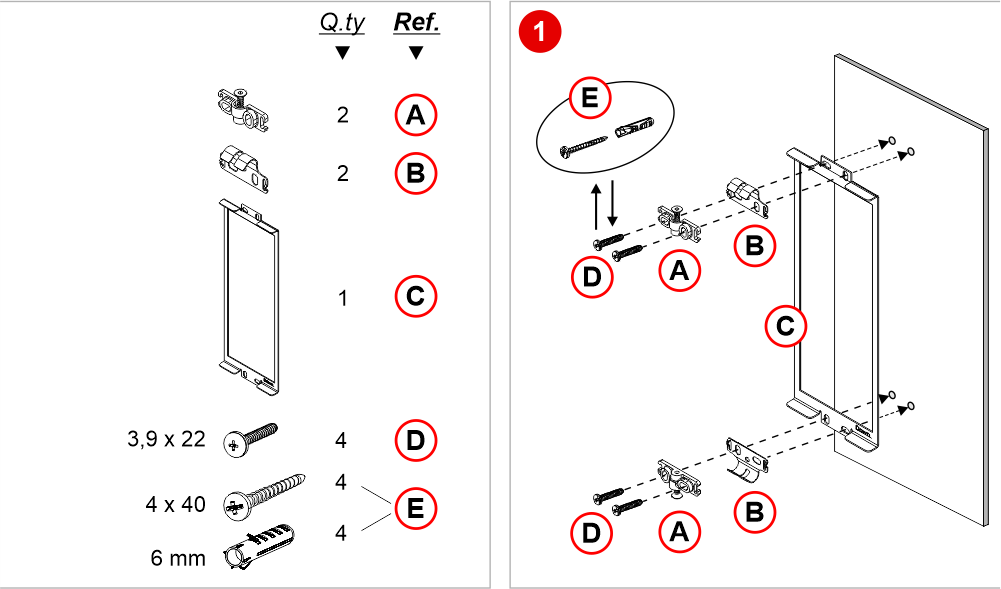
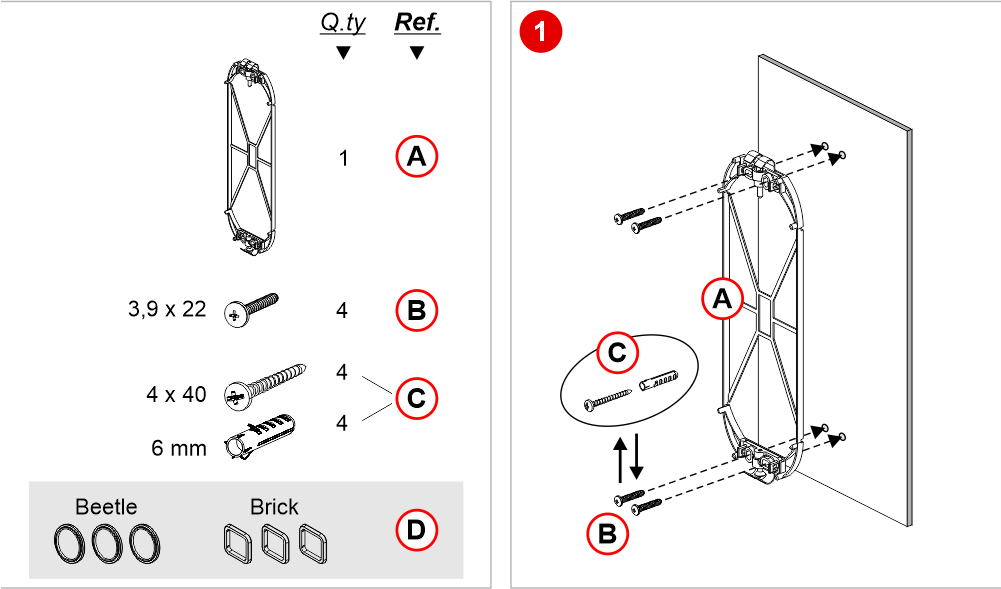 A) Fixing support
B) Screw (fixing on the door frame)
C) Screw and plastic wall plug (fixing on the Wall)
D) Spacers for the pushbutton mounting
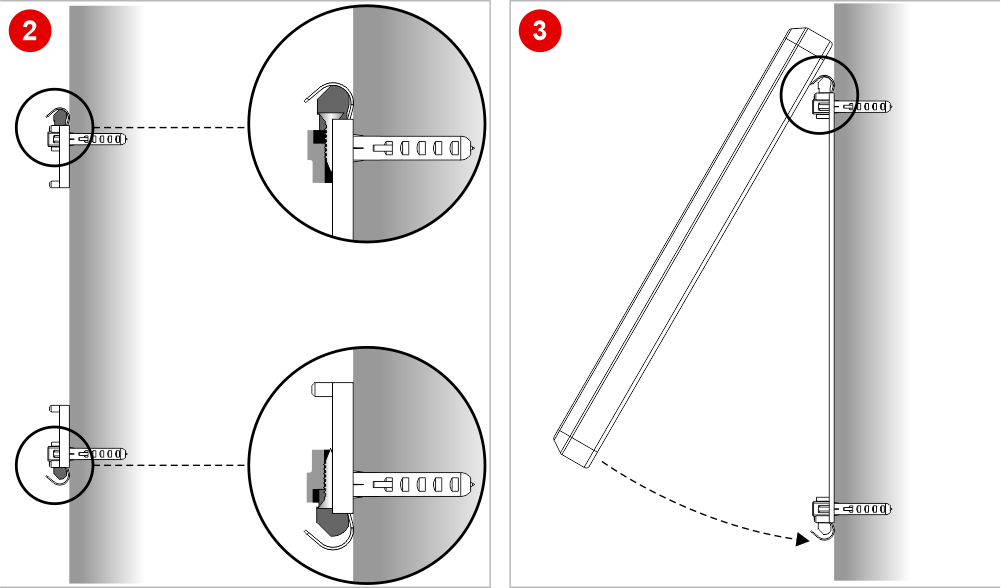
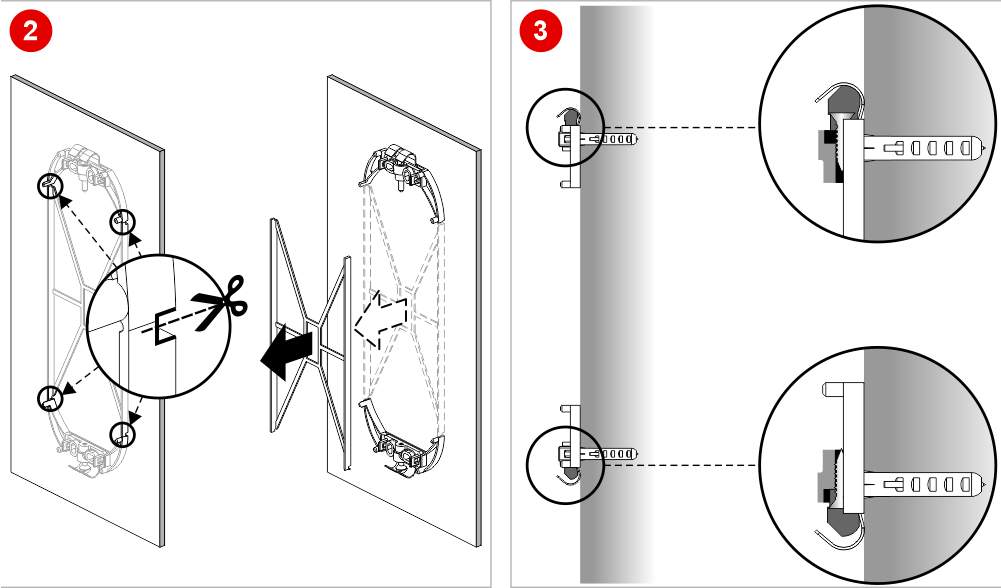 3] Make sure that the top screw fixing is in contact with the spring hook and that the lower screw fixing is NOT in contact with the spring hook.
5] Unscrew the screw locking until it reaches the spring hook.
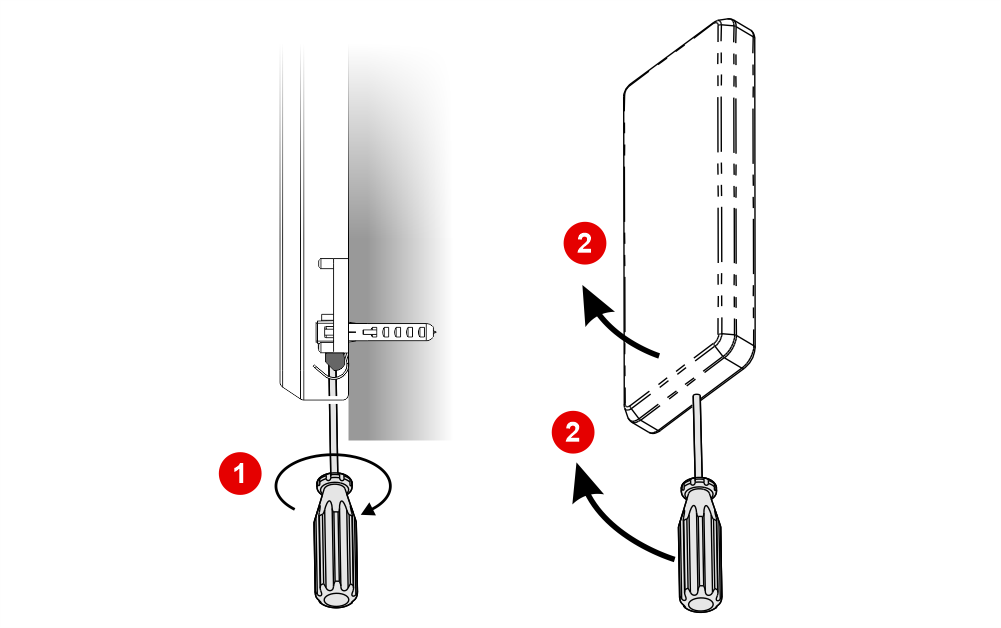
– Disassembly –
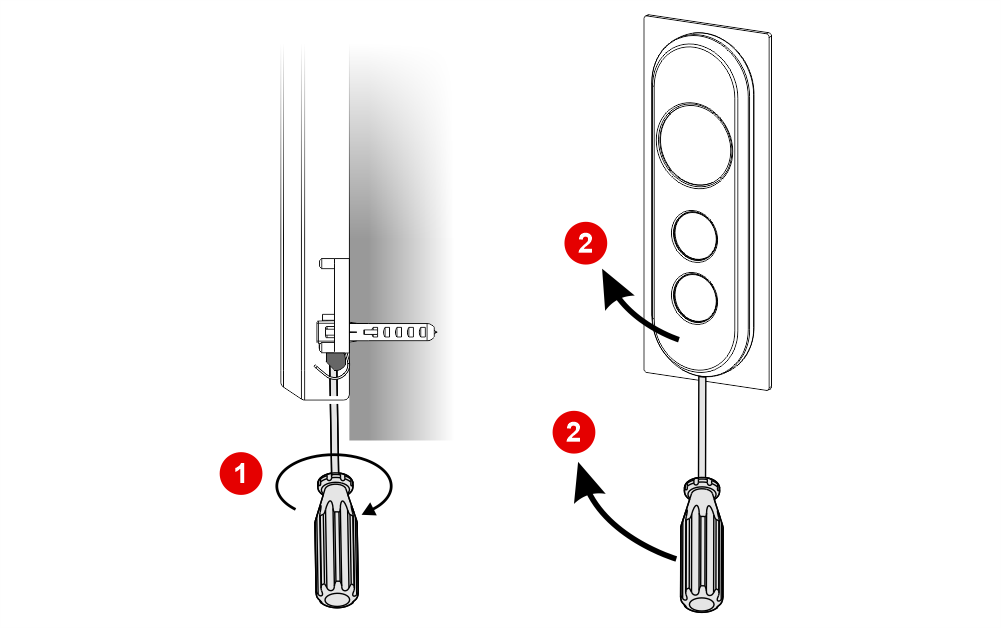
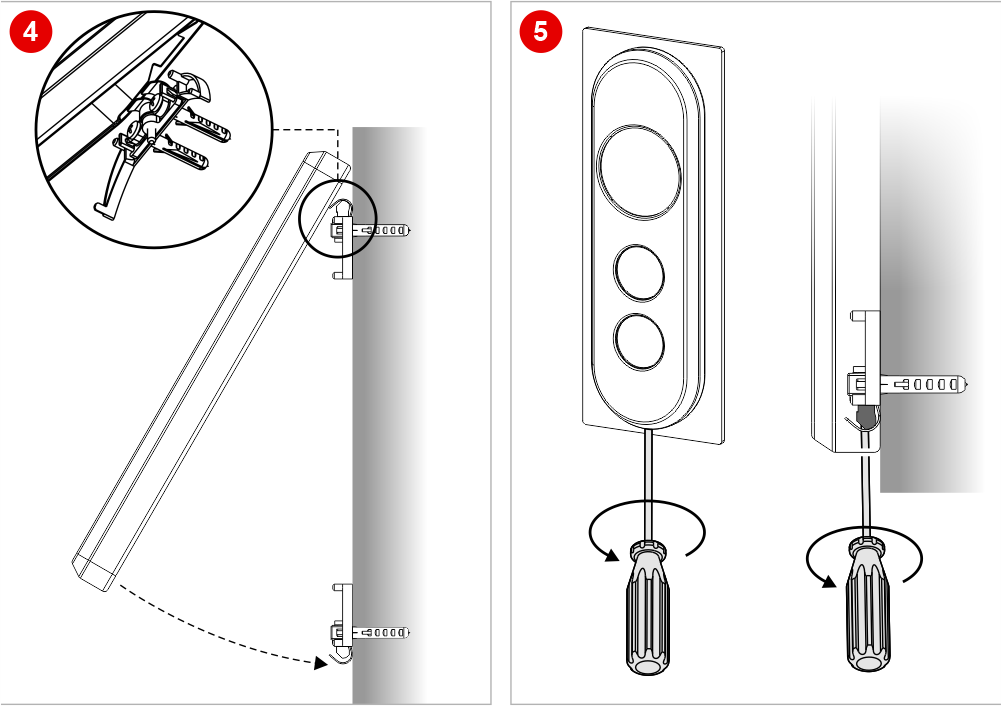
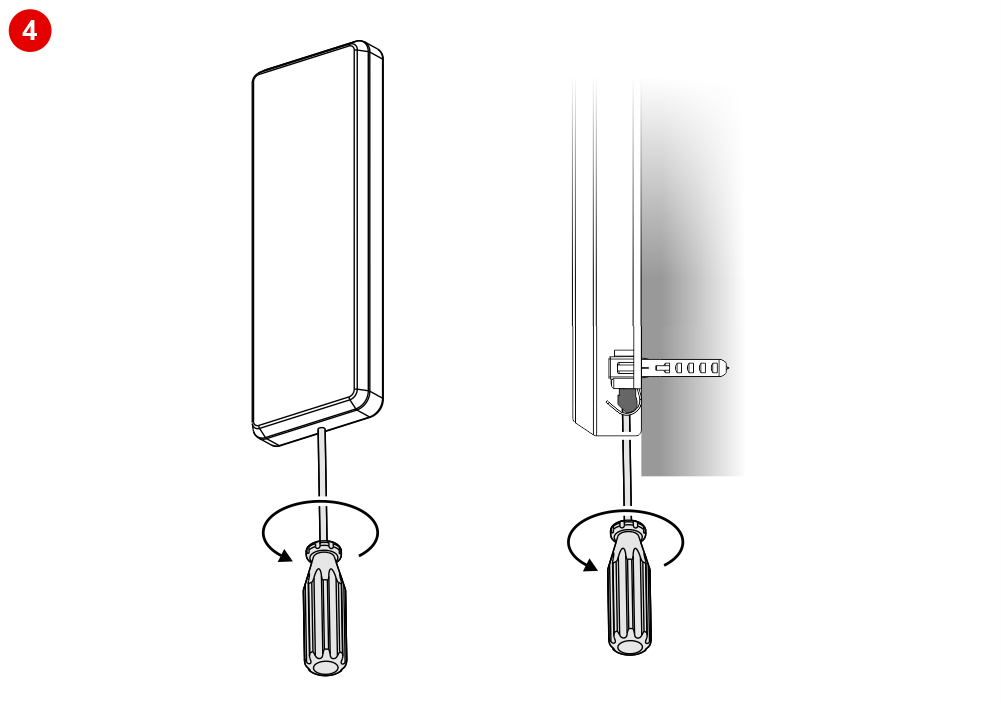
Turn clockwise the lower screw.
Brick 70x165mm
A/B/C) Fixing support
D) Screw (fixing on the door frame)
E) Screw and plastic wall plug (fixing on the Wall)
2] Make sure that the top screw fixing is in contact with the spring hook and that the lower screw fixing is NOT in contact with the spring hook.
4] Unscrew the screw locking until it reaches the spring hook.
– Disassembly –
Turn clockwise the lower screw.
Download
| Reference | Version | Link |
|---|---|---|
| Mounting of elevator car button panel | 1.4 (current version) | Download PDF (English) |