(v 1.7)
Safety and usage cautions
Before installing our products, we recommend you to consult the section about safety and usage cautions at the link below.

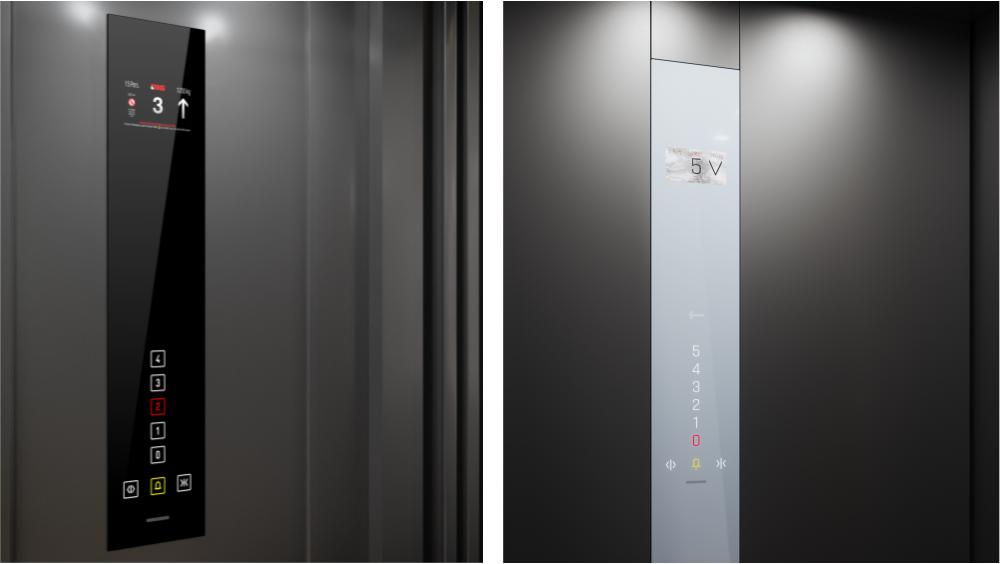
FLUSH plates
– Elevator car column panel –
[Phase 1] – Cut-out wall of elevator car
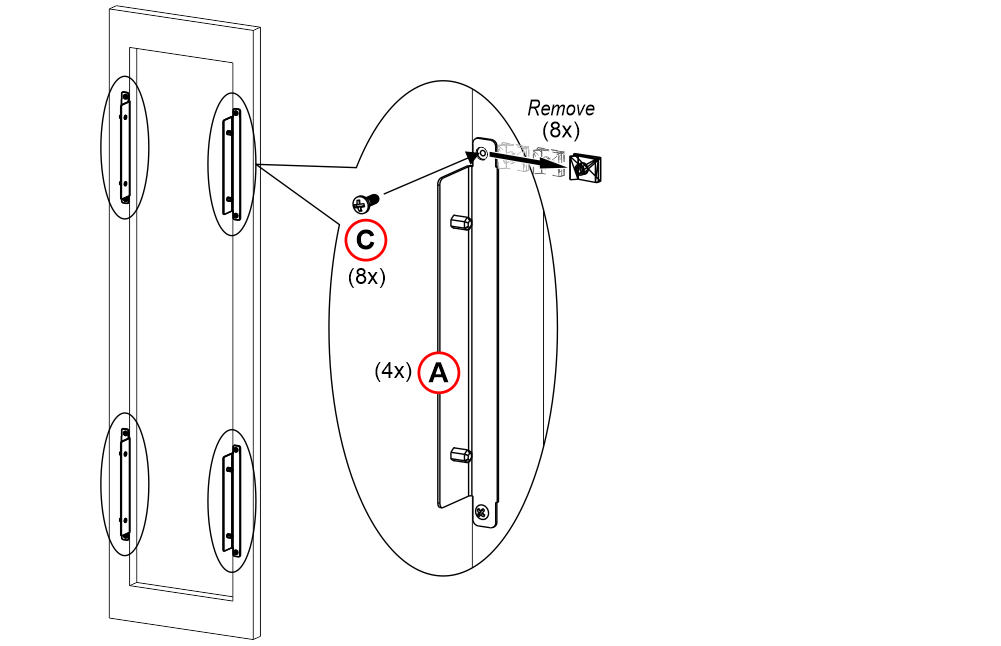
[Phase 2/3] – Remove the column from the wall box
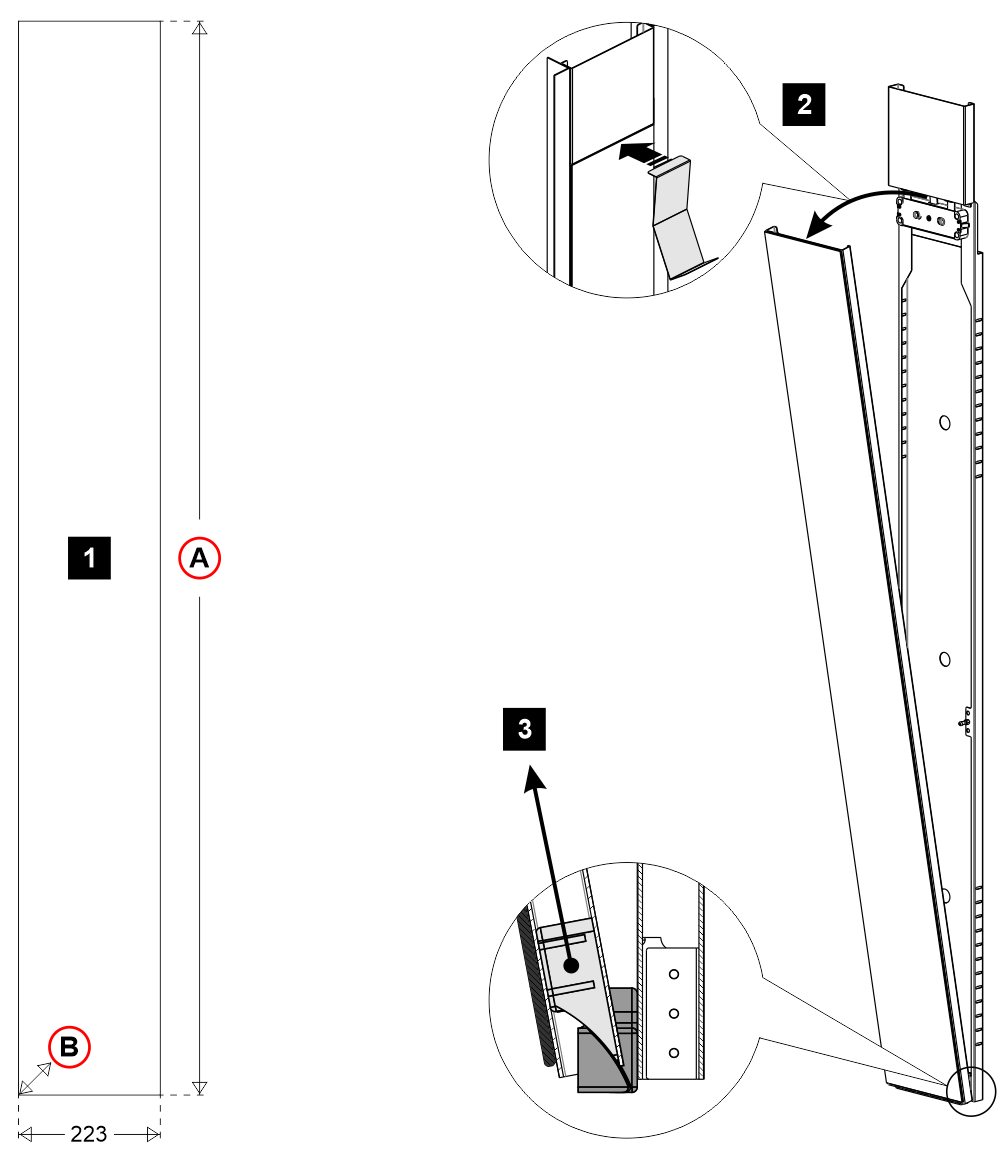 A) – Total heigh column + 2mm (ex. 2.115 mm + 2 mm)
B) – Depth: 60 mm (is the minimum rear space required for the box )
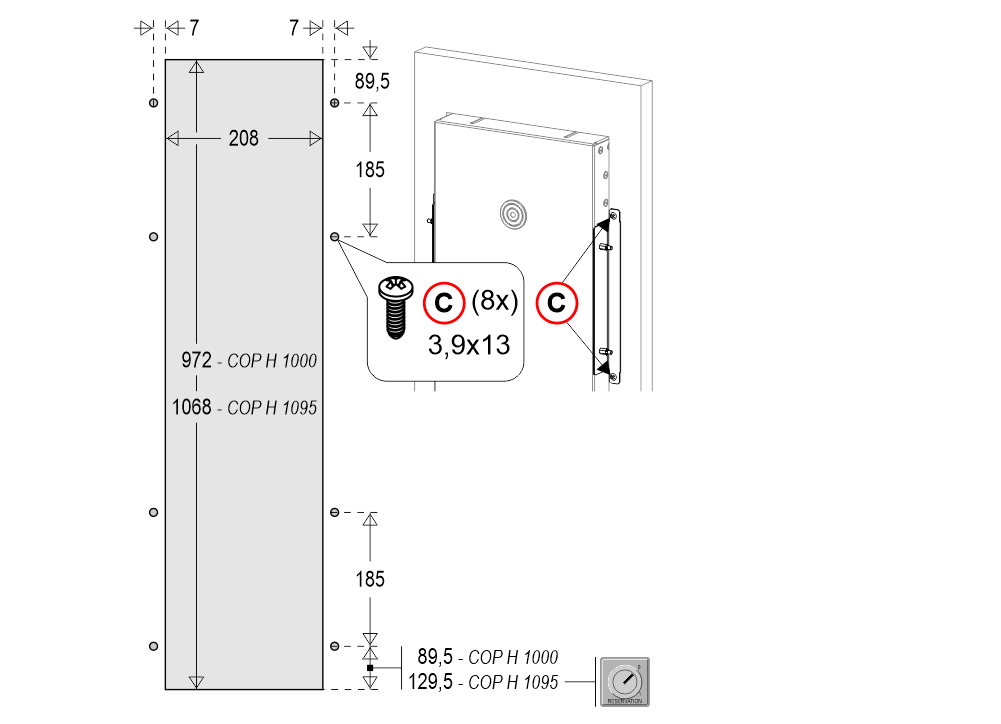
[Phase 4]– Reference settings for fixing
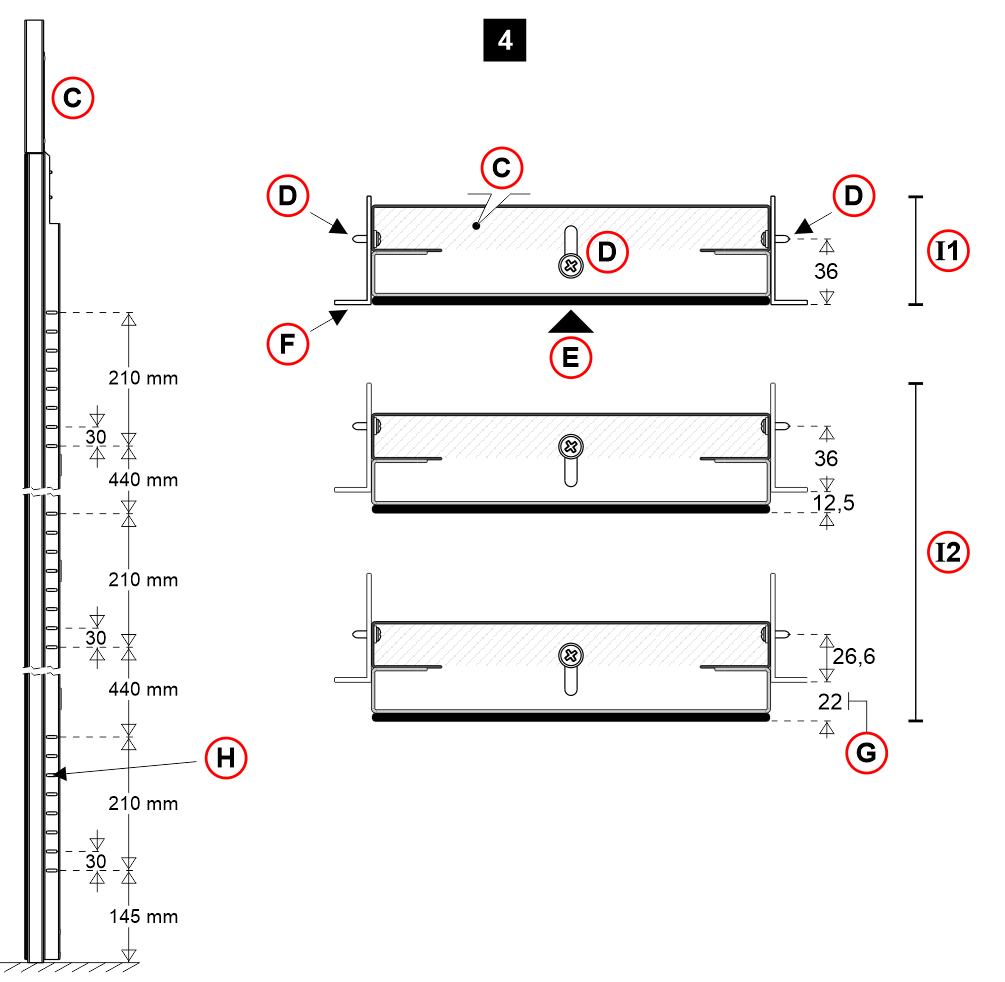 C) – Back box
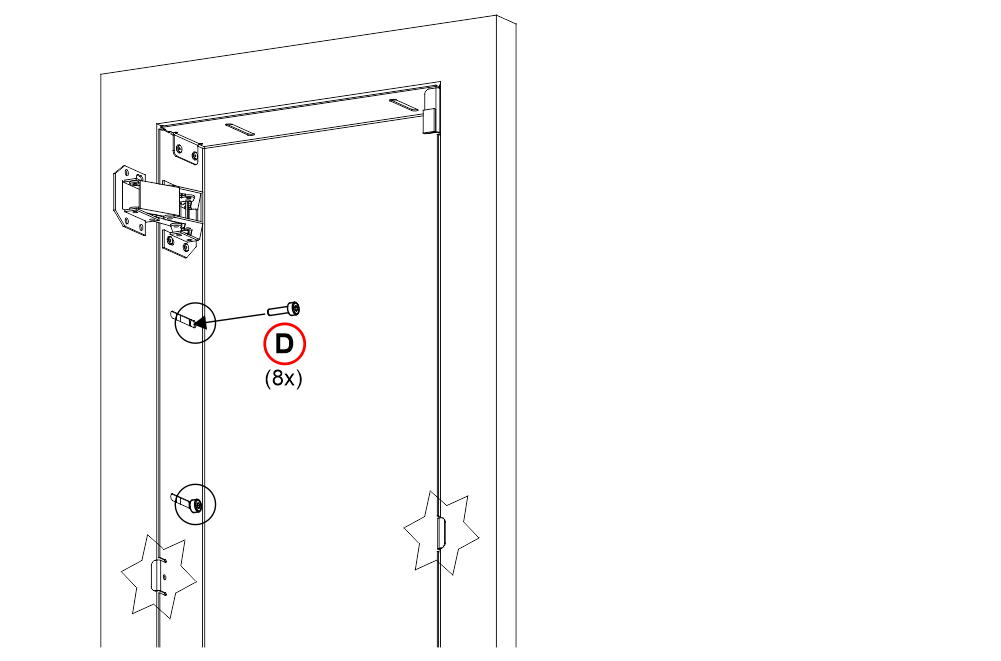
D) – Fixing screws
E) – Column front view
F) – Elevator car wall profile
G) – Maximum protrusion
H) – Adjustment holes
I1) – Flush plate installation
I2) – Protruding installation
[Phase 5/6] – See below
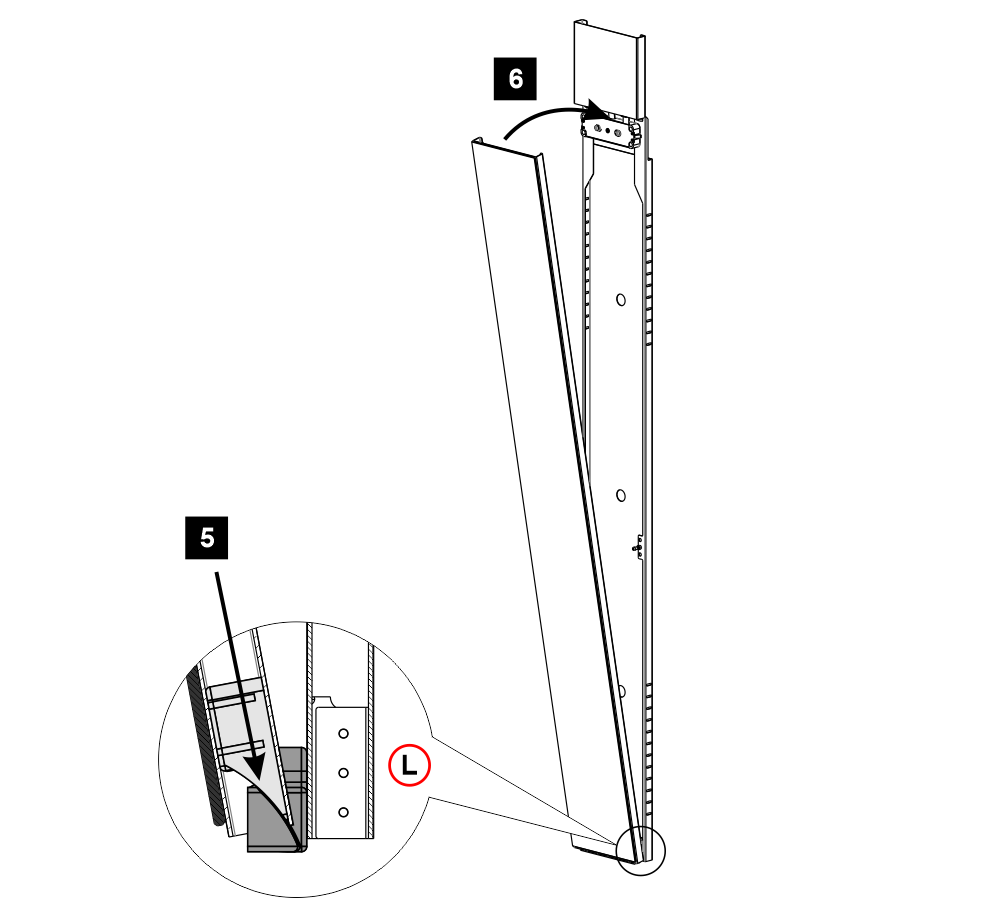
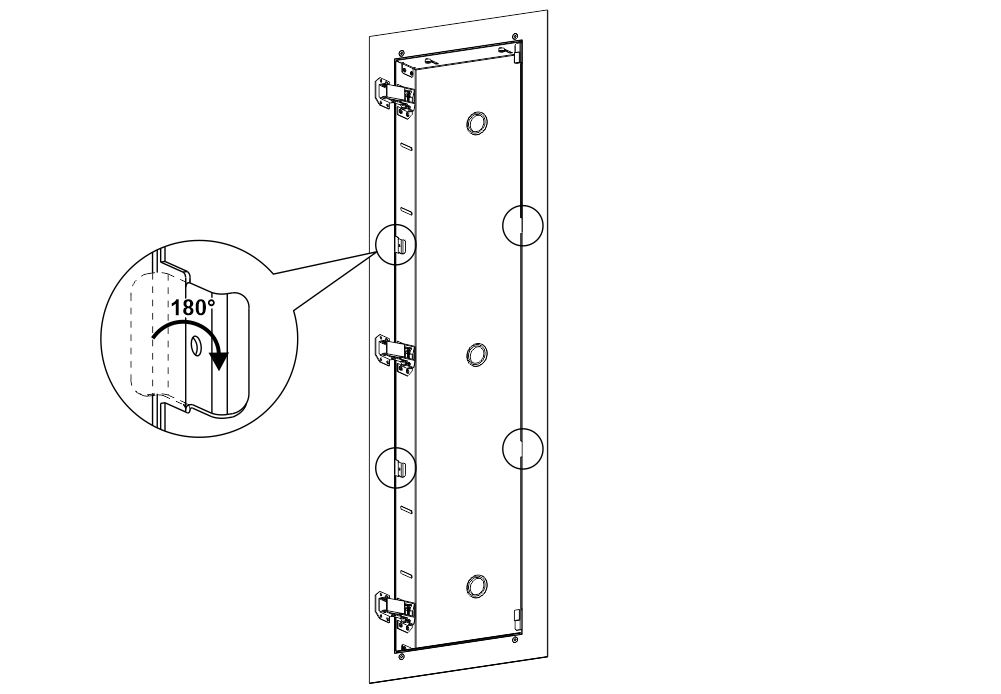
L) – Hinge detail
– Short elevator car panel –
[Mounting kit]
[Cut-out] – FRONT fixing
G) – Elevator car wall
[Phase 1] – See below (back view)
[Phase 2] – See below (front view)
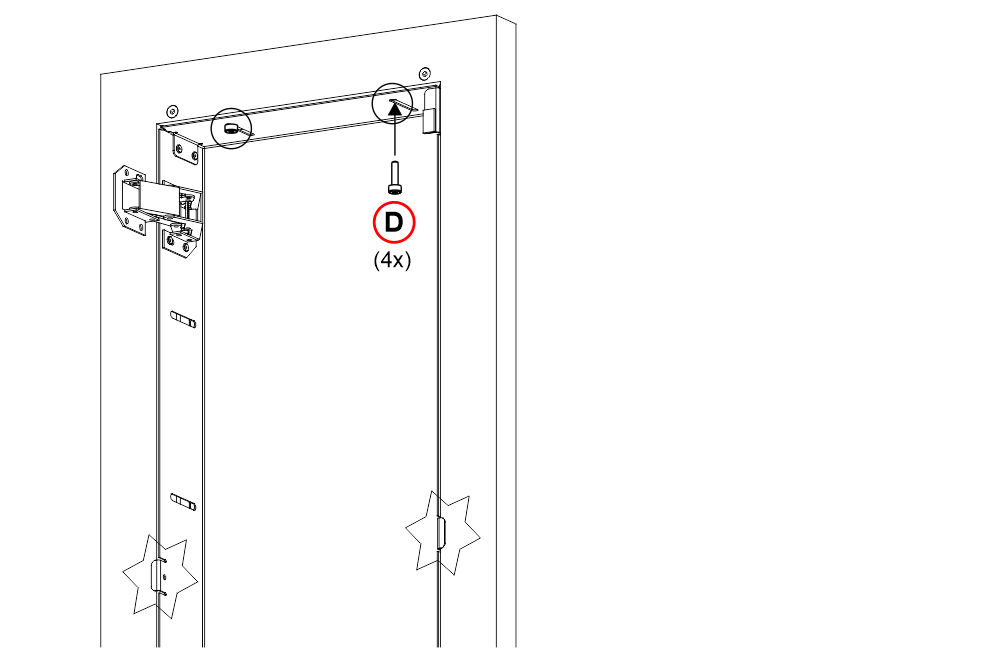 Insert the box up to the flap and fasten it (D)
[Cut-out] – BACK fixing
 The 8 holes must NOT be made on the front view of the elevator car wall.
[phase 1] – See below (back view)
[Phase 2] – See below (front view)
 Insert the box up to the flap and fasten it (D)
[Phase 3] – Fold the flaps (See below)
[Phase 4] – See below
[Phase 5] – See below
[Open the elevator car panel] – See below
– Floor panel –
(with back box)
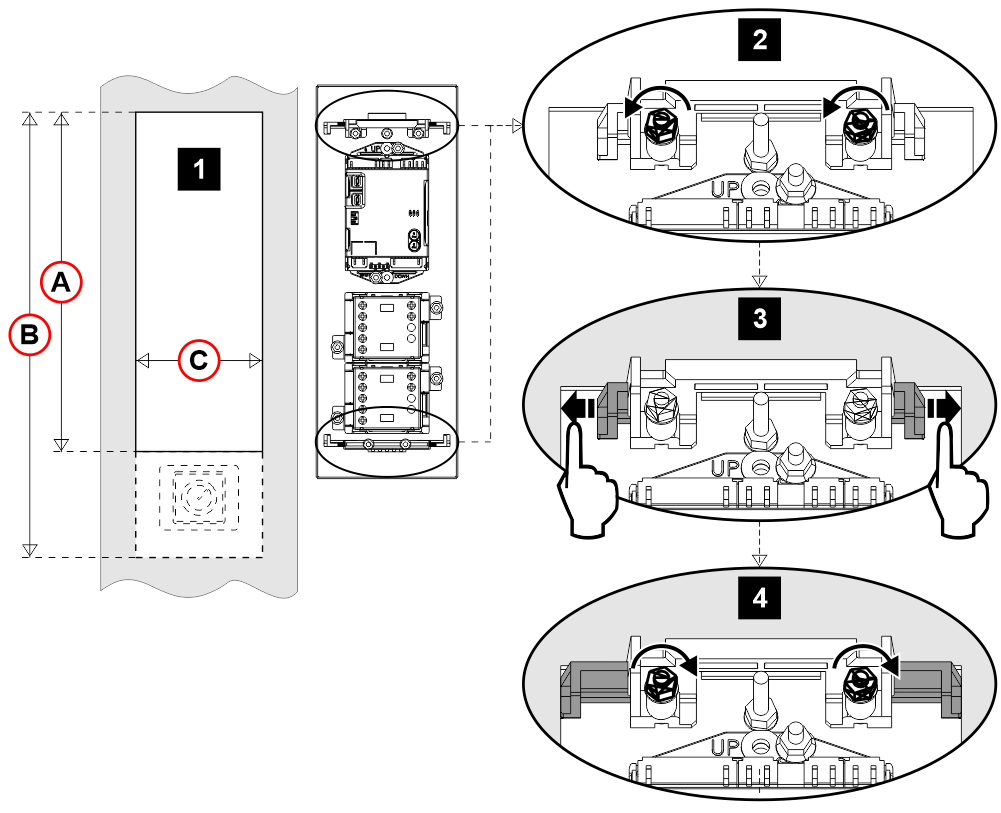
[Phase 2] – Insert the back box.
[Phase 3] – Loosen the two central screws.
[Phase 4] – Adjust the depth of the two brackets.
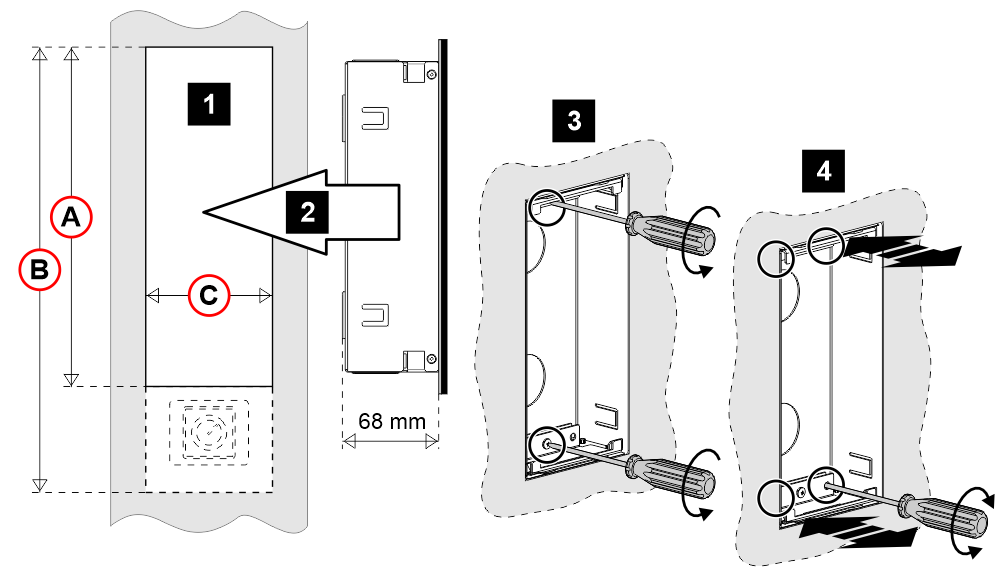
A) – 222 mm (LOP h250 mm without key)
B) – 299 mm (LOP h320 mm with key)
C) – 82,5 mm (LOP 90 mm) / 124 mm (LOP duplex 130 mm) / 85 mm (LIP 90 mm horizontal)
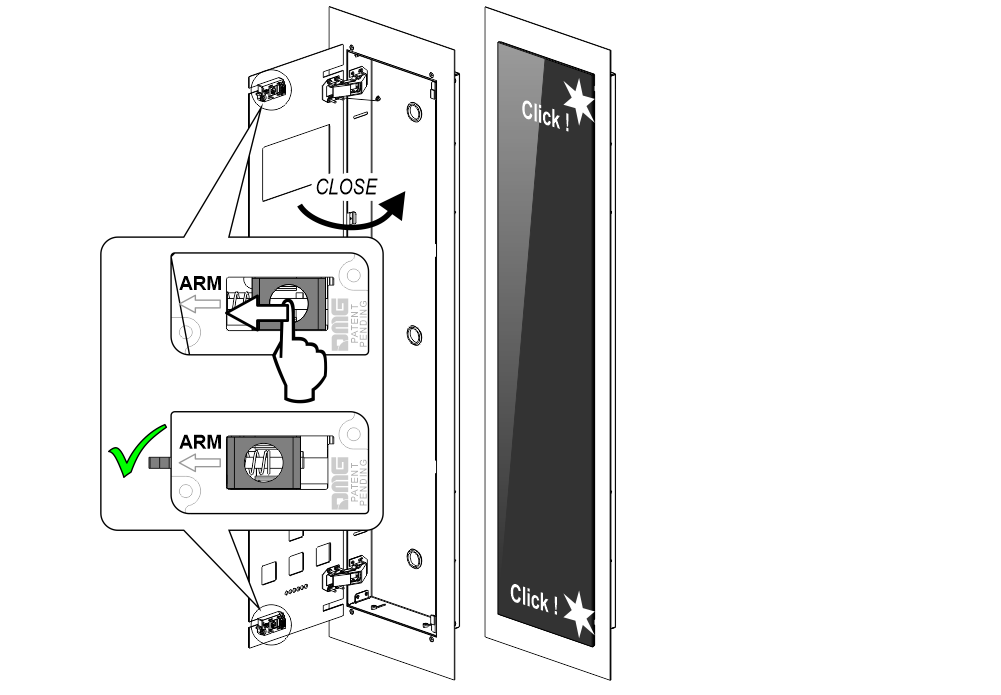
[Phase 5] – Tighten the two central screws.
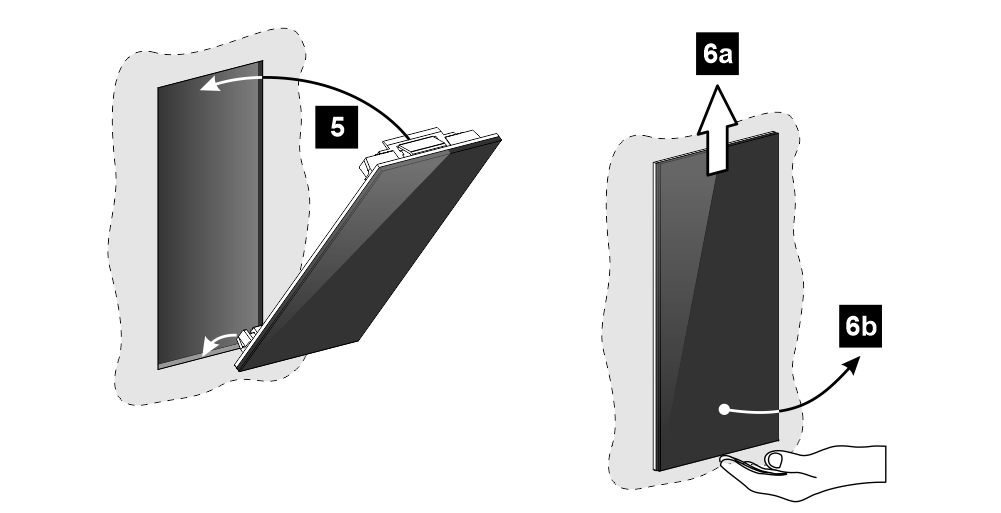
[Phase 6] – Close the floor panel.
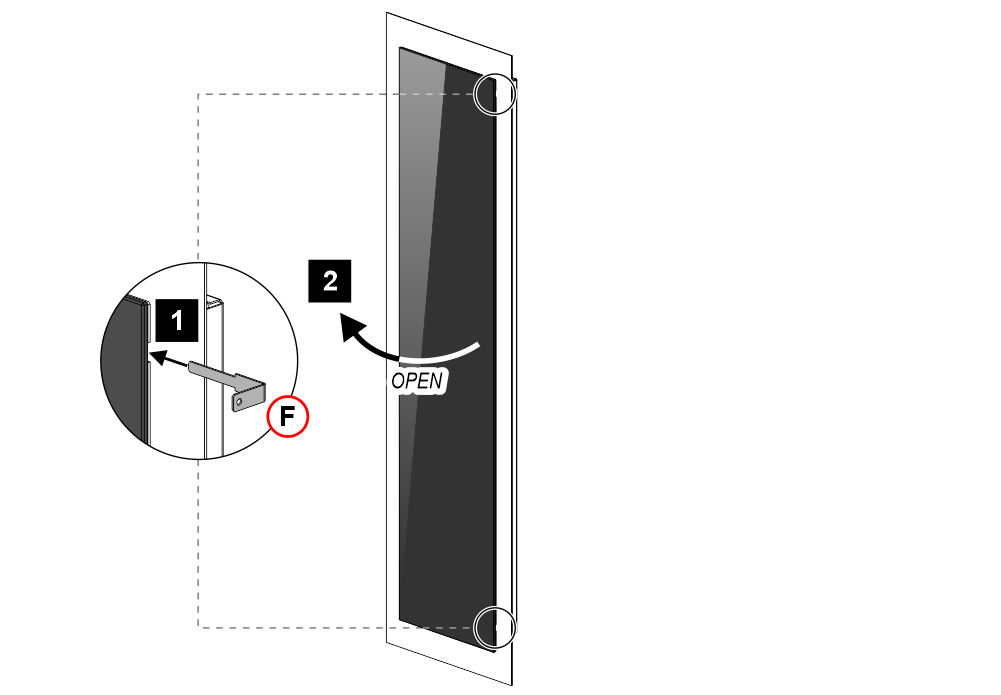
[Phase 7] – Dismantling the floor panel.
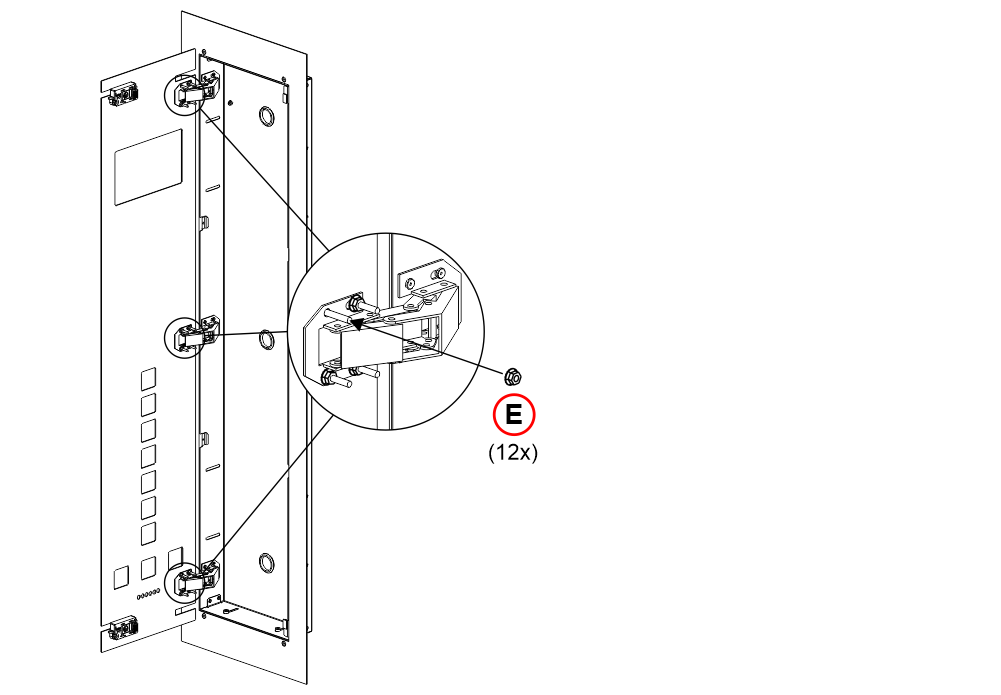
[Phase 2] – Loosen the 4 nuts.
[Phase 3]
[Phase 4] – Tighten the 4 nuts.
A) – 211,5 mm (LOP h250 mm without key)
B) – 288,5 mm (LOP h320 mm with key)
C) – 80,5 mm (LOP 90 mm) / 124 mm (LOP duplex 130 mm) / 82,5 mm (LIP 90 mm horizontal)
[Phase 5] – Close the floor panel.
[Phase 6] – Dismantling the floor panel.
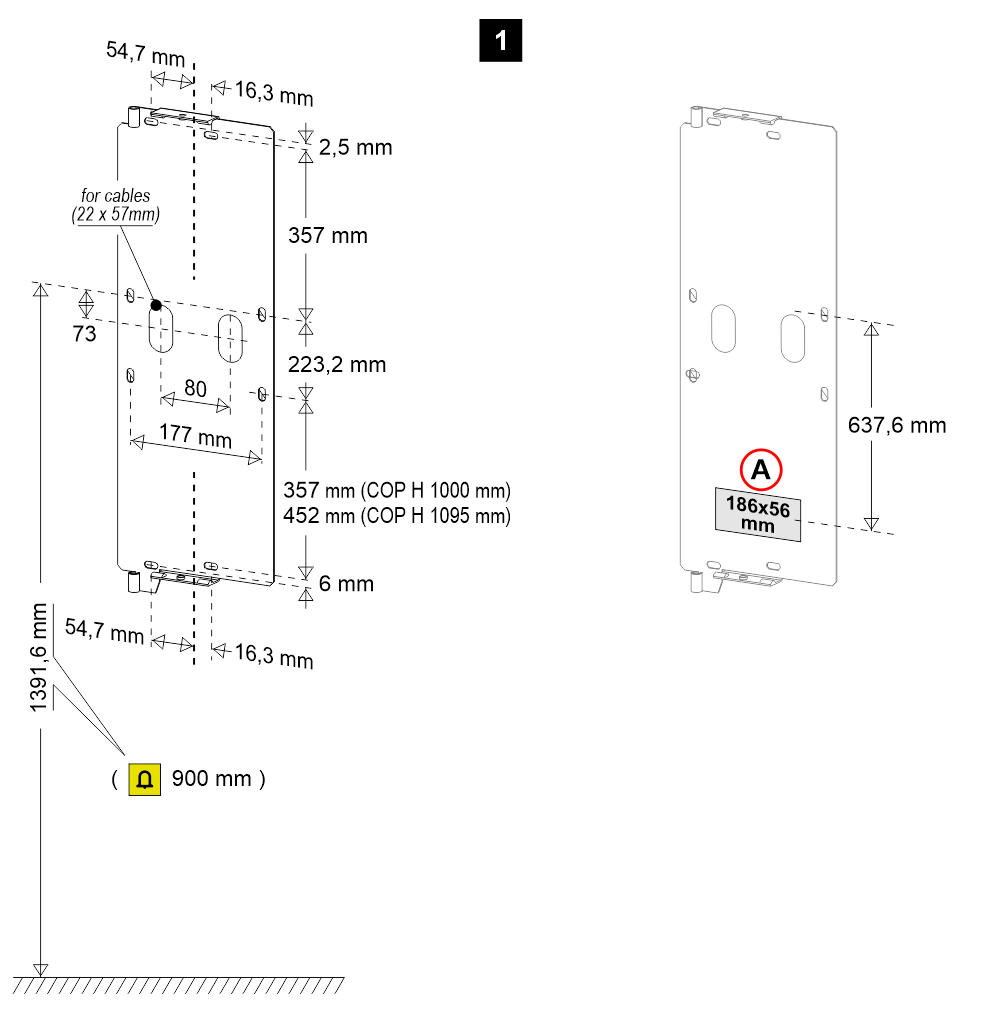
SURFACE plates
– Elevator car column panel –
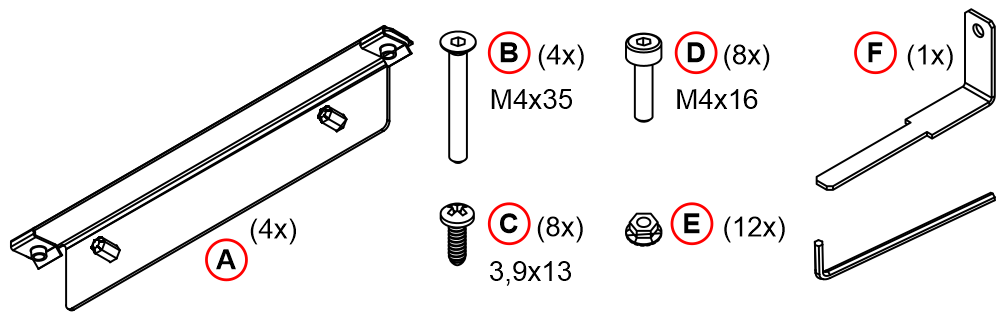
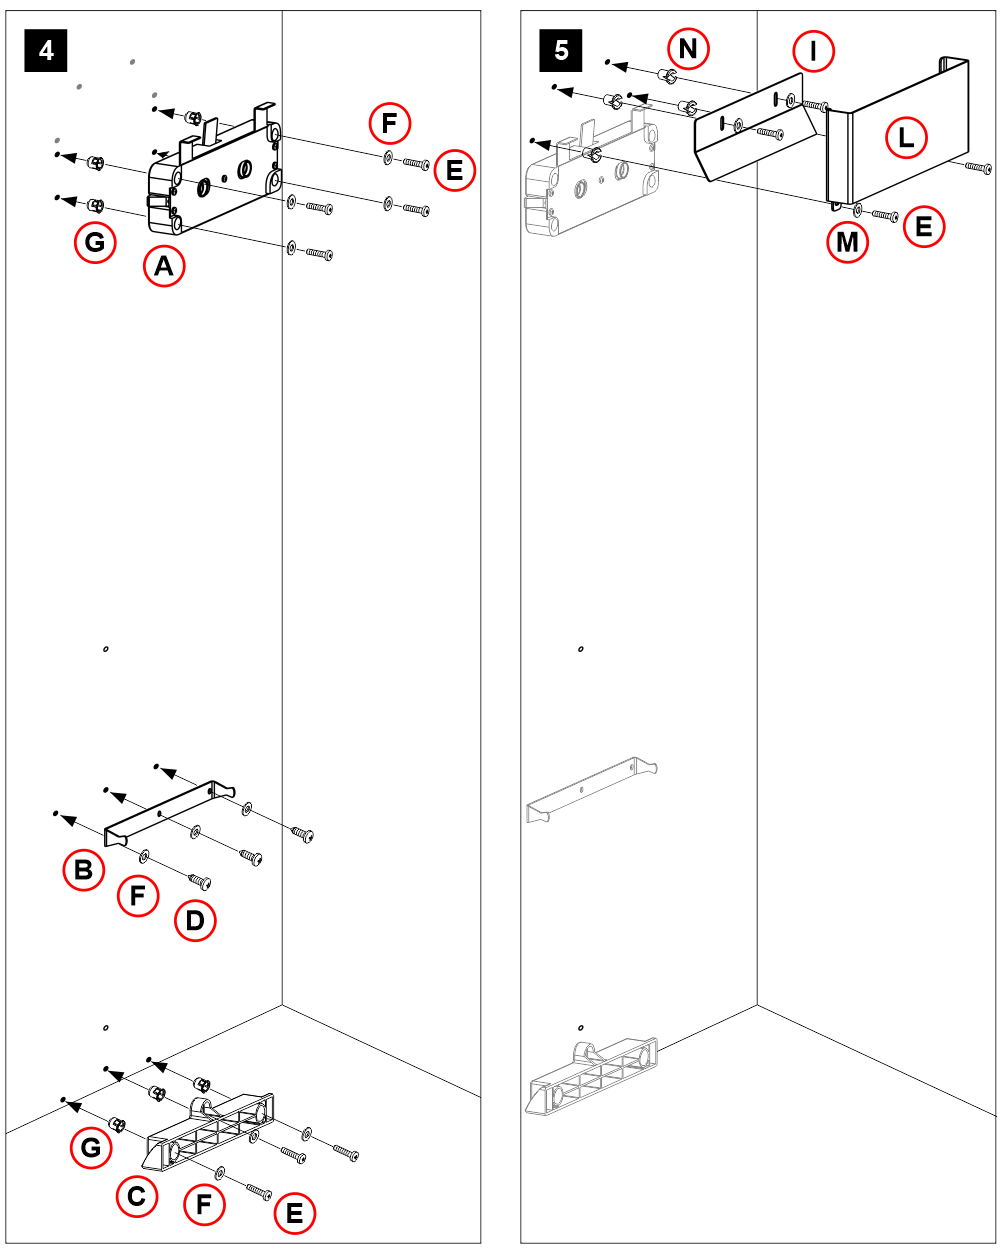
[Mounting kit]
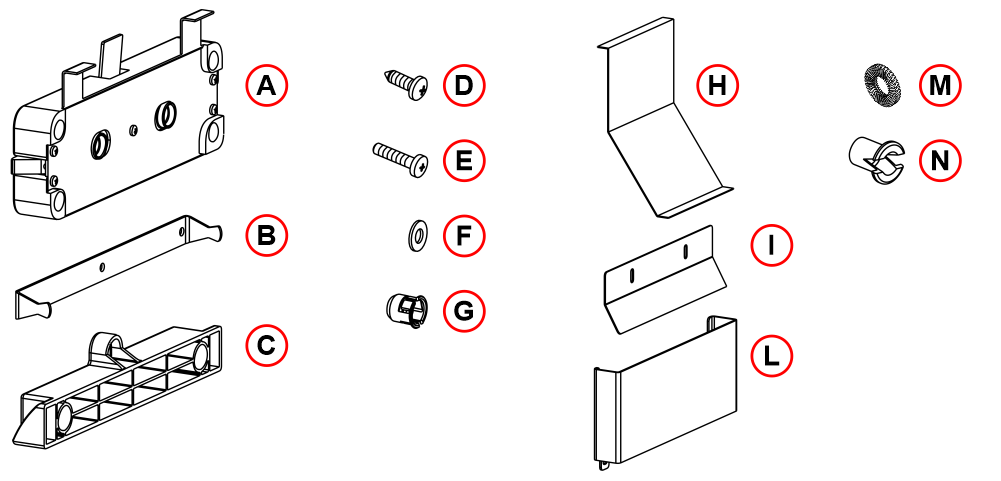
A) – 1 Lock B) – 1 Central stirrup C) – 1 Hinge D) – 6 Self tapping screw 3,9 x 13
E) – 11 Screw M4 x 18 F) – 10 Flat washer G) – 7 Round cage nut H) – 1 Opening tool
I) – 1 Ceiling support L) – 1 Ceiling adapter M) – 4 Crinkle washer
N) – 4 Threated Polyammide bush M4
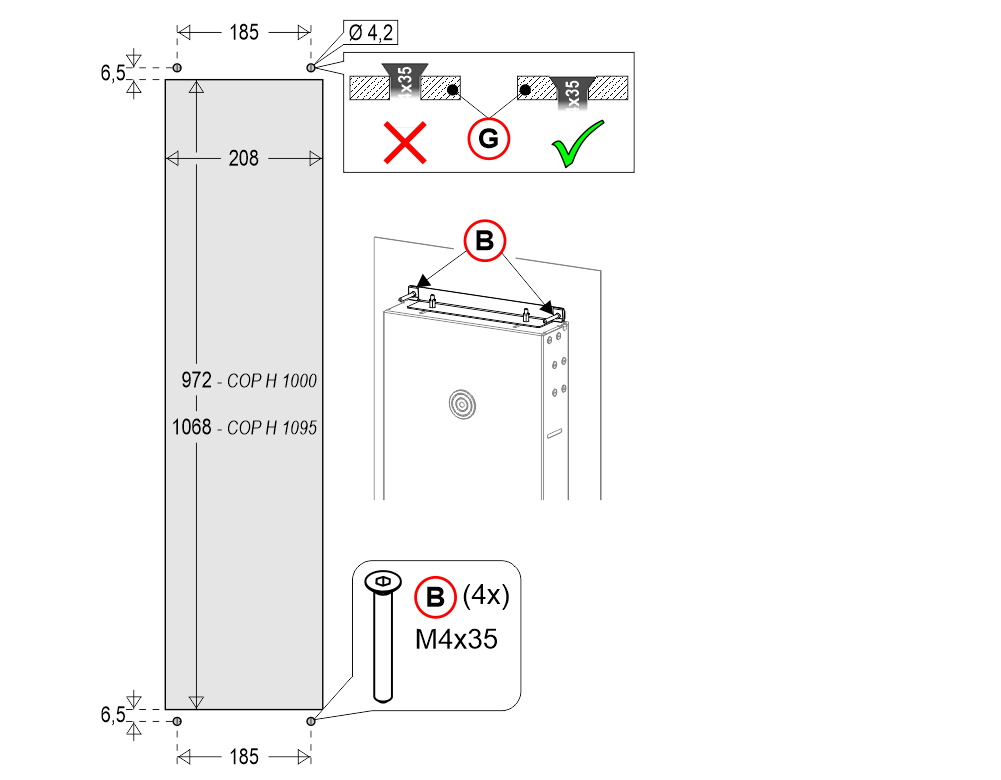
[Phase 1] – Approach the jig to the wall, drill the 3 holes and fix the jig with the screws (D). The central fixing is optional.
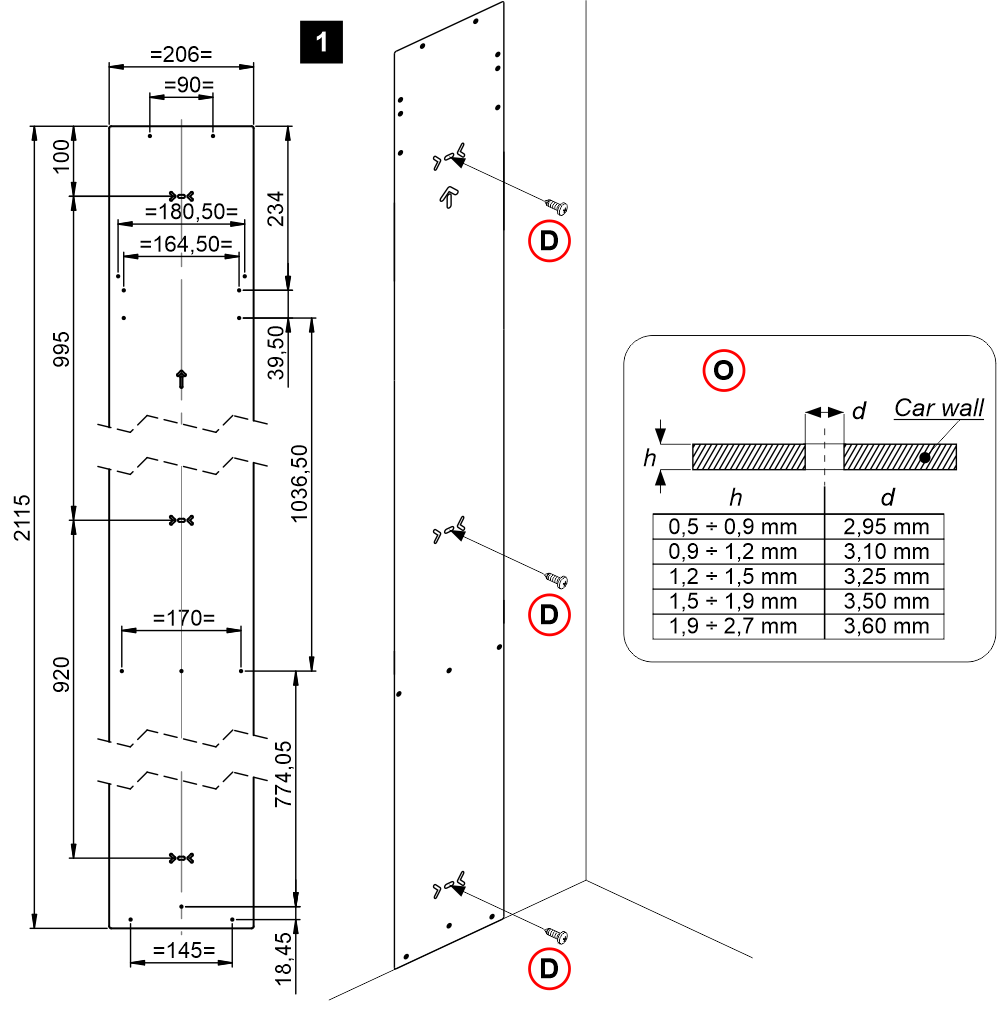
O) – Self tapping screw hole table (Ø 3,9 mm)
[Phase 2] – Drill according to indications
[Phase 3] – Remove jig.
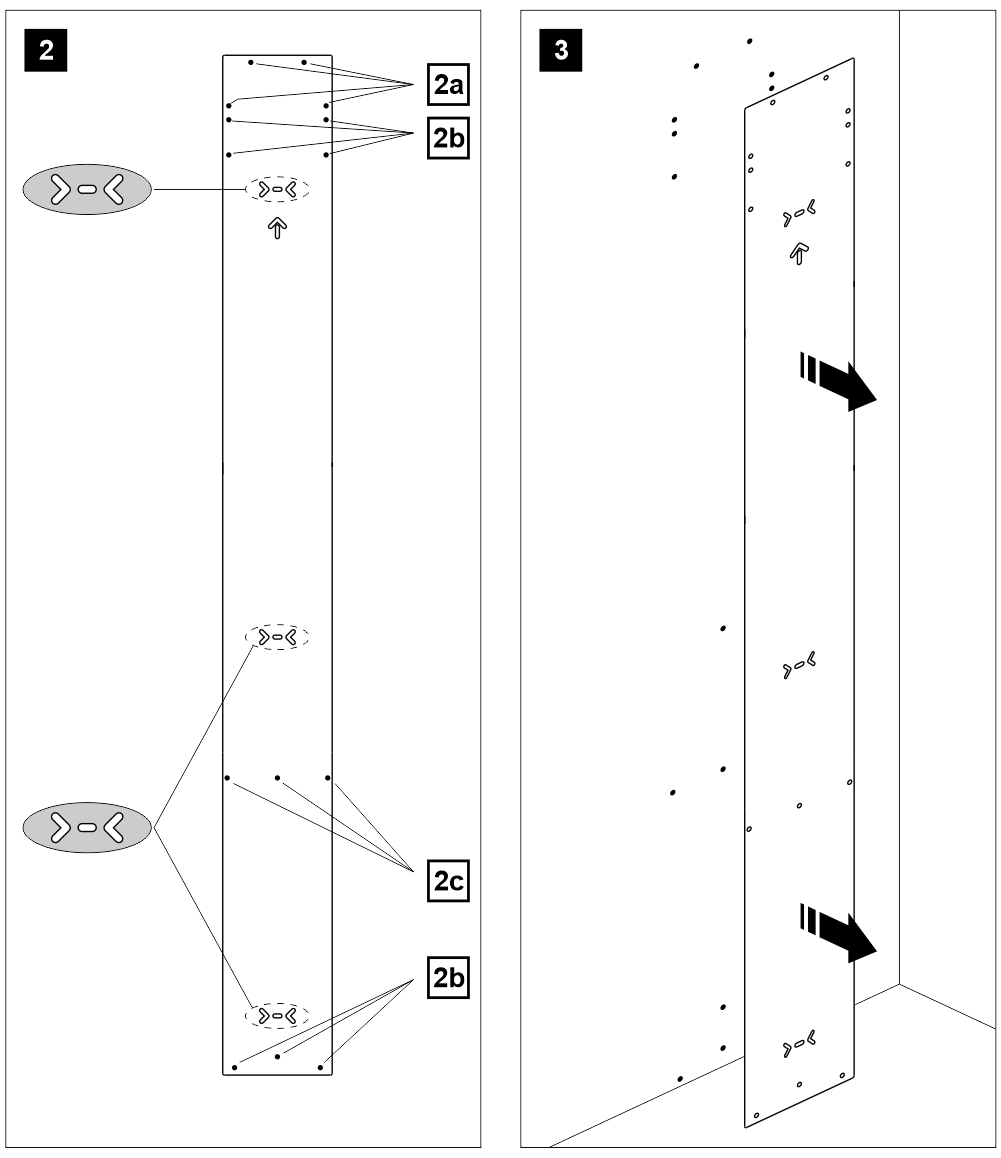
[2a] – Ø 6 mm
[2b] – Ø 10 mm
[2c] – Central stirrup (see “Self tapping screw hole table“)
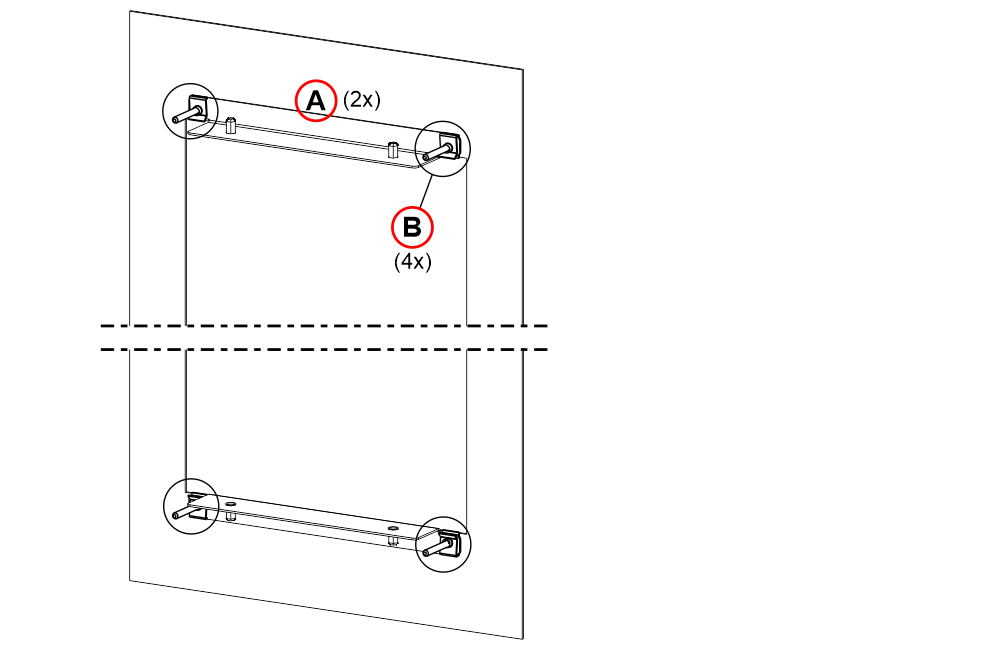
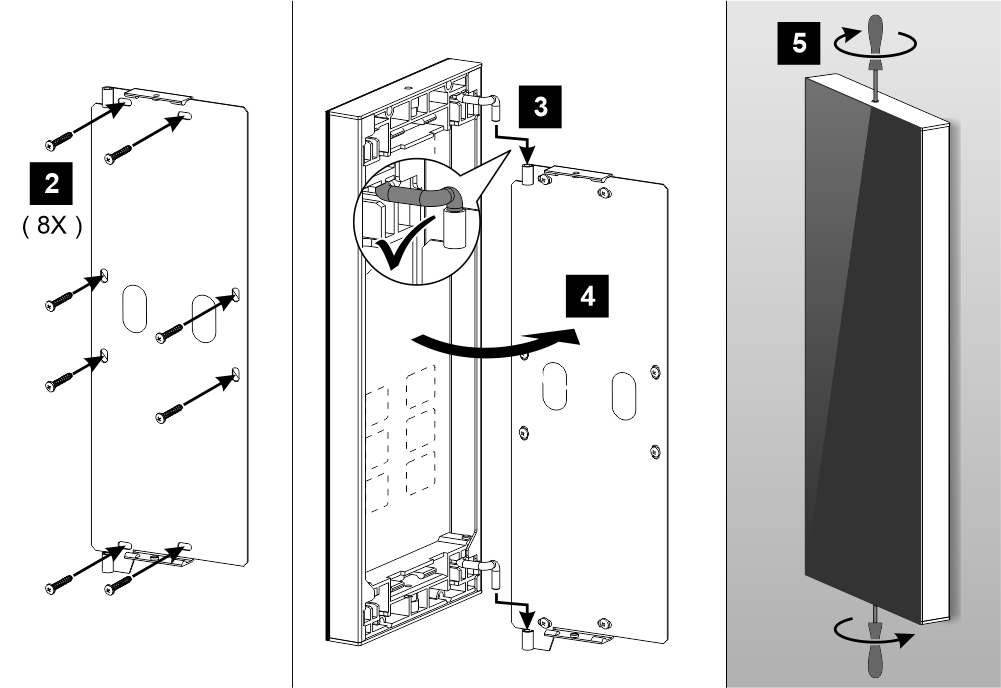
[Phase 4/5] – See below
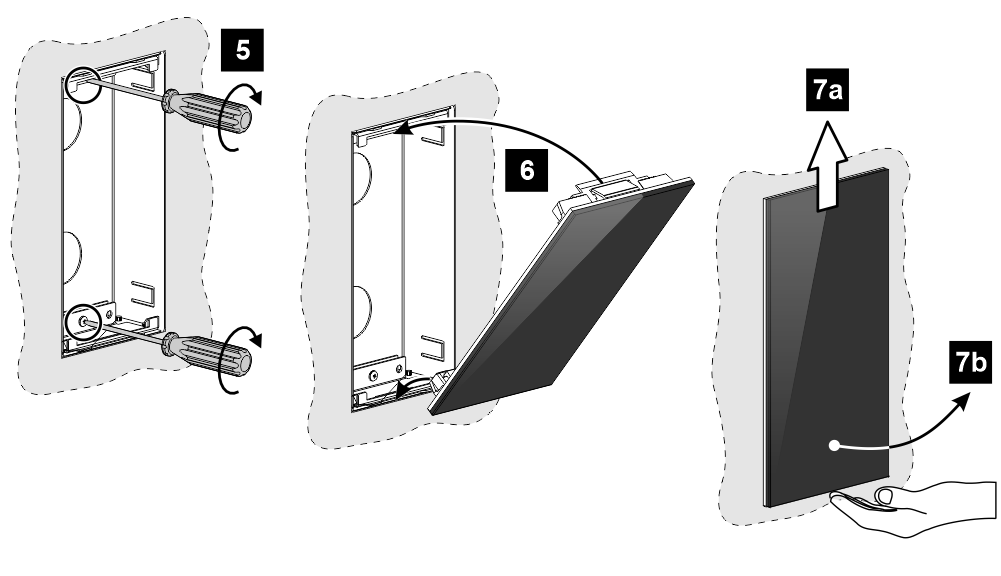
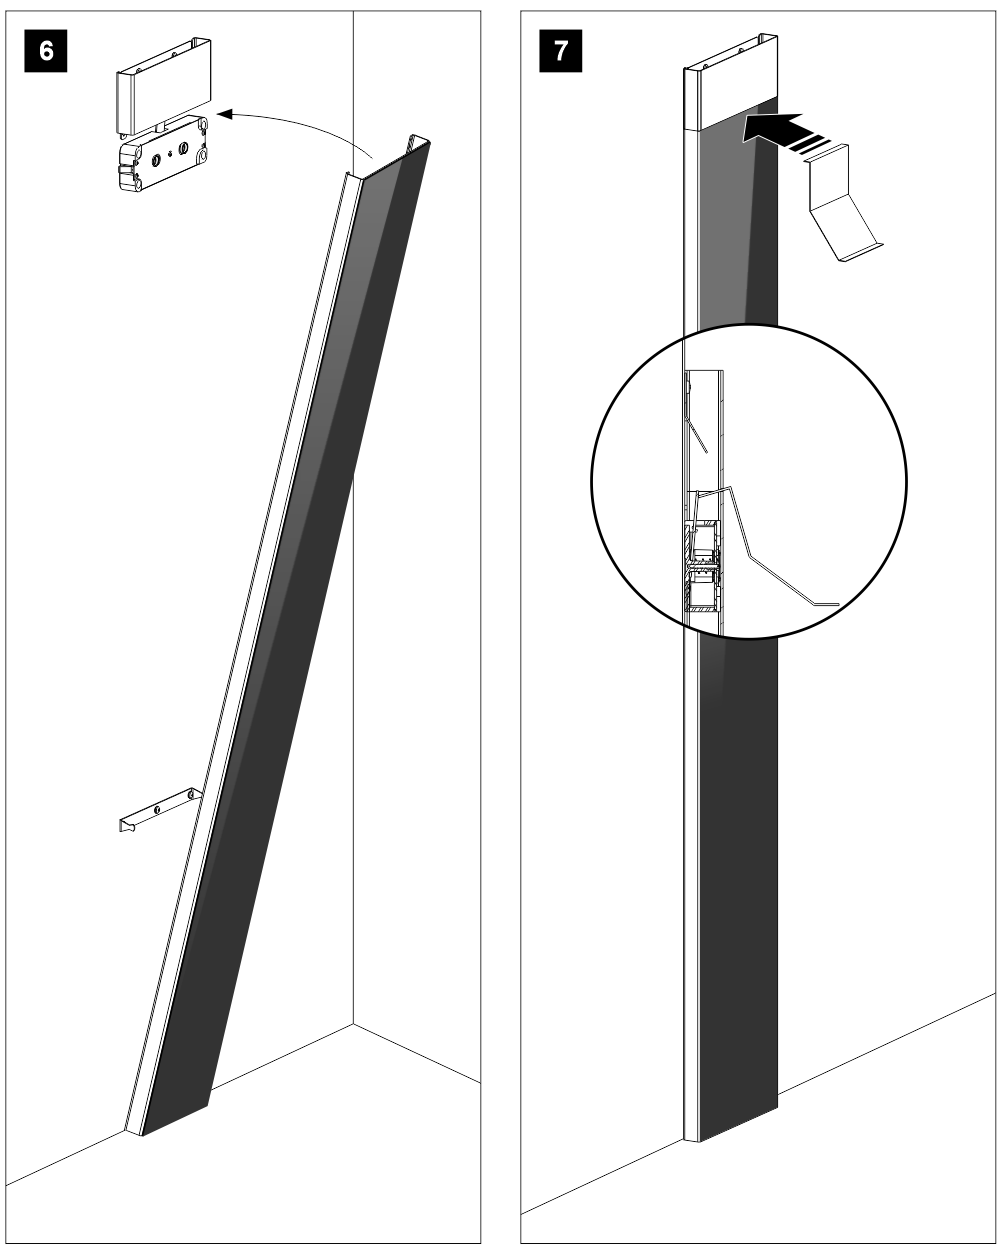
[Phase 6] – Insert the column into the hinge and hook to the lock.
[Phase 7] – Push the opening tool (H) to unlock and pull it to open the column.
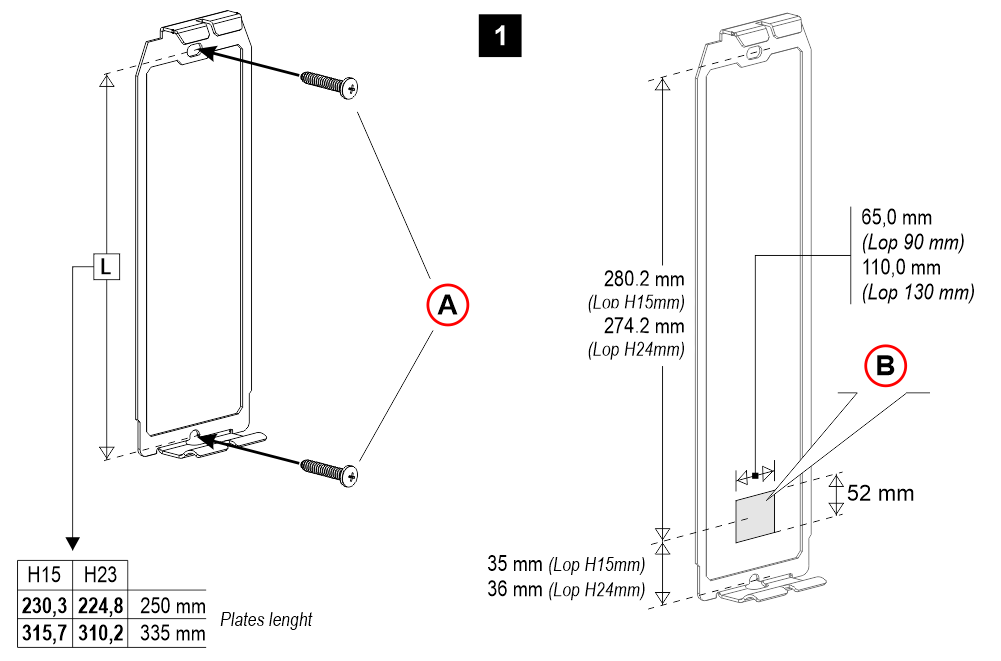
– Short elevator car panel –
[Phase 1] – See below
A) – Cut-out elevator car wall required for plates 1095mm high (with service keys)
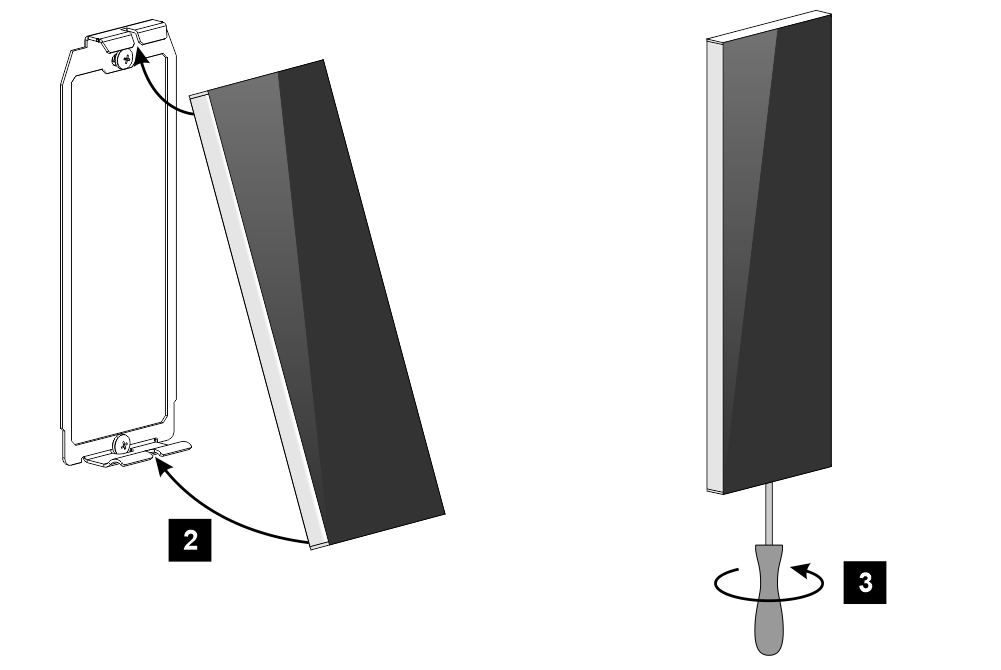
[Phase 2÷5] – See below
– Floor panel –
[Phase 1] – See below
A) – 2 screws: 90 mm width plates / 130 mm width plates H23
4 screws: 130 mm width plates H15
B) – Cut-out wall required for 335mm lenght plates (with key)
[Phase 2/3] – See below
You might be interested in
I-DMG (Touch/Touchless & Mechanical)
For the installation instructions of the MURANO I-DMG Touch/Touchless & Mechanical landing operating panel, please refer to the following link:
Touch button
Touchless button
Download
| Reference | Version | Link |
|---|---|---|
| 1.6 | Download PDF (English) | |
| Fixed error | 1.7 (current version) | Download PDF (English) |