(v 1.2)
Safety and usage cautions
Before installing our products, we recommend you to consult the section about safety and usage cautions at the link below.

Dimensions
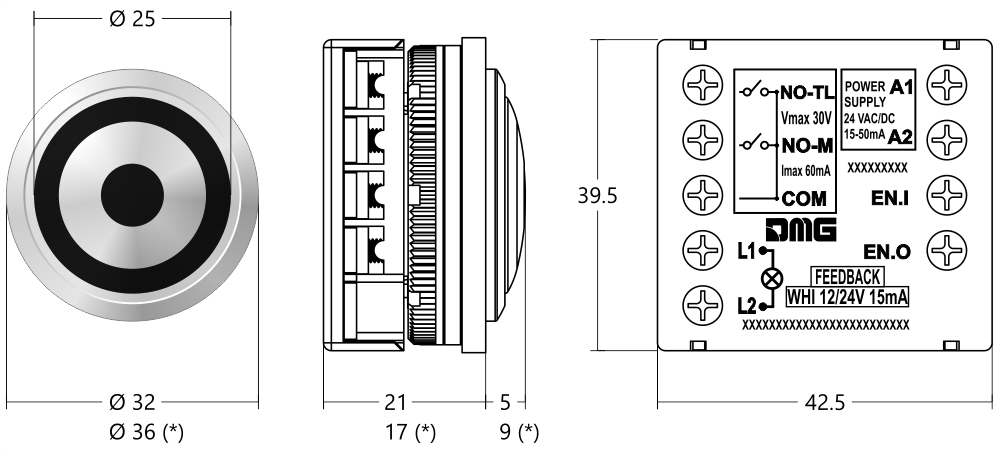
(*) Main floor
Cut-out / Distance between buttons

Wiring Instructions
Version without buzzer
Attention:
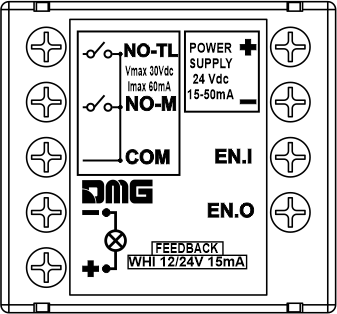
In the version without buzzer it is possible to independently connect both the mechanical contact (NO-M) and the touchless contact (NO-TL).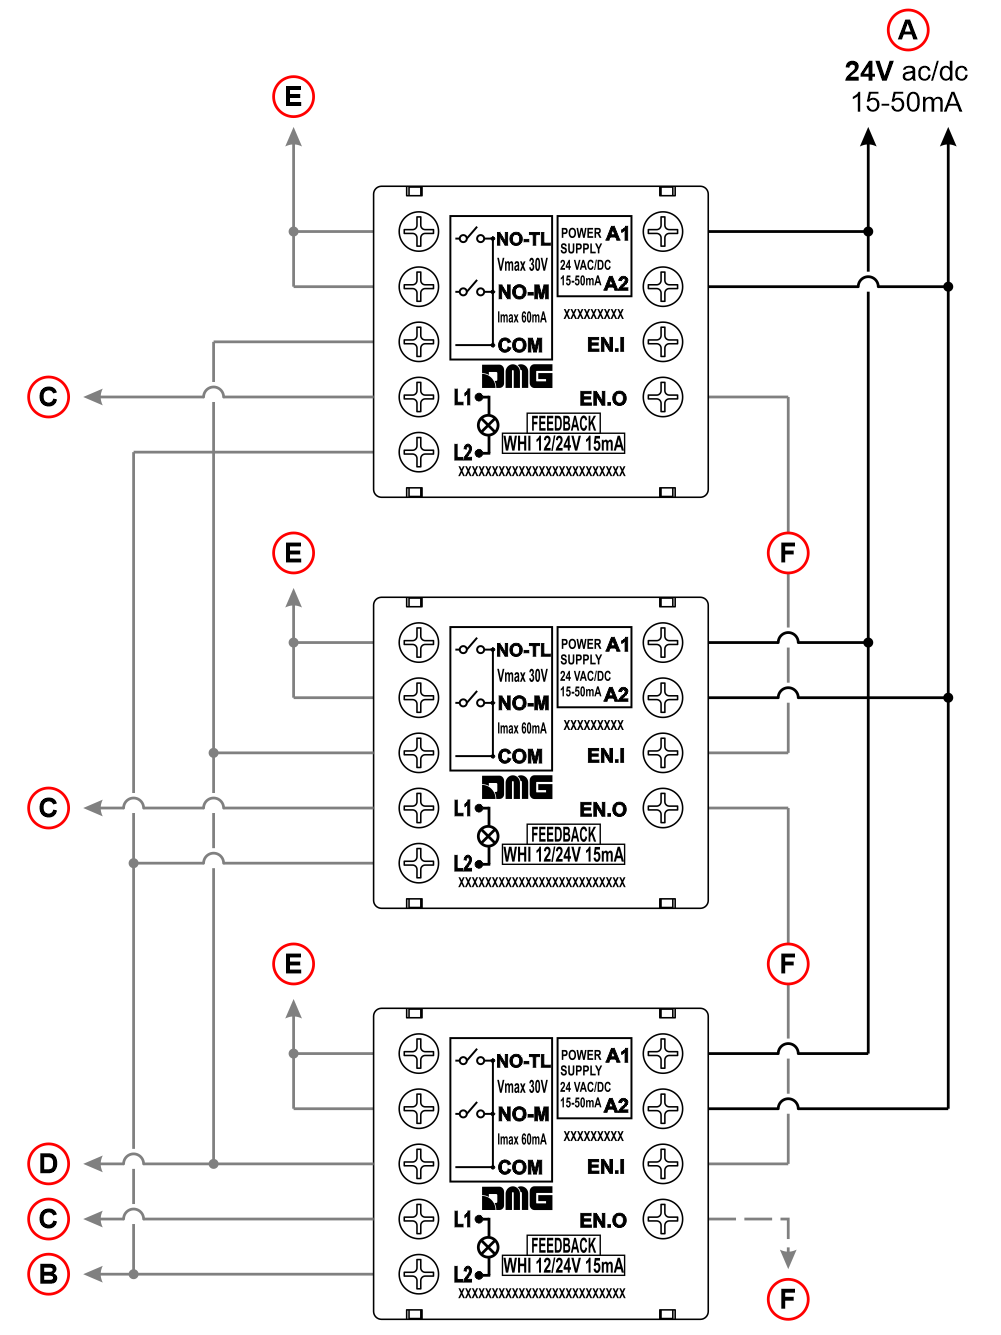 A) – Power supply: 24V ac/dc / 15-50mA
B) – The common of the lamps
C) – Lamps
D) – The common of the contacts
E) – Contacts
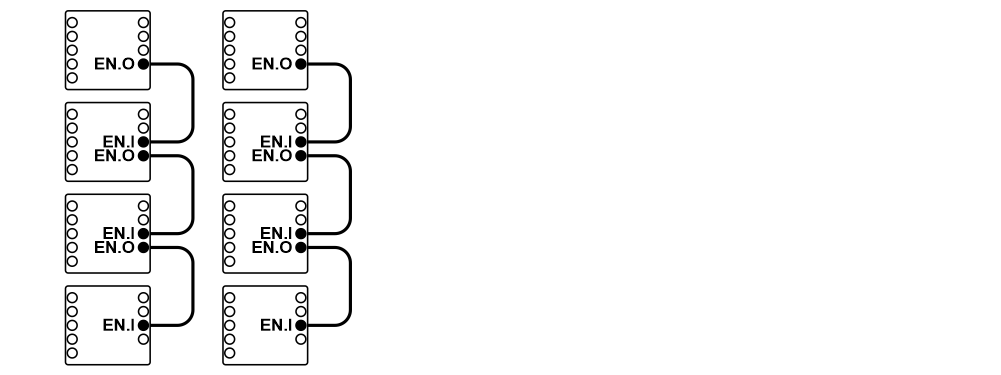
F) – To avoid simultaneous activation of more than one call, each button is connected to the one below by an unipolar link from terminal EN.O to terminal EN.I (see below).
In the version without buzzer it is possible to independently connect both the mechanical contact (NO-M) and the touchless contact (NO-TL).
 A) – Power supply: 24V ac/dc / 15-50mA
B) – The common of the lamps
C) – Lamps
D) – The common of the contacts
E) – Contacts
F) – To avoid simultaneous activation of more than one call, each button is connected to the one below by an unipolar link from terminal EN.O to terminal EN.I (see below).

Version with buzzer – No longer available for sale
Attention: in the version with buzzer, the mechanical and touchless activation have been unified in a single contact (NO).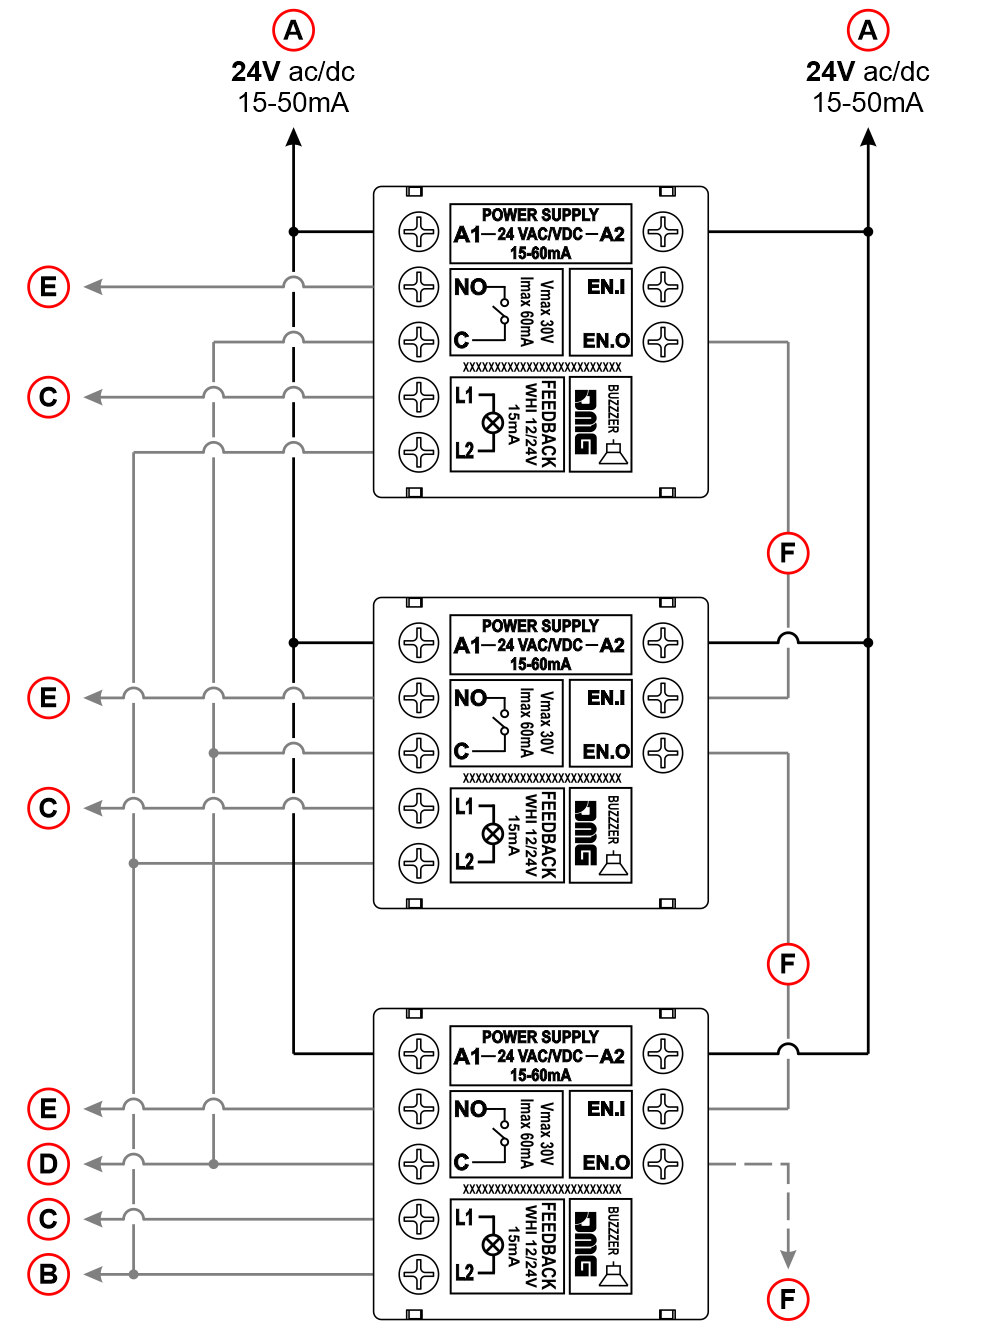 A) – Power supply: 24V ac/dc / 15-50mA
B) – The common of the lamps
C) – Lamps
D) – The common of the contacts
E) – Contacts
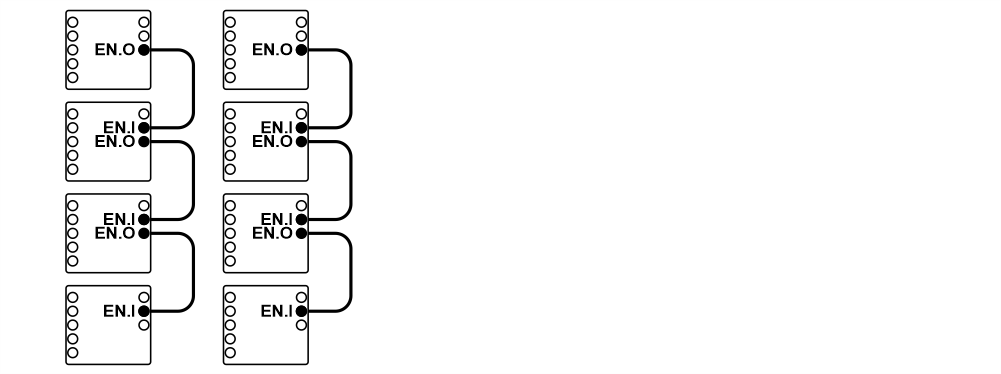
F) – To avoid simultaneous activation of more than one call, each button is connected to the one below by an unipolar link from terminal EN.O to terminal EN.I (see below).
 A) – Power supply: 24V ac/dc / 15-50mA
B) – The common of the lamps
C) – Lamps
D) – The common of the contacts
E) – Contacts
F) – To avoid simultaneous activation of more than one call, each button is connected to the one below by an unipolar link from terminal EN.O to terminal EN.I (see below).

Settings
Volume setting (version with buzzer only) – No longer available for sale
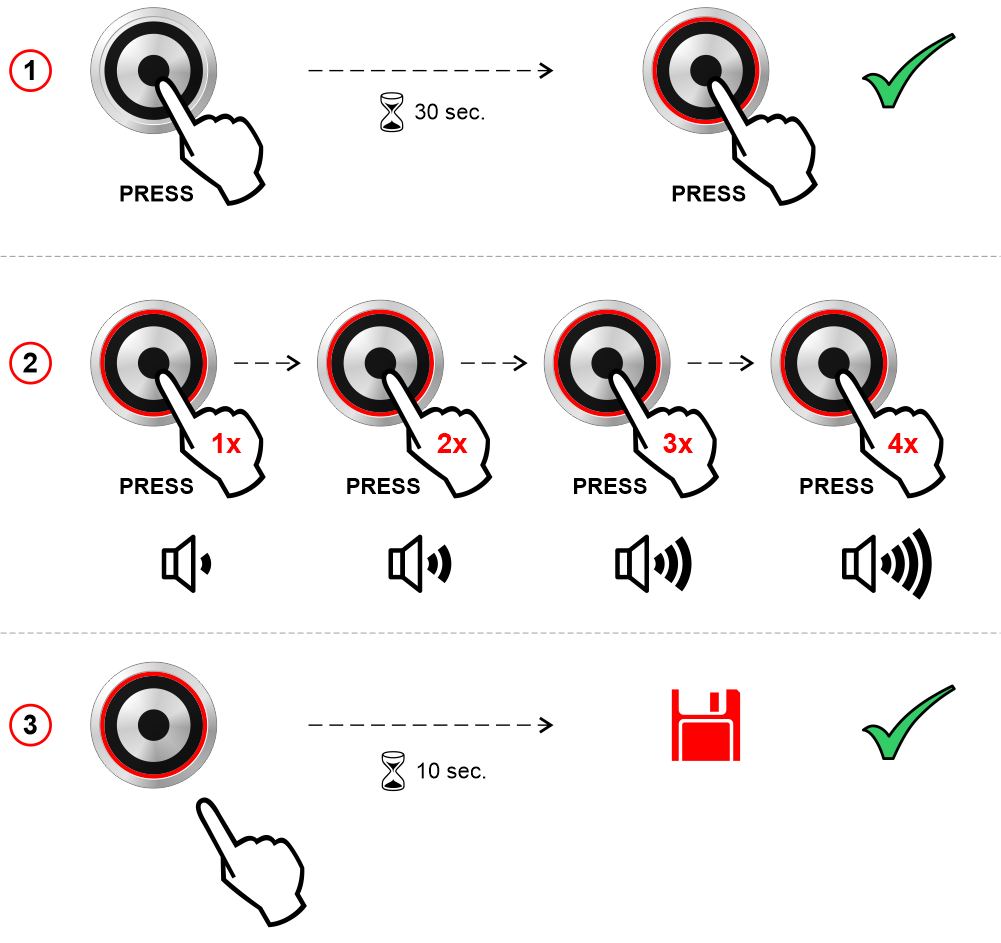 1) – Press and hold the button for 30 seconds.
2) – Set the desired volume by pressing the button several times.
3) – Once you have chosen the right volume, wait 10 seconds without pressing the button to store the setting.
Datasheet
| Body | AISI 303 turned stainless steel button |
| Contacts | mechanical mode: 1 contact 30V, 60mA touchless mode: opto relay 30V, 60mA |
| Power supply | 24V ac/dc, stand-by 15mA, max 50mA |
| Illumination | white, LED 12V or 24V AC/DC, no illumination when not activated |
| Wiring | version without buzzer: 9 screw terminals version with buzzer: 8 screw terminals |
| Avg. life | 1.500.000 mechanical activations (24V, 20mA) |
| Operating temperature | -5 / +50 °C |
| Protections | IK07 / IP44 |
| Lockable thickness | 1÷4 mm (1÷3 mm main floor version) |
Download
| Reference | Version | Link |
|---|---|---|
| Version with buzzer no longer available for sale. | 1.2 (current version) | Download PDF (English) |
| Added version with buzzer. The contact holder module does not report the polarity of the contacts. | 1.1 | Download PDF (English) |
 | 1.0 | Download PDF (English) |
