(v 1.8)

Safety and usage cautions
Before installing our products, we recommend you to consult the section about safety and usage cautions at the link below.

Mounting
– CAR (short button panel) –

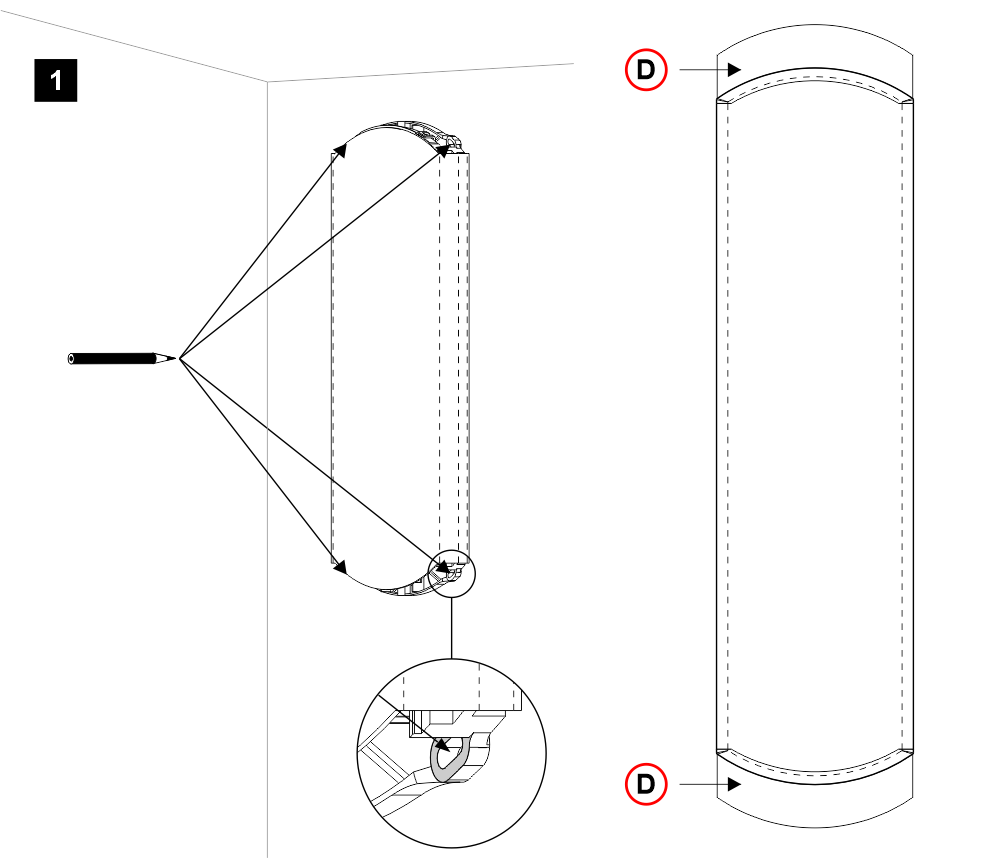
D) – Free zone for end caps fixing.
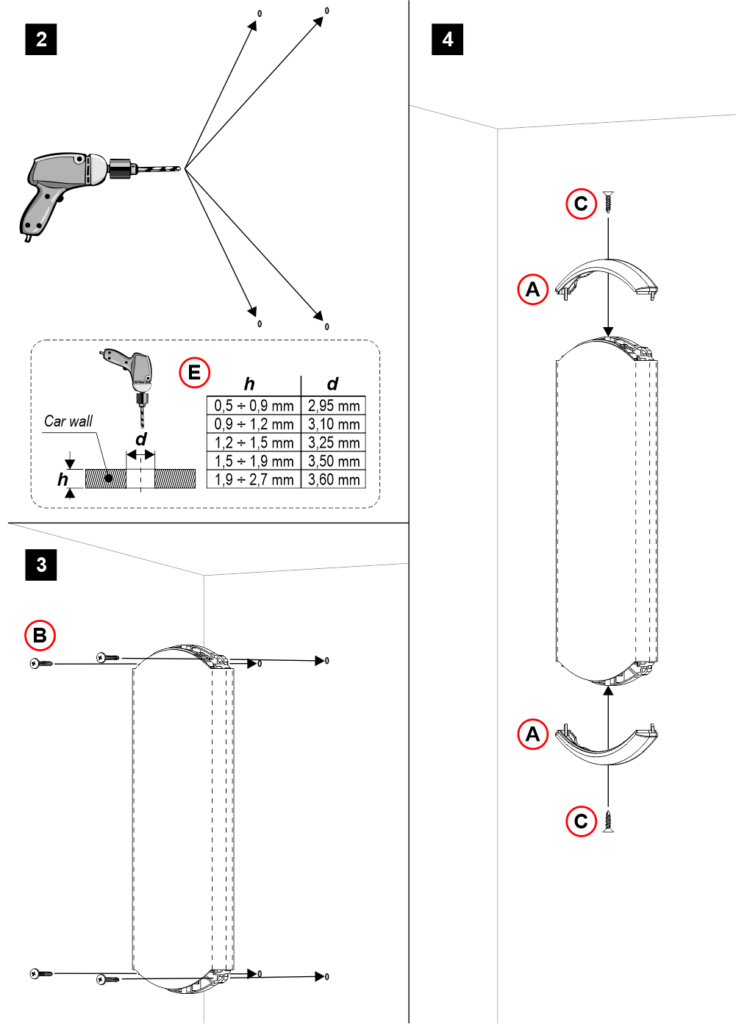
E) – Table of reference holes.
– CAR (column) –
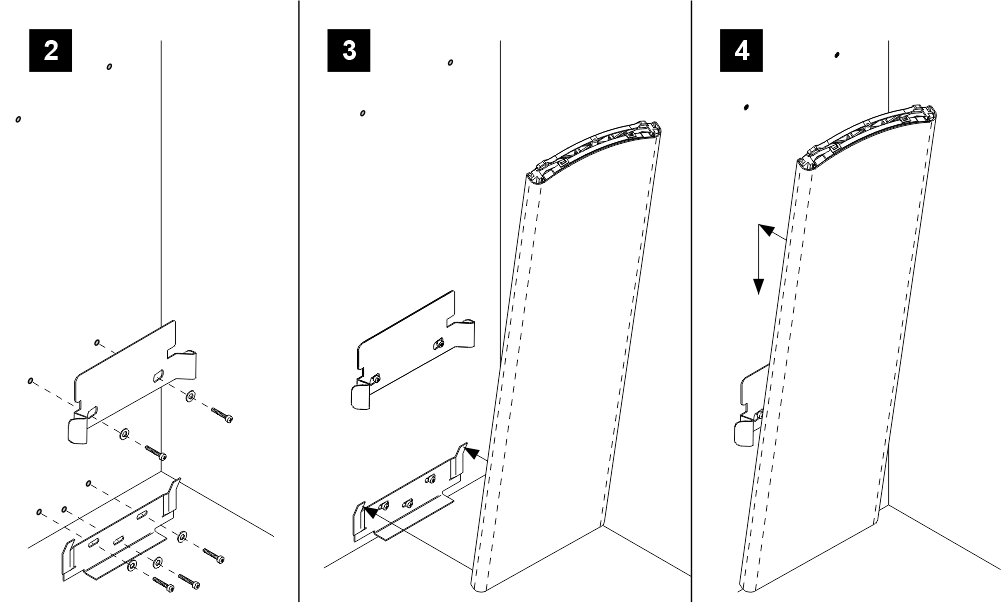
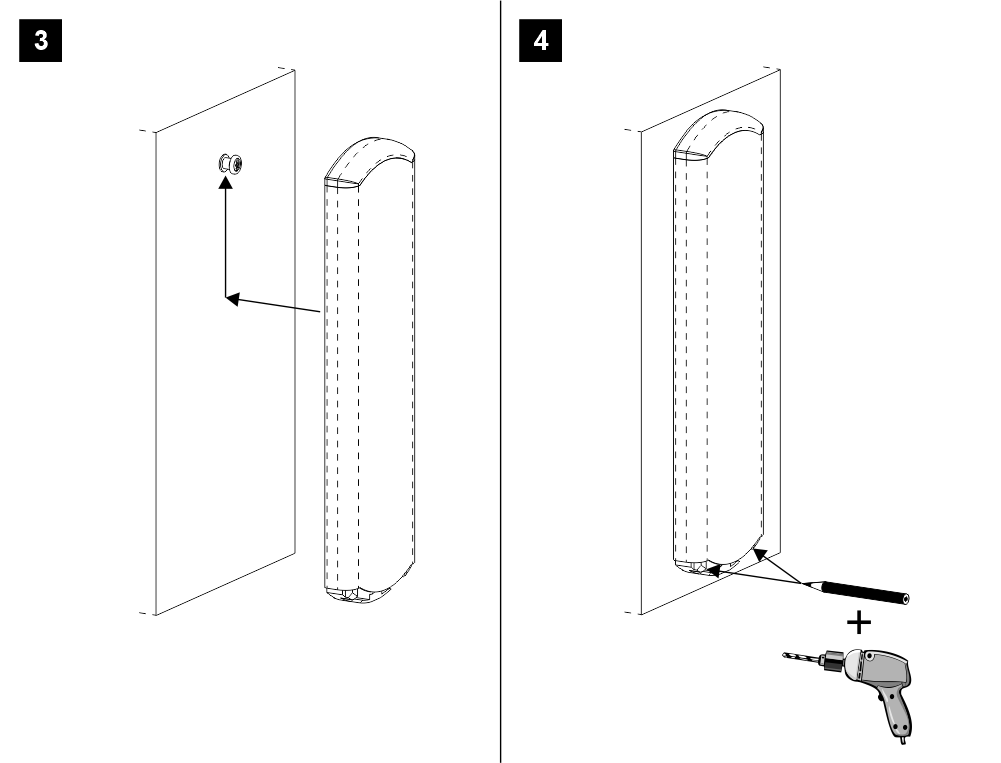
[4] – Fix the plate to the wall, as seen in the picture. Verify that there are 2 mm of free air from the floor. Try to move the plate to verify that is properly anchored.
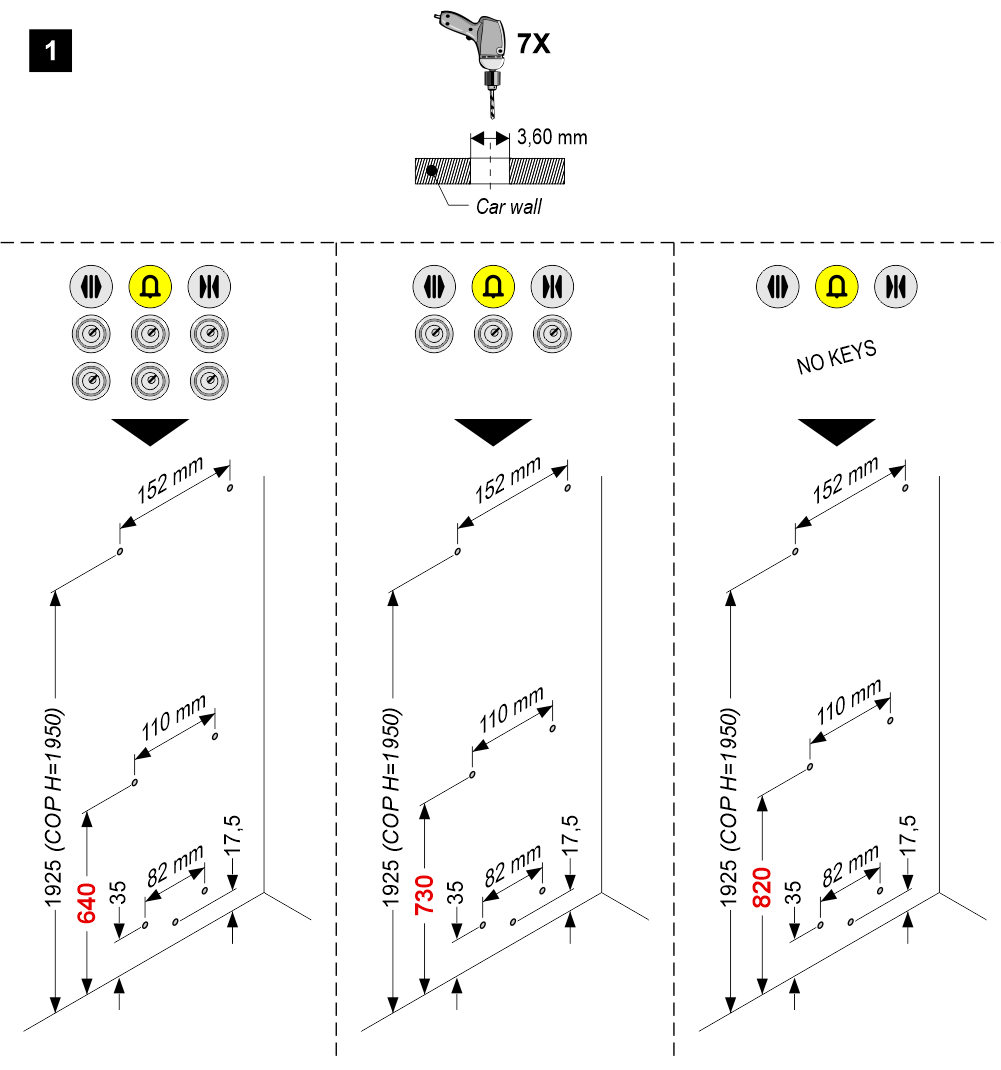
A) – TORX fixing tool
– FLOOR –
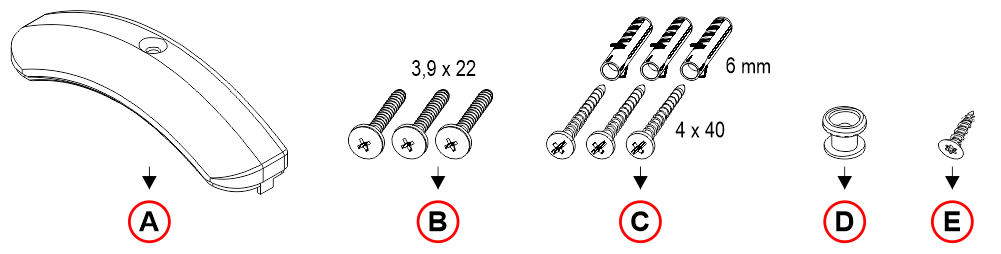
B) – For door frame fixing.
C) – For wall fixing.
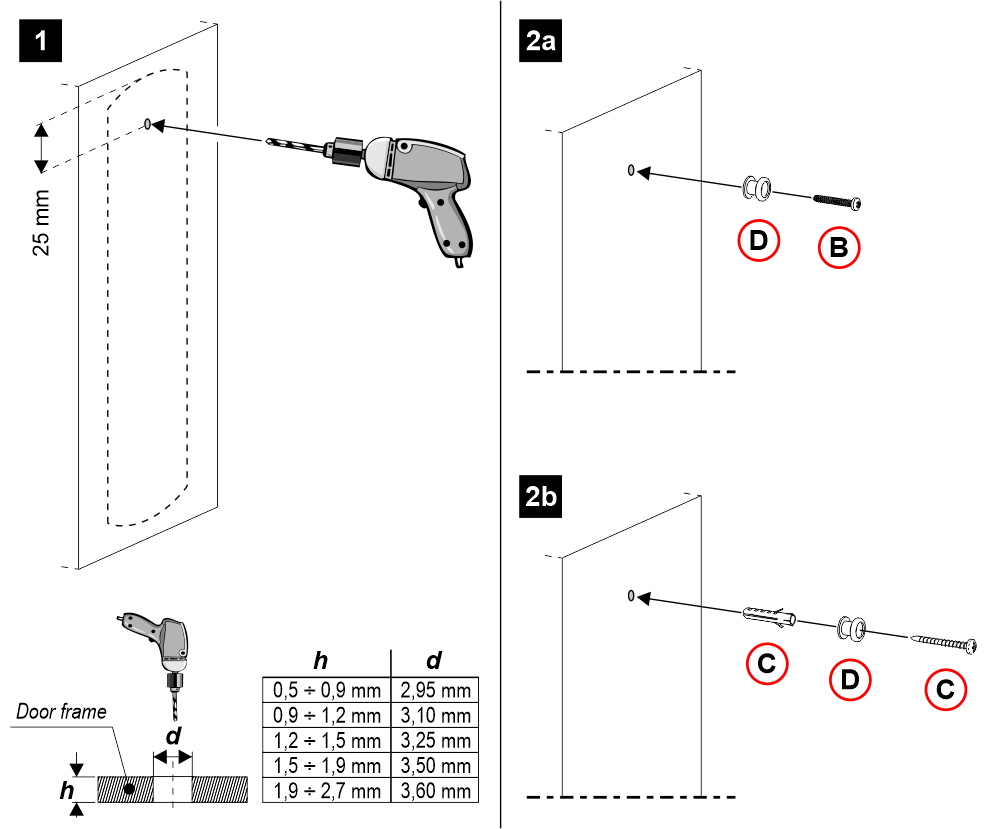
[2a] – For door frame fixing.
[2b] – For wall fixing.
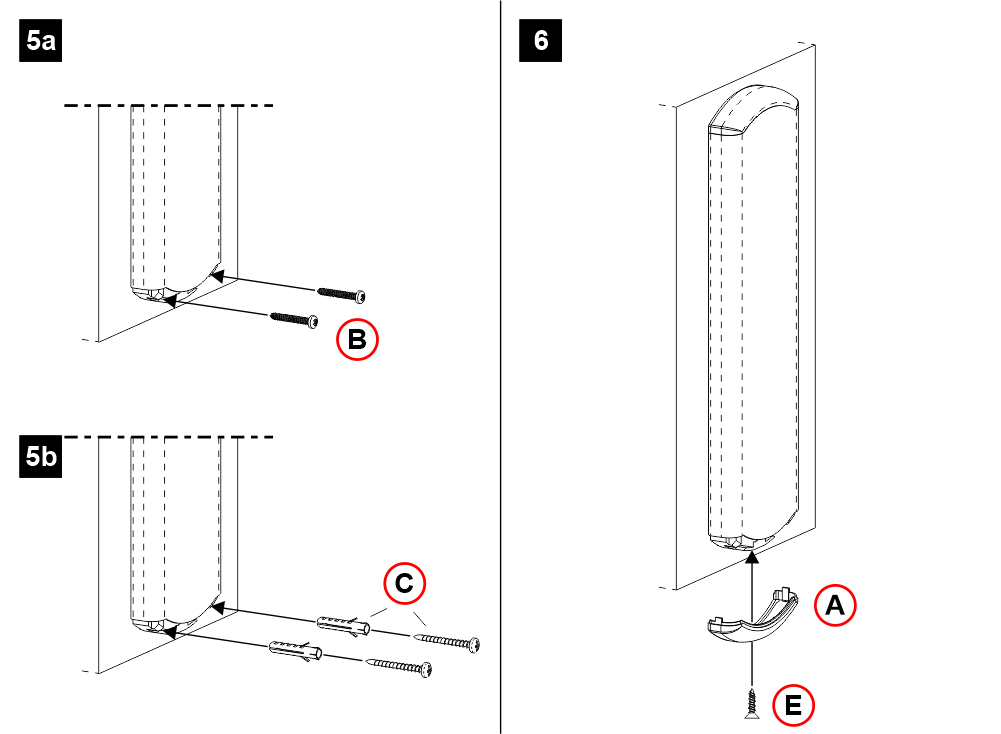
[5a] – For door frame fixing.
[5b] – For wall fixing.
Download
| Reference | Version | Link |
|---|---|---|
| 1.8 (current version) | Download PDF (English) | |