(v 1.5)

Safety and usage cautions
Before installing our products, we recommend you to consult the section about safety and usage cautions at the link below

Mounting
Short elevator car panel (WITHOUT hinge opening)
(It is also valid for the backlight version mounting)
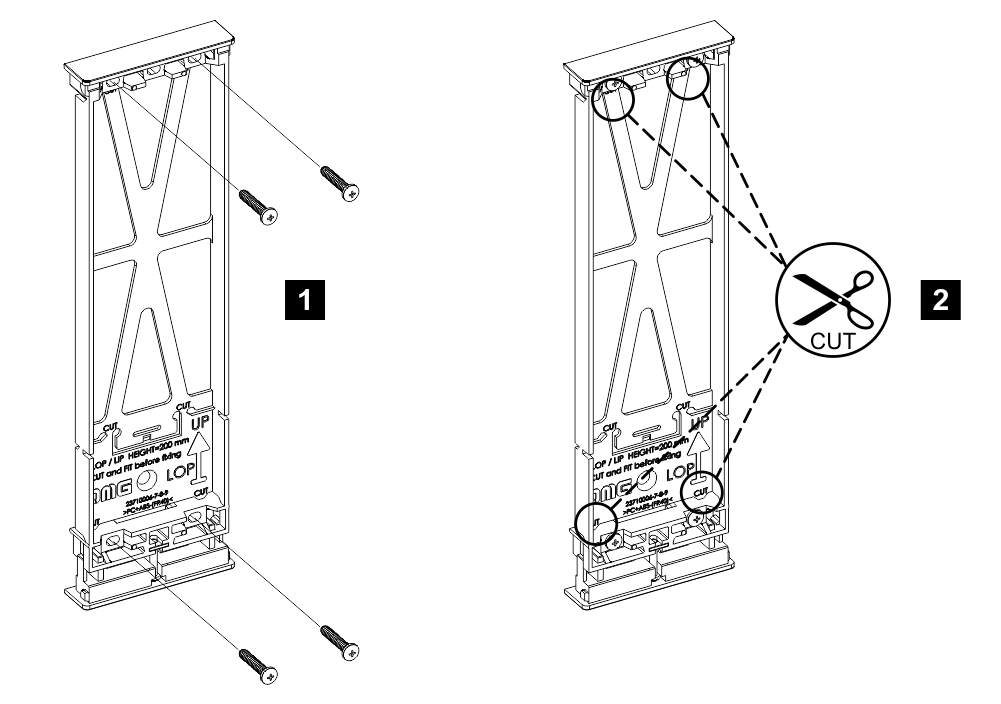
Take the fixing references of points 1 and 3 to make the holes in advance.
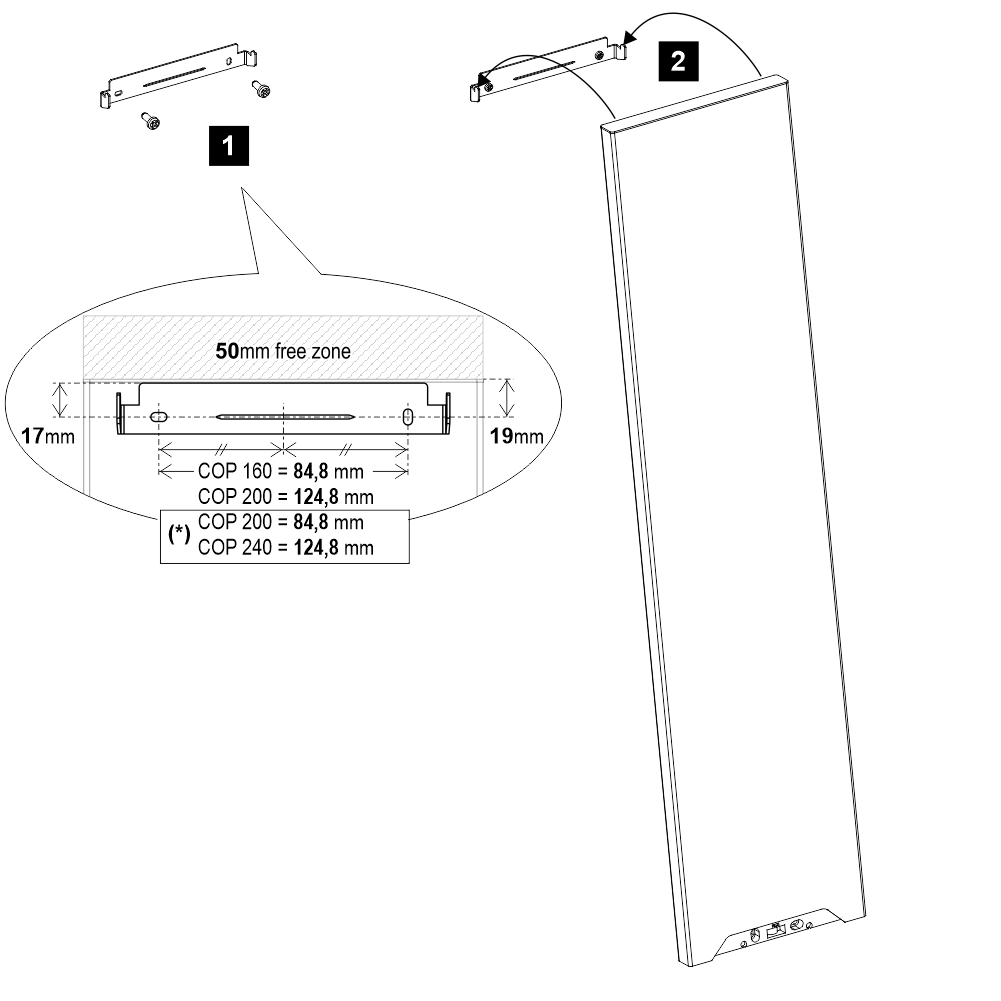
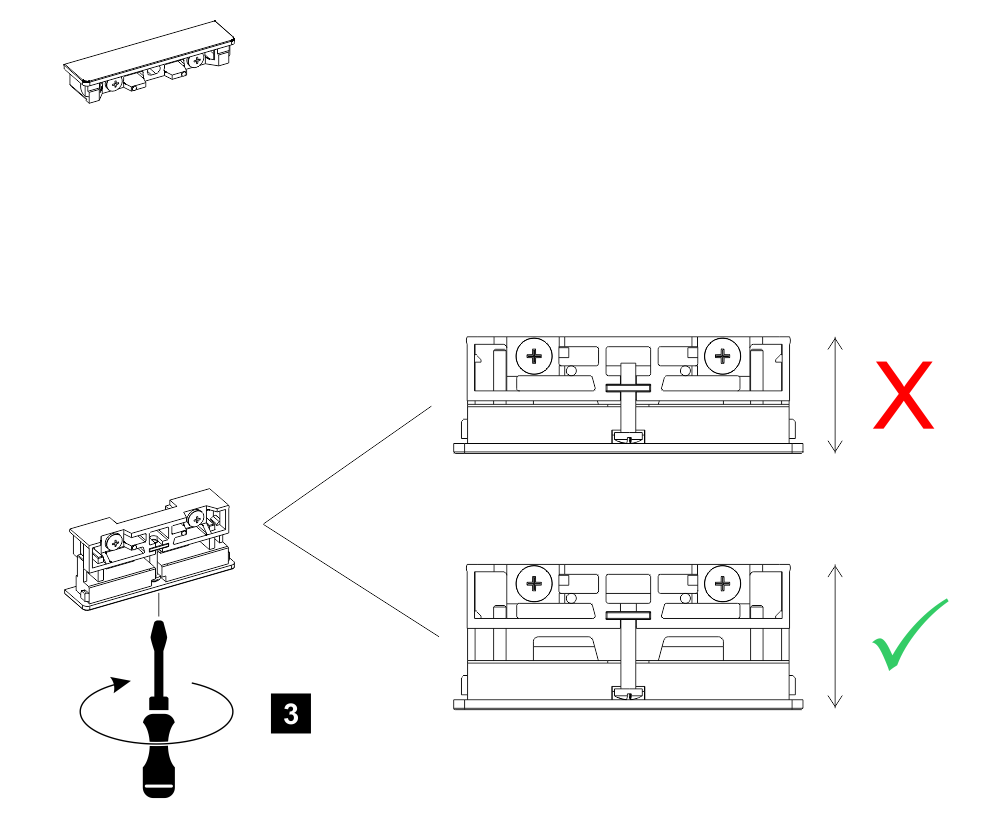
1) – Fix the support and consider these measures for the correct positioning of the components in accordance with the regulations.
(*) – Backlight version
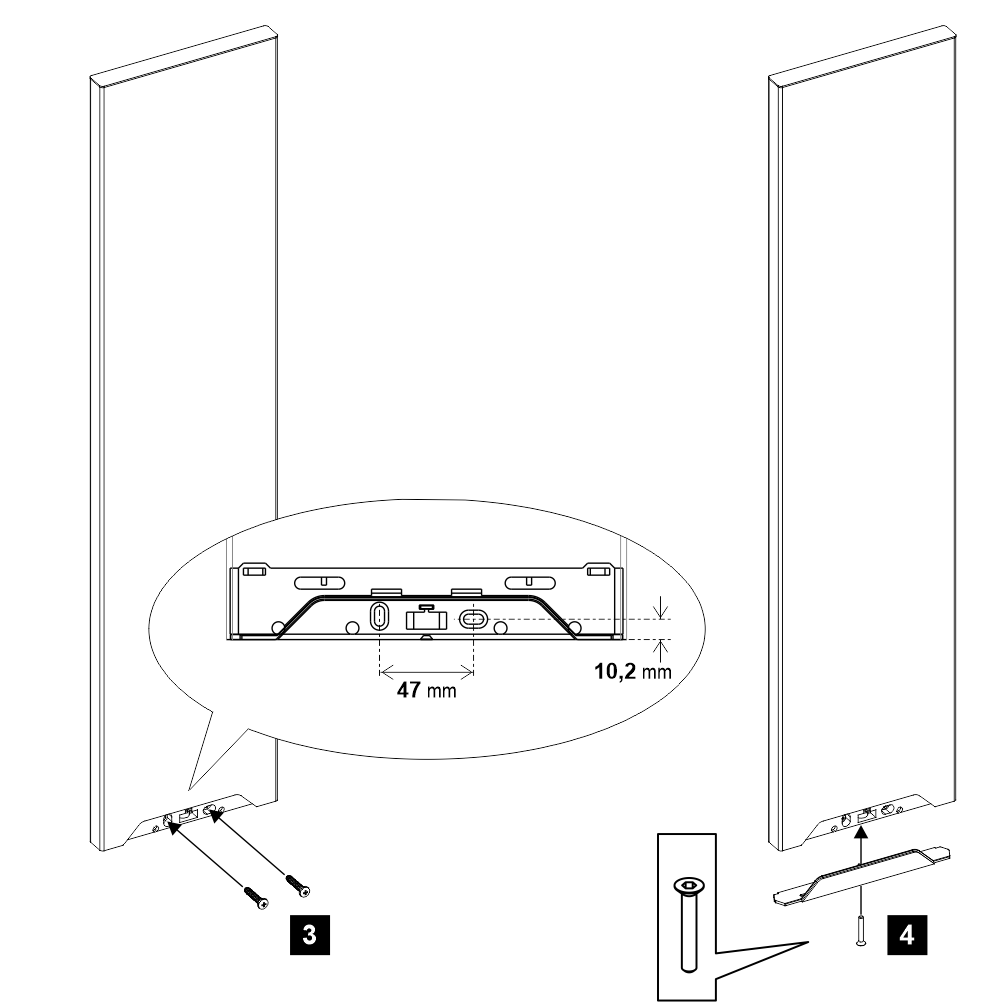
Short elevator car panel (WITH hinge opening)
Remove 1 of the 3 breakable areas to pass the cables.
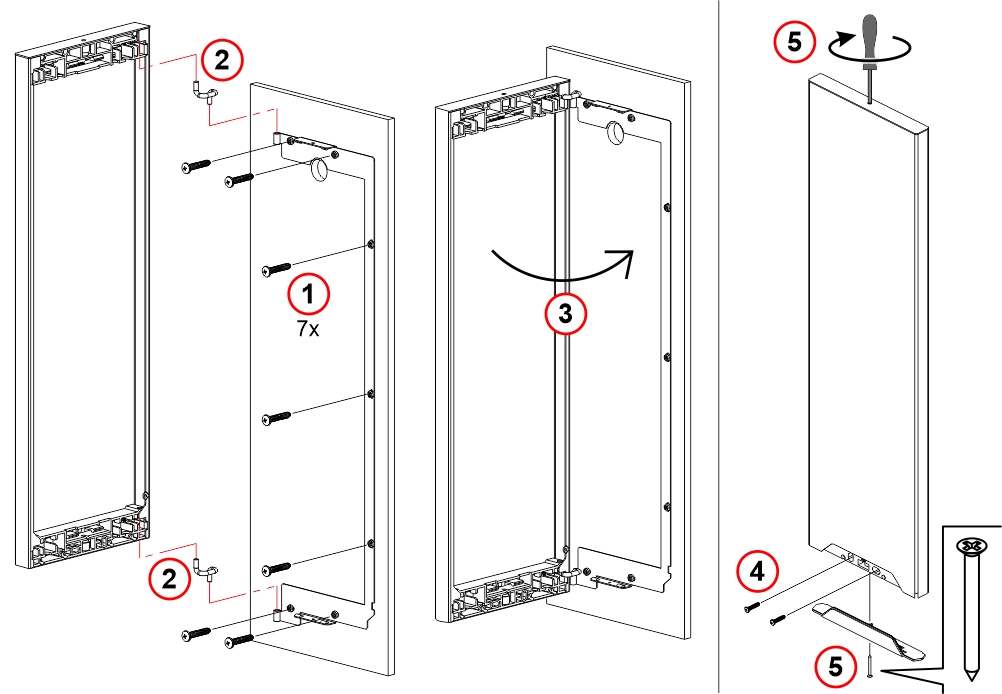
4) – Optional fixing
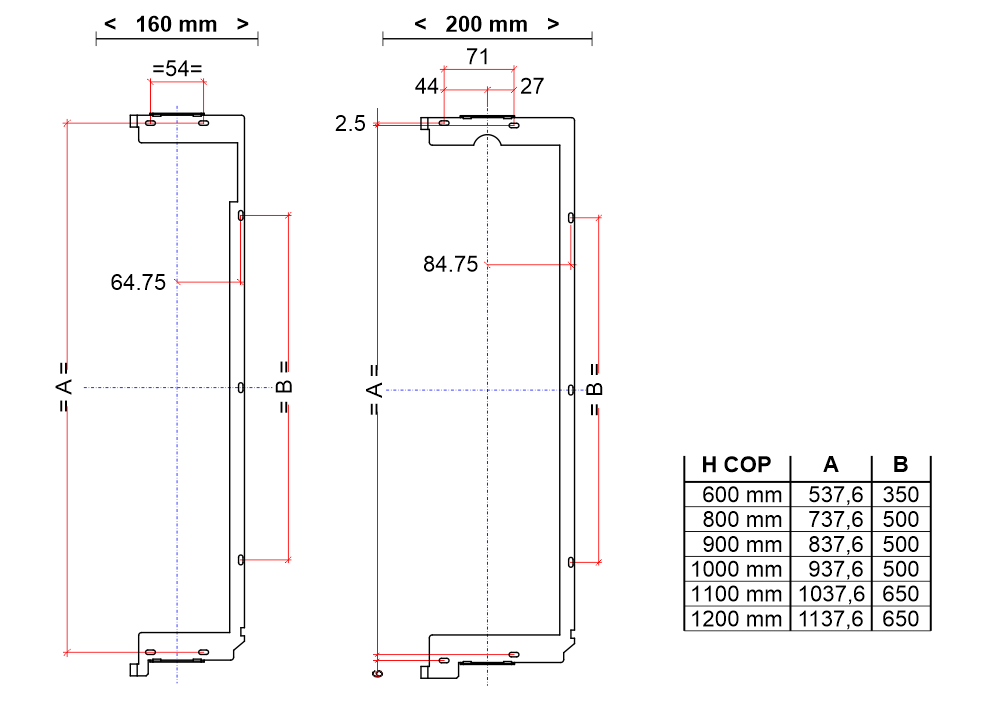
Elevator car column panel
(Only for the backlight version mounting)
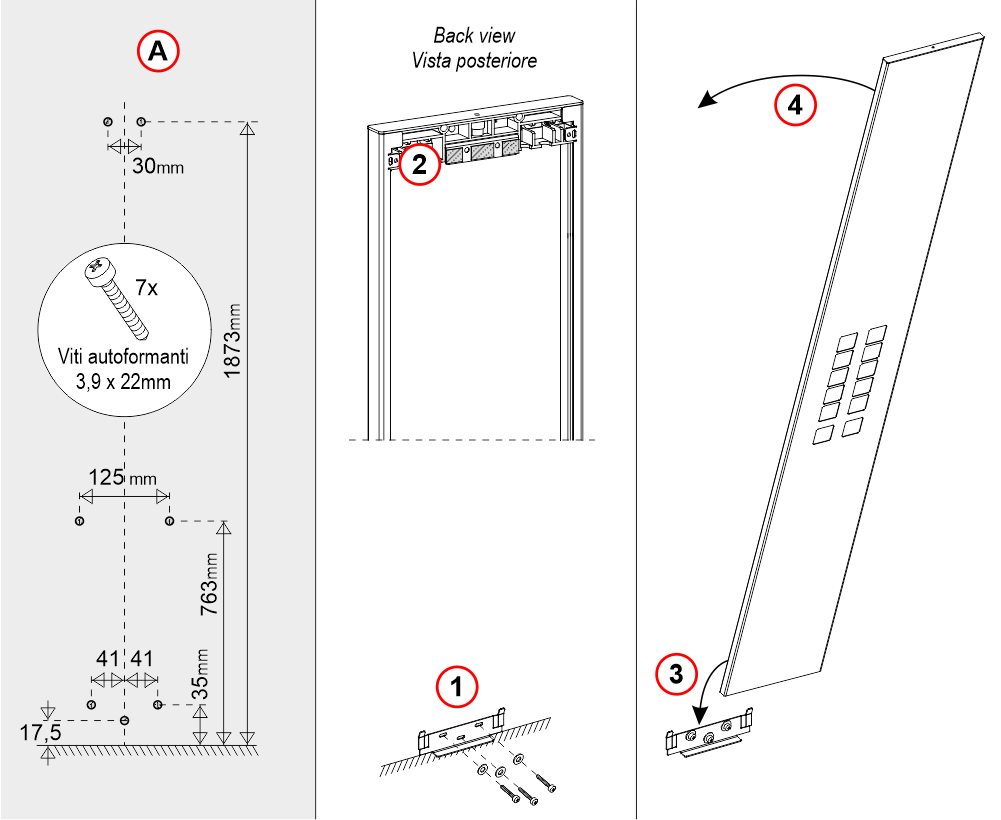
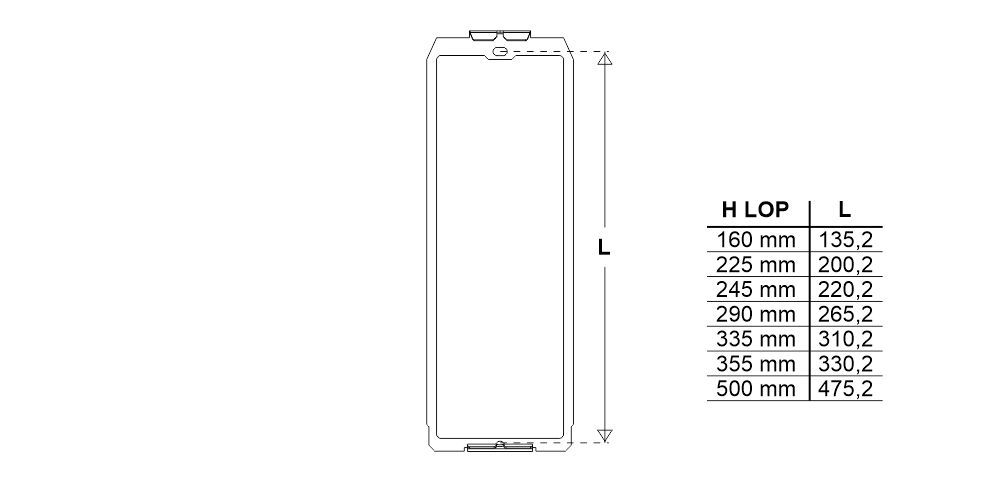
A) Table with fixing references.
1) Fix the lower bracket flush with the floor.
2) Remove the paper from the double-sided tape.
4) Place the plate against the wall and make sure the double-sided tape adheres well.
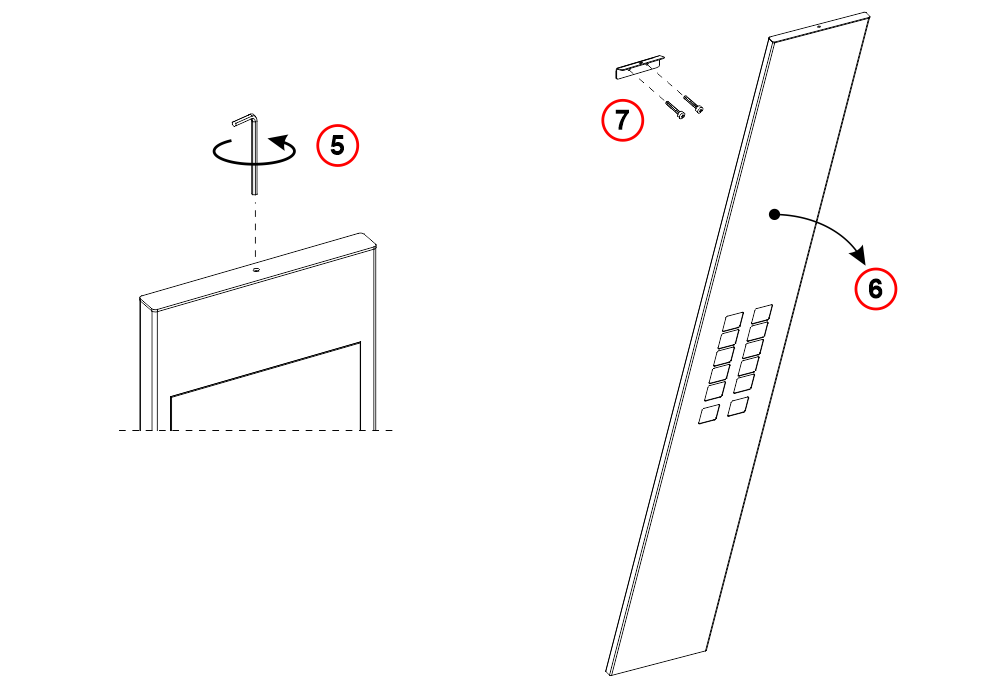
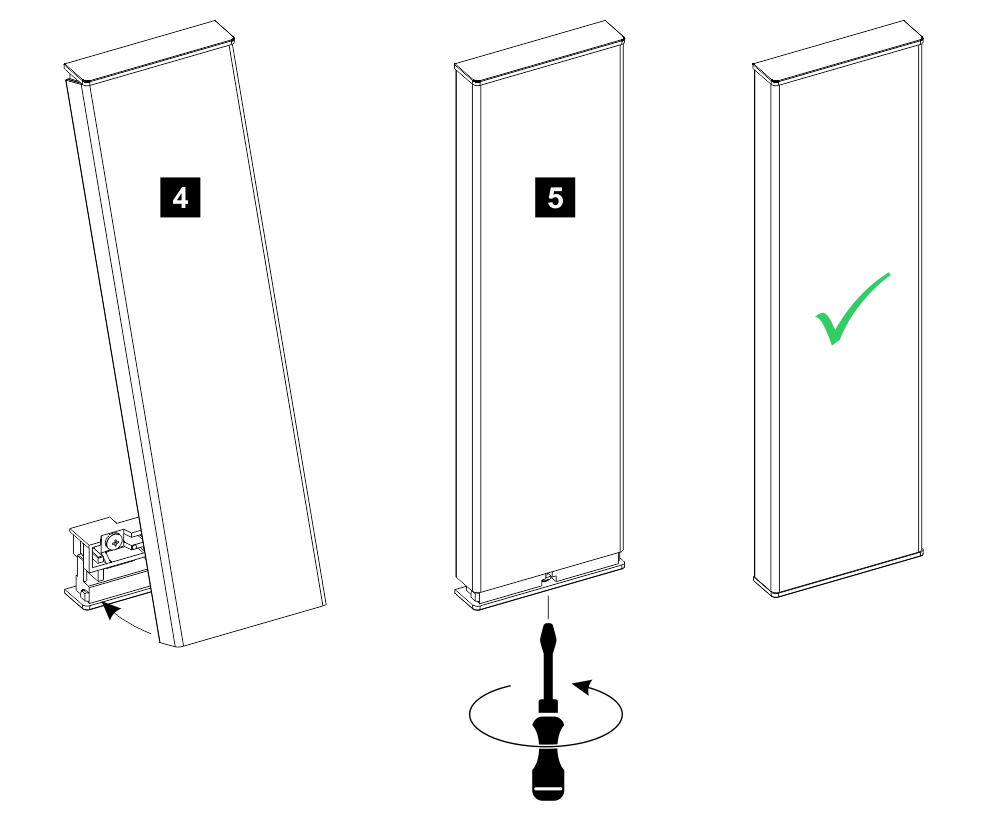
5) Loosen the screw.
6) Remove the plate.
7) Fix the upper bracket.

8) Bend the tabs of the center bracket jig.
9) Anchor the jig to the plate.
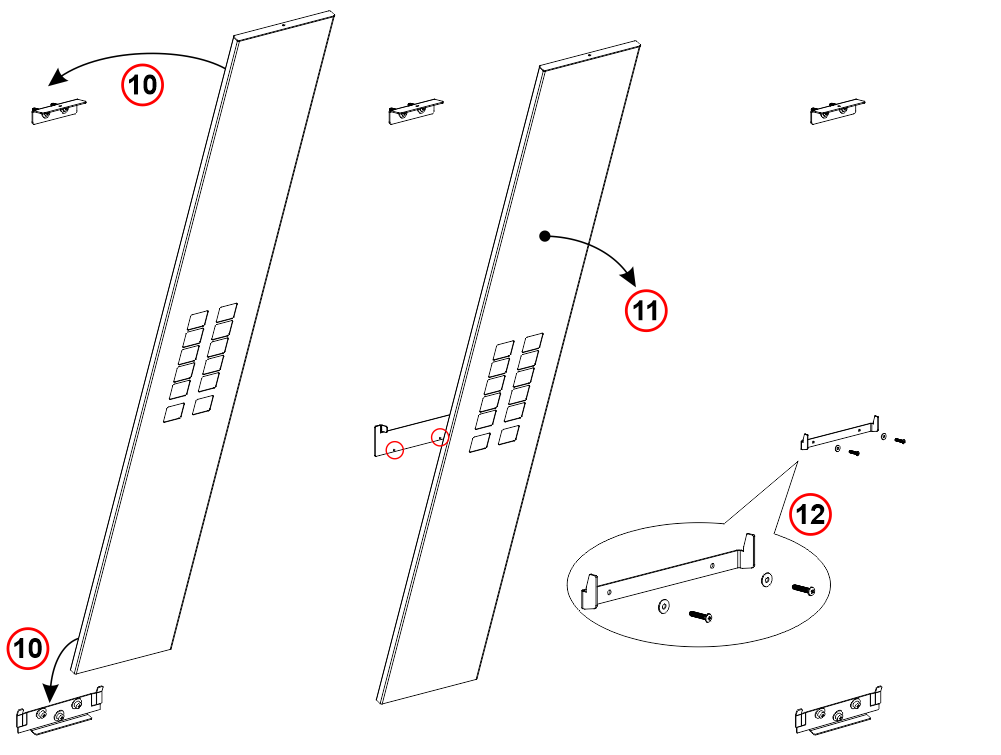
10) After removing the double-sided tape, place the plate against the wall and make sure the double-sided tape adheres well.
11) Remove the plate and mark the references of the 2 holes for fixing the central bracket.
12) Remove the jig and fix the middle bracket.
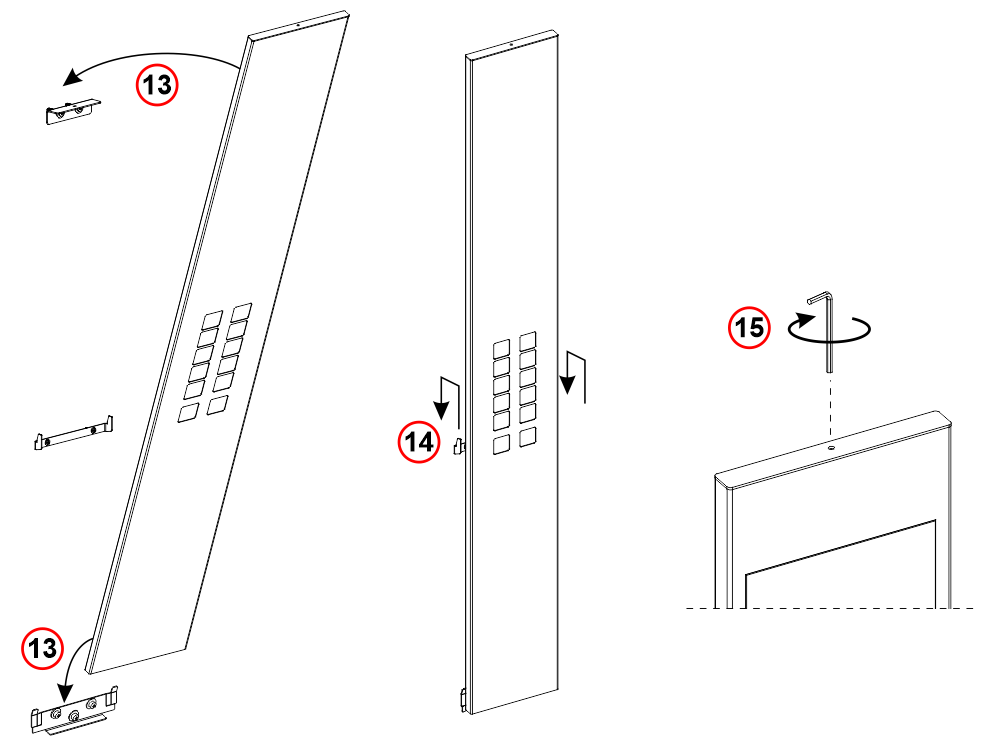
13) Place the plate against the wall.
14) Anchor the plate.
15) Tighten the top screw.
FLOOR (H16 mm)
FLOOR (H23 mm)
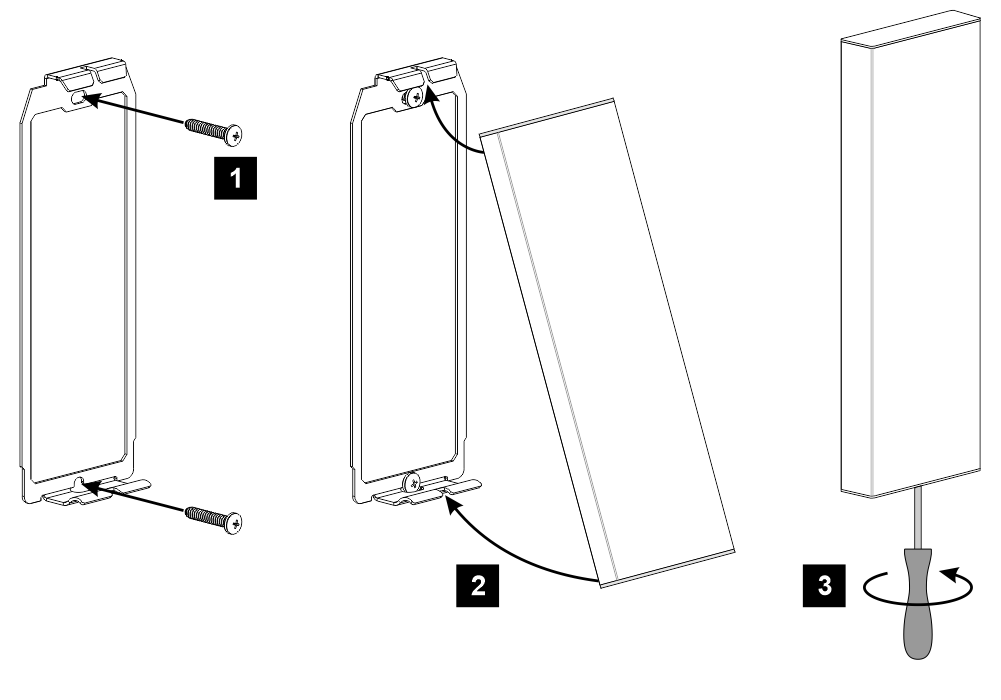
Wirings
Connecting LED strips
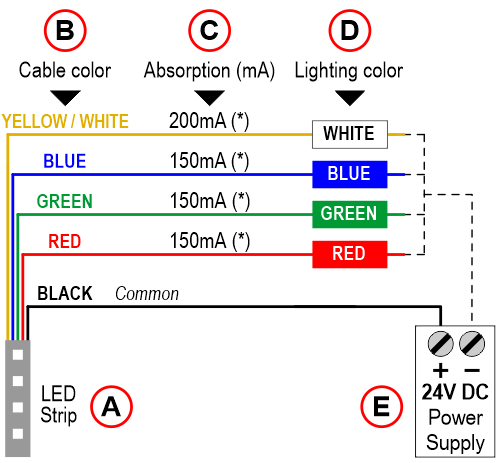
A) Led strip
B) Cable color
C) Absorption per linear meter
D) Lighting color
E) Power supply (24VDC)
Download
| Reference | Version | Link |
|---|---|---|
| Mounting of elevator car button panel | 1.3 | Download PDF (English) |
| Special finishes (and hinge opening) | 1.4 | |
| faceplate with hinge opening | 1.5 (current version) |
