
Using DMG rope magnetic encoder or motor encoder
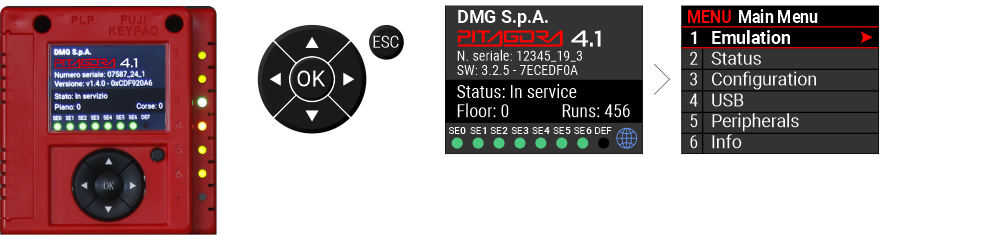
From the main menu, access the Emulation menu.
Main Menu > Emulation
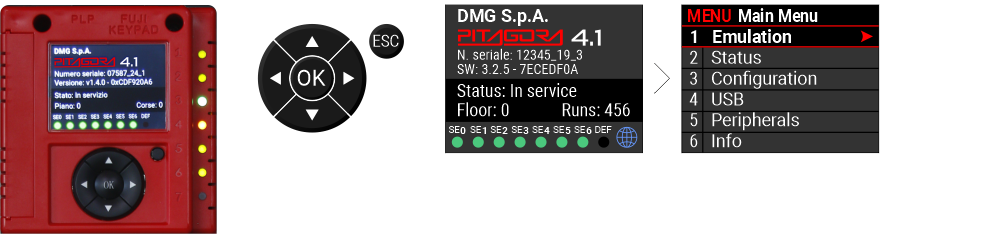
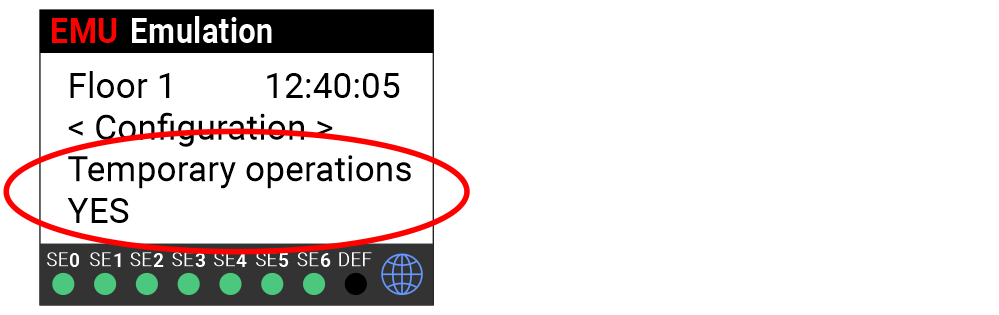
(1) – Check that the lift is in temporary operations.
Main Menu > Emulation > Configuration > Temporary operations > YES
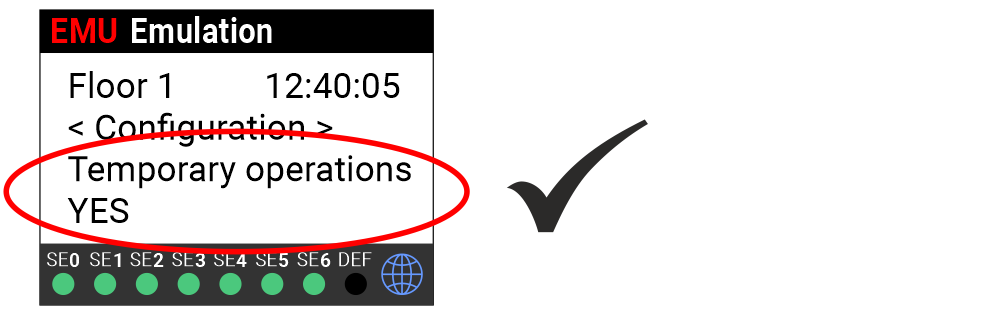
(2) – Check that the direction of car movement corresponds to the increase or decrease of the value (mm).
Main Menu > Emulation
The value increases as the car moves upward.
The value decreases as the car moves downward.
Proceed to step 4
The value increases as the car moves downward.
The value decreases as the car moves upward.
Proceed to step 3
(3) – Reverse the encoder rotation direction.
Main Menu > Emulation > Positioning > Positioning system > Encoder Counterclockwise

(4) – Check that the LEDs (AGH, ZP, AGB) light up when the car passes.
Main Menu > Emulation > I/O status > Playboard IN/OUT > page 7/9
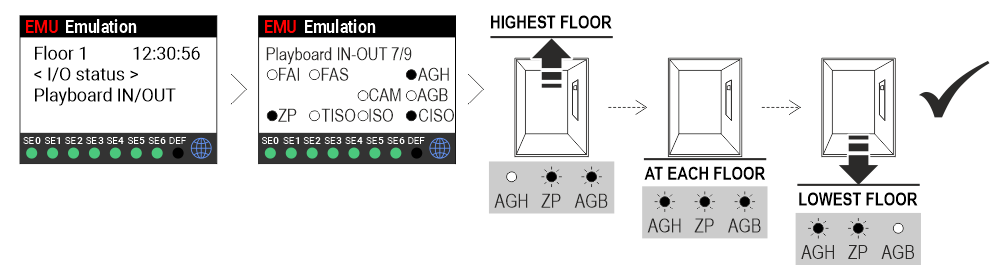
Move the car to the highest floor (AGH), then pass through all intermediate floors down to the lowest floor (AGB).
(5) – Initiating the automatic procedure
Main Menu > Emulation > Positioning > Autosetting > YES
During the procedure, the system requires the entry of specific parameters depending on the encoder type (DMG rope magnetic encoder or motor encoder).

Using DMG rope magnetic encoder
Enter / Check:
Pulse N.: encoder resolution
ZP Lenght: 150 mm
No.of floors: number of floors
Max speed (of the lift)
Autosetting: learning speed
Using Motor encoder
Enter / Check:
Pulse N.: resolution of the motor encoder
Motor Ratio: machine reduction ratio
Traction pulley: diameter of the traction pulley (in mm)
Roping: direct/indirect roping ratio of the elevator
No.of floors: number of floors
Max speed (of the lift)
Autosetting: learning speed

Using absolute encoder ELGO LIMAX 33 CP
From the main menu, access the Emulation menu.
Main Menu > Emulation
(1) – Check that the lift is in temporary operations.
Main Menu > Emulation > Configuration > Temporary operations > YES
(2) – Turn the control panel selector to INSPECTION

(3) – Move the car to the highest position in the shaft

Counterweight on buffers
or Piston bottomed out.
(4) – Set the ELGO to ‘Manual Learning’ mode.

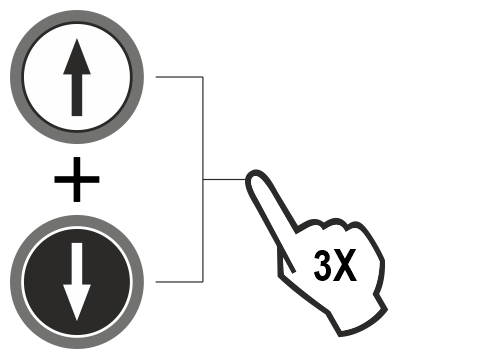
- Press the UP and DOWN buttons simultaneously three times.
- The message “WAIT” appears on the playpad.
- The ELGO starts emitting a beep every 2 seconds. This acoustic signal will be active throughout the Manual learning procedure.
- The message “TOP” appears on the playpad.
(5) – Storage of the highest extreme point
- Press the UP and DOWN buttons simultaneously three times to set the highest position of the system.
- The highest point in the shaft is stored as a reference for all upper limits (Top limit switch, Top inspection limit switch, Top ETSL, etc.).
- The ELGO emits a long beep to confirm the stored point.
(6) – Storage of the highest floor

- The message “Floor n” is displayed on the playpad.
- Move the car and align it with the highest floor of the system.
- Press the UP and DOWN buttons simultaneously three times to set the floor position.
- The ELGO emits a short beep as confirmation of the stored point.
(7) – Storage of the other floors
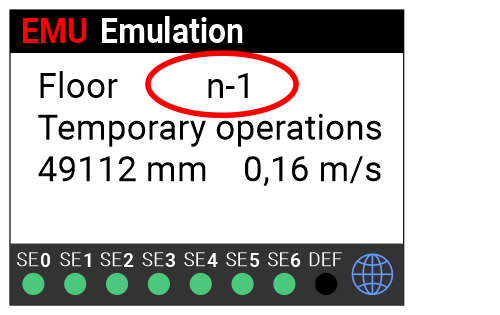
- The message “Floor n–1” is displayed on the playpad (n–1 is the next floor to be stored).
- Repeat the procedure described in step (6) at each floor, moving the car downward until reaching the lowest floor.
(8) – Storage of the lowest extreme point

- The message “BOTTOM” is displayed on the playpad.
- Move the car to the lowest position of the system.
- Press the UP and DOWN buttons simultaneously three times to set the lowest point of the system. This point in the shaft is stored as the origin of the magnetic tape (0 mm).
- The ELGO emits a long beep to confirm the stored point.
(9) – Closure of the manual learning procedure

- The message “/\” is displayed on the playpad.
- Move the car upward, stopping it above the position of the lowest floor..
- The controller sets the ELGO to normal mode (this operation is necessary because the system would otherwise be at the final limit)
- The message “WAIT” is displayed on the playpad.
- After about 10 seconds, floor 0 is displayed and the acoustic signal turns off.
(10) – Automatic learning
Before entering service, it is mandatory to perform an automatic learning procedure of the shaft to detect the actual stopping distances for both ascent and descent at each floor.
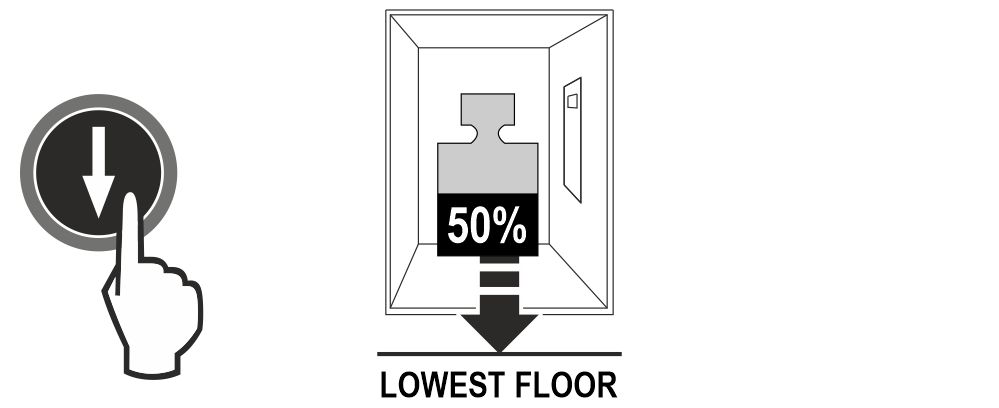
While in temporary operation, move the car to the lowest floor (with the car loaded to half its capacity, if possible).
(11) – Initiating the automatic learning procedure
Main Menu > Emulation > Positioning > Autosetting > YES

The elevator starts moving automatically.
When the car returns to the lowest floor, the system is ready to switch to normal operation (Temporary Operation = No)